
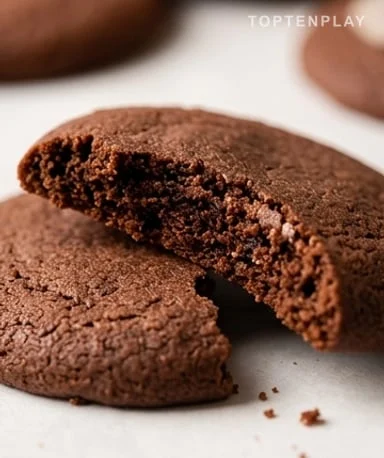
Thin, dry cut-out cookies are not worth your time. These are thick, chocolatey, with clean edges and a tender center. We keep the classic decorated shortbread, but without making the method tedious.
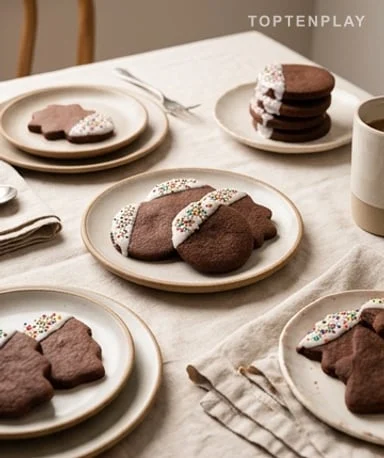
The dough is dark, almost matte, with a distinct cocoa smell as soon as you mix it. After baking, the edges become slightly firm while the center stays soft, like a subtle brownie. This is the kind of cookie that holds together nicely, doesn’t crumble everywhere, and accepts a thin icing without being overwhelming.
Why you’ll love this recipe
Ingredient Notes
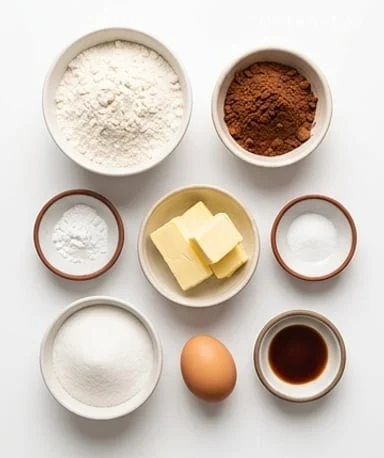
Flour, unsweetened cocoa, butter, sugar, egg, and alcohol-free vanilla: few ingredients, so each one really counts.
- Flour : It provides the structure that lets cookies hold their shape after cutting. Use standard wheat flour and, if possible, weigh it rather than scooping it into a measuring cup, otherwise the dough becomes dry and floury quickly.
- Unsweetened cocoa powder : This brings the dark color and clear chocolate flavor. Choose pure cocoa without added sugar: natural cocoa gives a more vibrant note, while Dutch-processed cocoa gives a rounder, milder flavor.
- Unsalted butter : It adds tenderness and that slight shortbread edge that crumbles softly. It should be soft but not melted: if it’s shiny or runny, the dough may spread and lose its outlines.
- Granulated sugar : It sweetens the dough and helps the edges become slightly crispy. Fine sugar blends better with butter and gives a more even dough, less grainy when rolled.
- Egg : It binds the dough and adds richness, preventing the cookie from being brittle. Use it at room temperature if possible: it incorporates faster and the dough becomes more homogeneous.
- Alcohol-free vanilla : It rounds out the cocoa without masking it. Use vanilla powder, seeds from a pod, or alcohol-free vanilla extract for a clean, sweet note.
Soft butter makes the difference
The start depends on the butter-sugar mixture. You need soft, creamy butter that squishes easily under a spatula, not a shiny puddle at the bottom of the bowl. When you beat it with sugar, the mixture lightens a bit and becomes fluffier, which gives cookies that are less dense. If the butter is too cold, the dough won’t form well and will stay in dry crumbs. If it’s too hot, the dough becomes greasy, sticky, and the shapes collapse during baking.
Cocoa must be controlled
Cocoa adds a lot of flavor, but it also absorbs moisture. That’s why we mix it with the flour, baking powder, and salt first: the powder distributes better without forming bitter pockets. The dough should become evenly brown, with a fairly strong dark chocolate smell. If you still see light flour streaks, mix a bit more, but stop as soon as the dough comes together. Overworking the dough gives firmer, less short cookies.
Rolling before chilling is non-negotiable
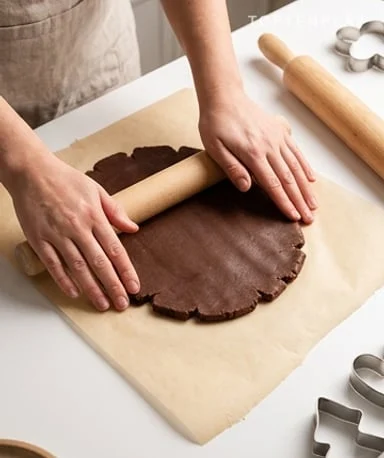
This is the step that simplifies the entire recipe. Freshly made dough rolls much better than a hard block straight from the fridge. Place it between two sheets of parchment paper, then roll it into an even layer about half a centimeter thick, smooth and dark like a sheet of soft chocolate. Only then do you put it in the cold to firm up. When cutting, the cookie cutters sink in cleanly and the edges come out sharp.
Short baking always wins
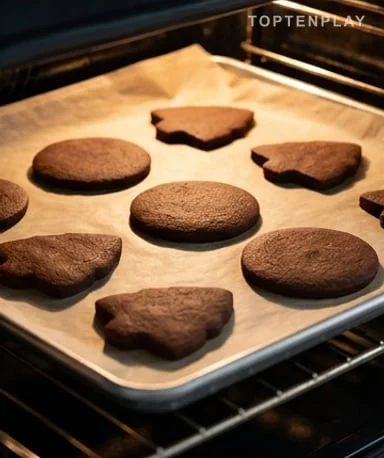
These cookies should not be baked until hard. The right sign is set edges, slightly matte, and a center that still feels a bit soft when gently touched. The smell of hot cocoa arrives quickly, often before the cookies look fully baked. Trust them: they continue to firm up on the baking sheet as they cool. Leaving them too long in the oven gives a dry result with more pronounced bitterness.
Decoration should stay simple
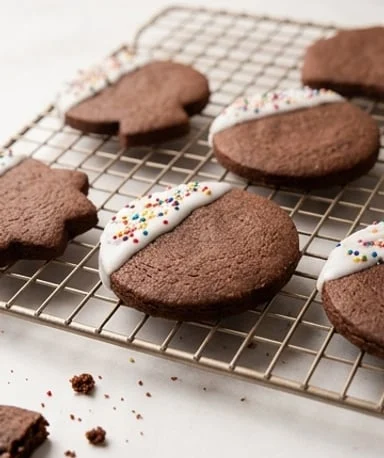
A chocolate cookie already has character, so no need to bury it under a thick layer of icing. A thin line of icing, a few colored dots, or a dusting of powdered sugar keeps the balance. The smooth surface holds well, especially when the cookies are completely cool. If you decorate too early, residual heat melts the icing and makes it dull. Wait until the cookies are cool to the touch, with that lingering cocoa scent on your fingers.
Tips & Tricks
- Roll the dough between two sheets of parchment paper to avoid adding too much flour to the work surface, keeping the cookies more tender.
- Chill the rolled dough for at least an hour, because the butter must firm up so the shapes hold well in the oven.
- Use simple cookie cutters for a perfect result, as very fine or intricate shapes bake faster and break more easily.
- Remove the cookies when the edges are set but the center still seems slightly soft, because they finish setting on the hot baking sheet.
Why roll the dough before chilling?
Because freshly made dough is much easier to work with than a hard block straight from the fridge. Once rolled, it chills flat and cuts cleanly.
Why do my cookies spread during baking?
The dough was probably too warm or the butter too soft. Place the cut shapes in the fridge for 10-15 minutes before baking if your kitchen is warm.
Which cocoa to use for these shortbread cookies?
Unsweetened cocoa is essential, otherwise the dough becomes too sweet and less clear in taste. Natural cocoa gives a more vibrant flavor, Dutch-processed gives a rounder chocolate taste.
Can I prepare the dough in advance?
Yes, the rolled dough can stay in the refrigerator for up to 2 days, well covered. You can also freeze the dough sheets and let them come back a few minutes before cutting.
How to decorate the cookies without softening them?
Wait until they are completely cool before adding icing. A thin layer is enough, especially with a rich chocolate base.
Cut-Out Chocolate Shortbread Cookies
American
Cookies
Thick chocolate cookies, soft in the center and clean on the edges, designed for cookie cutters and simple decorations.
Ingredients
- 190g all-purpose flour
- 65g unsweetened cocoa powder
- 1 tsp baking powder
- 1/4 tsp fine salt
- 170g unsalted butter, softened
- 200g granulated sugar
- 1 large egg
- 1 tsp alcohol-free vanilla extract
Instructions
- 1Mix the flour, cocoa, baking powder, and salt in a bowl until evenly combined.
- 2Beat the soft butter with the sugar until creamy and lighter in color.
- 3Add the egg and alcohol-free vanilla extract, then mix just enough to get a homogeneous base.
- 4Gradually incorporate the dry ingredients until the dough becomes dark, soft, and compact.
- 5Divide the dough into two portions, then roll each between two sheets of parchment paper to about 5-6 mm thickness.
- 6Place the dough sheets in the refrigerator for at least 1 hour 30 minutes, until firm.
- 7Preheat the oven to 180°C and cut out shapes with cookie cutters.
- 8Place the cookies on a baking sheet lined with parchment paper, spacing them slightly.
- 9Bake for 10-12 minutes, until the edges are set but the center still feels soft.
- 10Let cool on the baking sheet for 5 minutes, then transfer to a wire rack before decorating.
Notes
• Do not melt the butter: it should be soft, not liquid.
• If the dough sticks too much when cutting, put it back in the fridge for 10 minutes.
• For cleaner cookies, chill the cut shapes before baking.
• Decorate only when the cookies are completely cool.
Nutrition Facts (per serving, estimated)
| 120 kcalCalories | 2gProtein | 16gCarbs | 6gFat |