
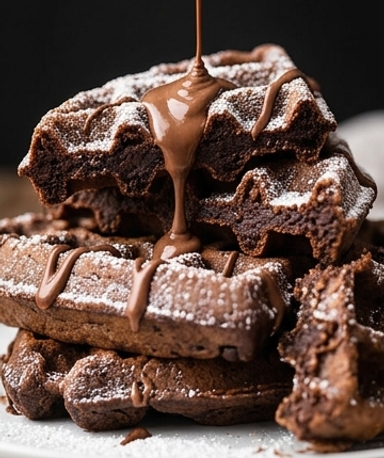
We all have the image of the light Sunday morning waffle—airy, sweet, with a bit of syrup and a clear conscience. These waffles are something else entirely. It’s a dense and seriously chocolatey brownie batter poured into a waffle maker, and the result looks like a waffle, eats like a brownie, and no one quite understands how it’s possible.
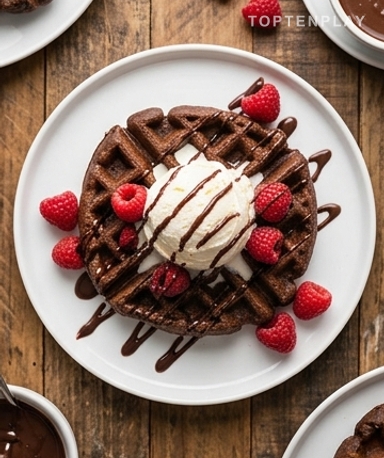
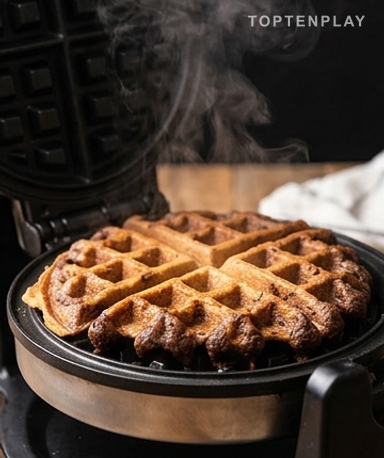
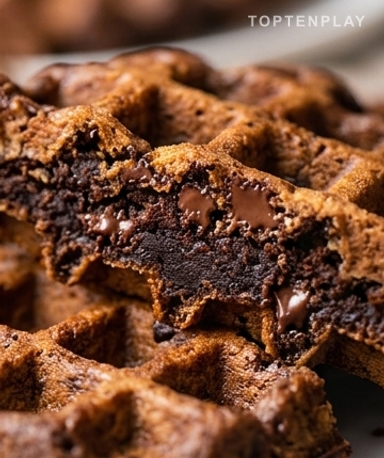
Coming out of the waffle iron, they have this deep brown-black hue, somewhere between 70% dark chocolate and burnt caramel. The edges are sharp and crisp—you hear a dry crack when you press your fork down. The center, however, remains soft. It gives way gently under pressure, like a brownie not quite convinced it’s done baking. A smell of hot cocoa rises, rich and intense, mixed with the slightly toasted butter on the plates.
Why you’ll love this recipe
Ingredient Notes
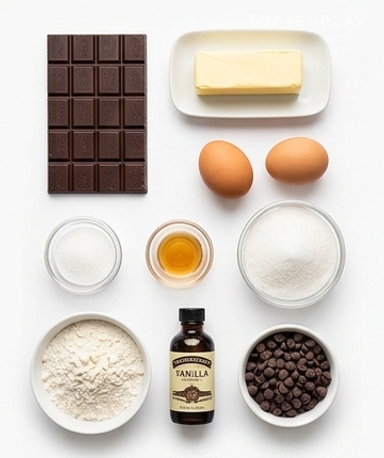
All the ingredients for brownie-style waffles: dark chocolate, butter, eggs, sugar, and flour.
- Dark chocolate : This is the heart of the recipe. Between 60 and 70% cocoa—any lower and the batter will be too sweet and lose that bitterness that balances everything. A Lindt 70% or any 70% dark bar from the supermarket works perfectly. Avoid low-end cooking chocolate: it often tastes like plastic once melted.
- Butter : It melts with the chocolate and gives that fatty, melting texture impossible to get otherwise. No margarine, no vegetable oil. Unsalted or semi-salted, both work—with semi-salted, you get that small salt-chocolate contrast that makes a difference in the final bites.
- Eggs : Three whole eggs, whisked with the sugar before incorporating the chocolate. This whisking creates a light foam that aerates the batter slightly. Without it, the texture would be too compact, almost heavy. Take them out of the fridge 20 minutes before—they incorporate better at room temperature.
- Flour : Only 80g, and that’s intentional. The low amount of flour is exactly what differentiates a brownie from an ordinary chocolate cake. If you are gluten-free, cornstarch works as a direct replacement, gram for gram.
- Chocolate chips : Technically optional. In practice, don’t skip them. They partially melt during cooking and create small pockets of semi-liquid chocolate inside. Dark, milk, or a mix of both—it doesn’t matter, the effect is the same.
Start the batter
Begin by melting the broken chocolate pieces with the butter. Use the microwave in 30-second increments, or a double boiler if you want total control. The butter disappears first, then the chocolate gradually gives in. When the mixture is smooth and glossy like black varnish, set it aside—it needs to cool slightly before meeting the eggs. In a bowl, whisk the eggs with the sugar for a full minute. No need to reach a white foam, just enough for the mixture to turn a pale cream tone and lighten up. Pour in the melted chocolate while mixing gently, then add the flour and salt all at once. About ten strokes with the spatula. No more—overworking the batter ruins the fudginess, which is exactly what we’re trying to keep.
The critical moment
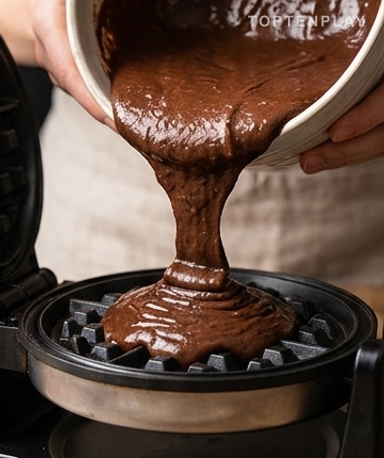
Preheat the waffle iron to the max—it’s this immediate contact with the burning hot plates that forms the crispy crust in seconds. Pour less batter than you would for normal waffles. This batter is dense; it doesn’t spread much and barely rises. If you overfill, it overflows and makes a chocolatey disaster that sticks to the plates. Close the lid without forcing it. At first, you’ll hear a slight whistling—the steam escaping, which is a good sign. Cook for 3 to 4 minutes. The waffle is ready when the edges stop smoking but the center still resists slightly under gentle pressure. This gap between the two is exactly where you want to be.
Leaving the waffle iron
The temptation to cut it immediately is real. Wait 60 seconds. The crust finishes forming as it cools—if you handle it too quickly, it falls apart under your fingers and you end up with a hot, delicious, but unmanageable chocolate mush. Place the waffle on a wire rack, never directly on a plate—the bottom would stay soft from its own humidity. And if the first one is a fail—overcooked, poorly measured batter, sticky crust—that’s perfectly normal. The first waffle is the test. it tells you everything about your machine and calibrates the ones to follow.
Tips & Tricks
- Use a chocolate you would eat on its own as a bar. Mediocre chocolate doesn’t improve with heat—it reveals itself. If you like the taste raw, you’ll like it melted.
- Don’t try to prolong the cooking for more crunch. Beyond 5 minutes, you lose the fudgy heart and end up with something dry. The crunch comes from the initial heat of the plates, not time.
- To reheat, put the waffle back in the waffle iron for 2 minutes on medium power. The microwave makes it completely soft—if you care about the crunch, avoid it.
Do I need a special waffle iron for this recipe?
No, any waffle iron works—Belgian, American, mini, whatever. The important thing is that it heats up well. Just avoid very low-power models that take 10 minutes to heat: immediate contact with the hot plates is what creates the crispy crust.
How do I know if the waffle is cooked without opening it too early?
When the steam whistling almost completely stops, that’s a good indicator. In practice, wait at least 3 minutes before opening. If the waffle resists when you try to lift the lid, it’s not ready—never force it, or it will tear.
Can I prepare the batter in advance?
Yes, the batter keeps for 24h in the refrigerator in a closed container. Take it out 20 minutes before cooking so it returns to room temperature—cold batter cools down the plates and prevents the crust from forming properly.
How to store and reheat the waffles?
At room temperature under a cloth, they last 1 to 2 days. In the refrigerator, up to 3 days. To reheat, put them back in the hot waffle iron for 2 minutes—they will regain their crunch. Avoid the microwave: it makes them completely soft and you lose all texture.
Can I make this recipe without a waffle iron?
Not really—the waffle iron is what creates the crust and the grid design. However, the same batter baked in a classic brownie tin produces an excellent brownie. Just change the baking time: 20-25 minutes at 175°C.
Can I replace dark chocolate with milk chocolate?
Yes, but the result will be sweeter and less intense. Compensate by reducing the sugar by about 20g. White chocolate also works for a sweeter version, but be careful: it melts differently and the final texture will be a bit firmer.
Brownie Waffles
French
Dessert
A dense and chocolatey brownie batter cooked in a waffle iron. Crispy on the surface, melting at the heart—the best of both worlds in 30 minutes.
Ingredients
- 200g dark chocolate (60-70% cocoa)
- 100g butter (unsalted or semi-salted)
- 120g granulated sugar
- 3 eggs
- 80g flour (or cornstarch for gluten-free version)
- 1 pinch salt
- 1 teaspoon vanilla extract (optional)
- 50g chocolate chips
Instructions
- 1Melt the broken chocolate with the butter in the microwave (in 30-second increments) or in a double boiler. Mix until smooth and glossy. Let cool for 5 minutes.
- 2In a bowl, whisk the eggs with the sugar for 1 minute until the mixture lightens slightly and takes on a pale cream hue.
- 3Pour the cooled melted chocolate over the egg-sugar mixture and mix gently with a spatula.
- 4Add the flour, salt, and vanilla. Mix with about ten strokes of the spatula—just enough so you no longer see flour. Do not overwork the batter.
- 5Fold in the chocolate chips and mix briefly.
- 6Preheat the waffle iron to full power. Lightly grease the plates if necessary.
- 7Pour a small ladle of batter into the center of the waffle iron (less than for classic waffles). Close and cook for 3 to 4 minutes without opening.
- 8Delicately remove the waffle, place it on a rack, and let it rest for 1 minute before serving. Repeat with the rest of the batter.
Notes
• Storage: at room temperature under a cloth for 1-2 days, in the refrigerator for up to 3 days, or in the freezer for up to 1 month. Reheat in the waffle iron for 2 minutes to regain crunchiness.
• The first waffle is always a test: it helps calibrate the amount of batter and the cooking time for your specific appliance.
• For a molten core version: slip a square of dark chocolate into the center of the batter just before closing the waffle iron.
Nutrition Facts (per serving, estimated)
| 340 kcalCalories | 6gProtein | 32gCarbs | 21gFat |