We often imagine frying as something complex, reserved for professionals with their specialized equipment and laser thermometers. The truth is that these sweet fritters are made with ingredients already in your pantry, in under an hour, and with a technique anyone can master on the first try. That’s exactly the kind of recipe that impresses without ever stressing you out.

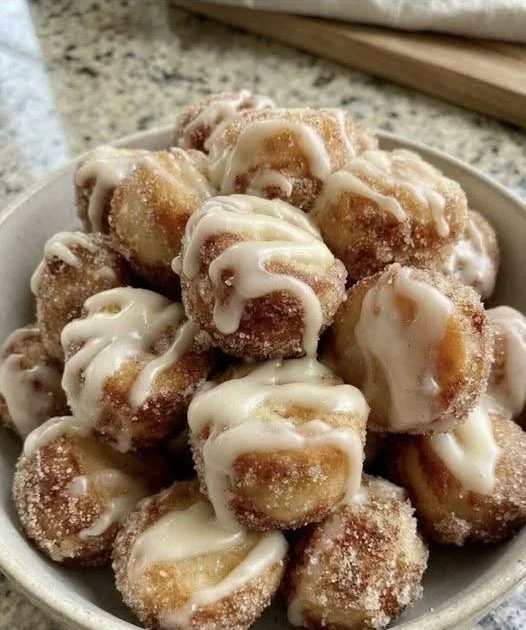
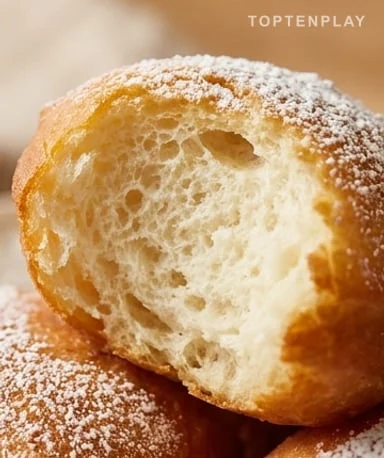
Taken out of the oil still bubbling, they fill the whole kitchen with the warm scent of sweet fried dough—that smell that brings everyone in without having to call. The crystallized sugar clings to the slightly crispy crust, and inside, it’s the opposite: a soft, airy crumb that gives way under fingertip pressure like a cloud. It’s this contrast of textures—crunchy outside, melting inside—that makes it hard to stop at just one.
Why you’ll love this recipe
Ingredient Notes
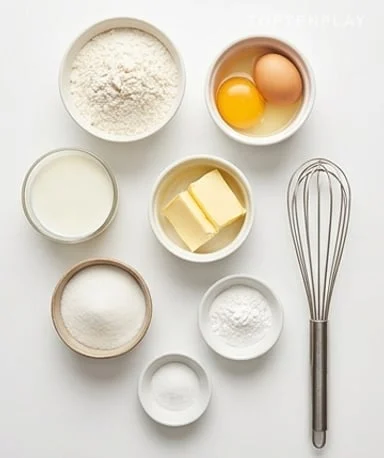
Just basics: flour, eggs, milk, melted butter, and leavening. Proof that you don’t need much to indulge.
- Flour (250 g) : It forms the skeleton of the dough—the gluten gives it structure and allows it to hold up in the oil without collapsing. Use standard T45 or T55. Whole wheat flour would weigh down the final texture, and bread flour (T65) gives slightly denser fritters but still works. It’s not an exact science; it’s pantry baking.
- Leavening (1 packet baking powder or 10 g yeast) : Baking powder is the efficient choice: no long rest, it acts directly from the heat of frying to puff up the fritters. Yeast requires 30 to 45 minutes of rest but gives a more alveolated, almost brioche-like texture—choose it when you have time. In both cases, never mix it directly with salt, which inhibits its action.
- Eggs (2) : They play a dual role: binding the dough so it stays coherent during cooking, and providing fat that contributes to tenderness. Take them out of the fridge half an hour before starting—room-temperature eggs incorporate much better and give a more homogeneous dough, without unintegrated yellow streaks.
- Milk (10 cl) : It hydrates the flour and determines the final dough texture. Too little, the dough will be firm and the fritters compact; too much, they absorb excess oil and come out greasy. Whole milk gives a richer result, but semi-skimmed works fine. As a replacement, coconut milk adds a subtle flavor that works particularly well with orange blossom.
- Melted butter (40 g) : It provides tenderness and prevents the fritters from drying out too quickly after cooking. Melted, it integrates without creating lumps or uneven fatty patches. If you don’t have butter, neutral oil in the same amount works, with a very similar result.
- Frying oil : Choose an oil with a high smoke point: sunflower, peanut, or grapeseed. Olive oil is to be avoided here—it smokes too quickly and gives the fritters a pronounced aftertaste that masks their sweetness. Plan about one liter in a normal-sized saucepan for sufficient depth, allowing the fritters to float freely without touching the bottom.
The dough: slightly sticky, and that’s intentional
The first time you make this dough, instinct tells you to add more flour because it sticks to your fingers. That’s a mistake. This soft, slightly adhesive texture is exactly what guarantees airy, tender fritters—a dough that’s too firm will give heavy fritters, almost hard once cooled. Start by mixing the dry ingredients in a large bowl: flour, sugar, and salt. The order matters because proper salt distribution from the start avoids uneven flavor zones. Add the eggs one by one, mixing well between each, then pour in the milk in a stream while stirring to prevent lumps. The melted butter comes next, and the leavening agent last. The final dough should be homogeneous, shiny, and fall from the spoon in a slow ribbon. If it resists, add a splash of milk. If it’s completely liquid, a spoonful of flour does the trick.
The rest: the only step you can’t skip
Thirty minutes in a warm place, and no negotiations. This resting time allows the gluten to relax—without it, the dough would be too elastic, the fritters would shrink in the oil and hold an irregular shape. With yeast, the rest is even more decisive: this is when the microorganisms begin their fermentation, producing the tiny gas bubbles that will puff up the fritters during cooking. Cover the bowl with a clean cloth and place it on top of the fridge, or in an oven slightly warmed then turned off. You’ll know the dough has rested well when it has slightly risen and its surface is less taut than at the start. If your kitchen is cool, extend by ten to fifteen minutes—yeast activity directly depends on ambient heat.
Frying: temperature is everything
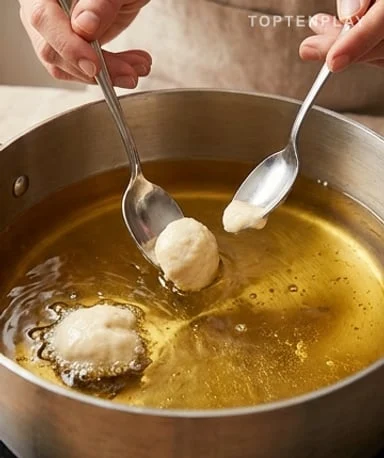
The oil must be at 170-180°C, and that’s the only real technical point of the recipe. Below that, the fritters absorb oil like sponges and come out soft with a pale, unappealing color. Above, the outside browns before the inside is cooked—a dark crust, raw center, the worst of both worlds. If you don’t have a thermometer, the dough test is reliable: drop a small hazelnut-sized piece into the oil. If it sinks to the bottom then slowly rises surrounded by fine, steady bubbles, the temperature is perfect. To shape the fritters, two tablespoons are enough: take a portion of dough on the first spoon, use the second to gently slide it into the oil without splashing. Ideal size is about a large walnut. Cook two to three minutes per batch and turn them halfway—you’ll hear the crackling change slightly when they are nicely golden on one side. Then drain them on paper towels, never in a closed container, which would soften them.
Sugar coating: timing matters
Rolling the fritters in sugar when they are still too hot melts the crystals into a sticky, translucent film. Waiting until they are completely cold, the sugar no longer sticks well and slides off. The right moment is when they are lukewarm—the surface still retains slight moisture that catches the crystals, and they stay distinct, with that pleasant crunch under the teeth. Use standard granulated sugar for a visible, slightly grainy texture, or powdered sugar if you prefer a more delicate, powdery finish. A pinch of cinnamon mixed into the coating sugar completely transforms the flavor profile without any extra effort.
Filled fritters: another level of experience
The plain version is already great. But filled fritters deserve their own mention. Once lukewarm, carefully pierce them with a thin knife and fill with a piping bag. Apricot jam is classic—its slight acidity perfectly balances the sugar of the dough. Melted chocolate also works, provided you serve quickly before it sets inside. For something more delicate, a pastry cream with orange blossom transforms these fritters into something authentically fragrant, close to sfenj. Orange blossom aroma is strong, so start with a few drops and adjust to taste. In any case, filled fritters are best eaten the same day, ideally within the hour—the filling inevitably softens the crust over time.
Tips & Tricks
- Do not cook more than 4 to 5 fritters at a time: each addition of cold dough drops the oil temperature, and if you put too many, it will take too long to come back to 170°C. The fritters then cook at too low a temperature, absorb excess oil, and come out greasy and heavy. Small batches, oil always at the right temperature—that’s the rule.
- If using yeast, never add it directly onto the salt in the bowl. Salt inhibits yeast even in small amounts and can partially block its action. Mix all other dry ingredients together first, then incorporate the yeast last.
- Keep an eye on the oil color as you go. Oil that foams excessively, darkens, or smells rancid should be changed. Degraded oil transfers its bad flavors directly to the dough—this is the most common reason for fritters with a bitter or unpleasant aftertaste, even if the recipe is perfectly executed otherwise.
- Fritters do not store well: after a few hours, they soften and lose their crispness. If you need to prepare ahead, keep the raw dough in the fridge (up to 12 hours) and fry at the last moment. That’s much more effective than trying to reheat already cooked fritters, which always come out a bit rubbery from the oven.
Can you make these fritters without leavening?
Yes, but the result will be more compact. Without leavening, the dough doesn’t puff during cooking, and the fritters have a denser texture, similar to a carnival fritter. If you really have nothing, add a teaspoon of baking soda with a few drops of lemon juice for a slight leavening effect.
How to know if the oil is at the right temperature without a thermometer?
The dough test is most reliable: drop a hazelnut-sized piece of dough into the oil. If it sinks to the bottom then slowly rises surrounded by small, steady bubbles, the temperature is ideal (170-180°C). If it stays at the bottom, the oil is too cold. If it browns in seconds, lower the heat and wait a minute before testing again.
Why are my fritters greasy and heavy?
The almost systematic cause is oil not hot enough. Below 170°C, the dough absorbs the oil instead of forming a crust that waterproofs it. Another common reason is cooking too many fritters at once, which drops the oil temperature. Small batches and hot oil solve the problem.
Can you prepare the dough in advance?
Yes, the raw dough can be stored up to 12 hours in the fridge, well covered. The cold slows down yeast activity without stopping it, sometimes even giving a slightly more developed texture. However, avoid storing already cooked fritters: they soften after a few hours and don’t regain their crispness even when reheated.
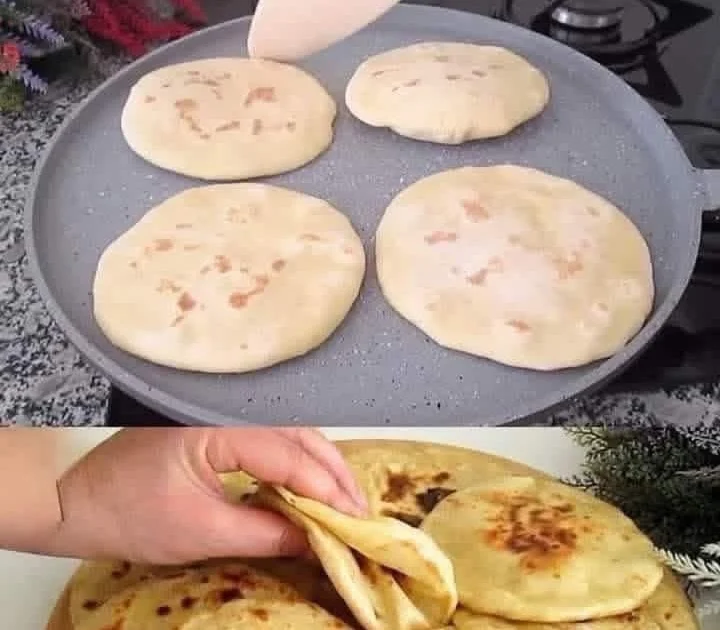
Can you replace frying with baking?
Technically yes, but it won’t be the same recipe. In the oven at 200°C, the fritters puff and cook, but without the characteristic golden crust of frying and with a texture closer to a light muffin. If you’re looking to avoid frying, it’s an acceptable alternative, but you have to accept that the result is different.
What flavors can you add to the dough?
The basic dough is neutral so it can be varied easily. A teaspoon of vanilla extract is the most accessible choice. A few drops of orange blossom give a typically North African flavor that’s very popular. The grated zest of a lemon or orange is more subtle but adds a pleasant freshness that contrasts with the coating sugar.
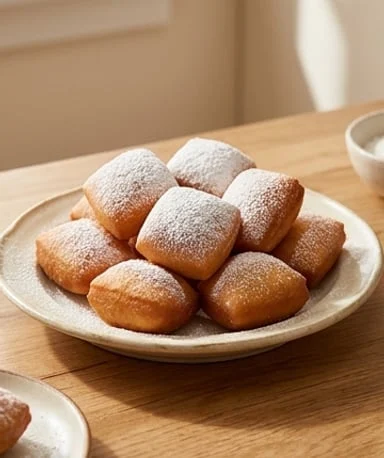
Soft Sweet Fritters
French
Dessert
Light, golden fritters coated in sugar — made in under an hour with pantry staples. Crispy on the outside, airy on the inside, and endlessly customizable.
Ingredients
- 250 g all-purpose flour (T45 or T55)
- 2 room-temperature eggs
- 50 g granulated sugar
- 1 packet baking powder (or 10 g active dry yeast)
- 10 cl milk (whole or semi-skimmed)
- 40 g melted butter
- 1 pinch fine salt
- 1 liter neutral frying oil (sunflower or peanut)
- 60 g granulated sugar for coating
Instructions
- 1In a large bowl, mix the flour, sugar, and salt. Add the eggs one by one, mixing well after each addition.
- 2Gradually pour in the milk while stirring to avoid lumps, then incorporate the melted butter. Add the leavening agent last and mix until you have a smooth, flexible, slightly sticky dough.
- 3Cover the bowl with a clean cloth and let rest for 30 to 45 minutes in a warm place.
- 4Heat the oil in a saucepan to 170-180°C. Check the temperature by dropping a small hazelnut of dough: it should slowly rise with steady bubbles.
- 5Shape the fritters using two tablespoons: take a walnut-sized portion of dough and gently slide it into the hot oil. Cook 4 to 5 fritters at a time maximum.
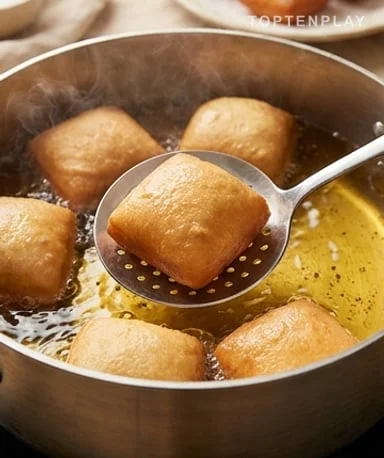
- 6Cook for 2 to 3 minutes, turning halfway, until the fritters are nicely golden on all sides.
- 7Remove the fritters with a slotted spoon and drain on paper towels.
- 8While still lukewarm, roll the fritters in granulated sugar until well coated. Serve immediately.
Notes
• Never cook more than 4 to 5 fritters at a time to keep the oil temperature constant.
• For filled fritters, pierce them with a thin knife once lukewarm and fill with a piping bag (apricot jam, pastry cream, or melted chocolate).
• Add a teaspoon of vanilla extract or a few drops of orange blossom water to the dough for different flavors.
• The raw dough can be stored up to 12 hours in the fridge. Always fry at the last moment for crispy fritters.
Nutrition Facts (per serving, estimated)
| 115 kcalCalories | 2 gProtein | 14 gCarbs | 5 gFat |