
Sunday afternoon, when the coming week looms and you already know that on Tuesday you won’t have five minutes to eat properly. That’s why we make these bars. Two hours, one pan, and you’ve got enough to last until Friday.
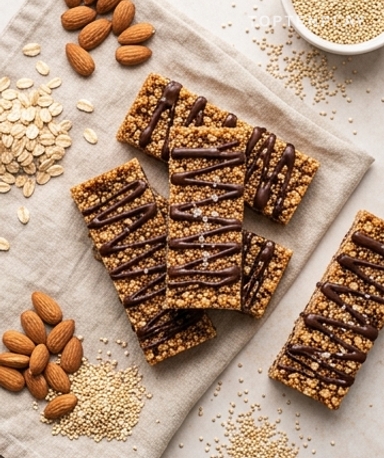
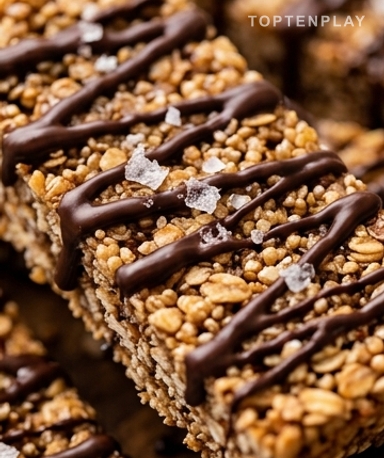
They are nothing like an industrial bar — not smooth, not perfect, with slightly irregular edges and a textured surface where the oats and quinoa stand out like a grainy mosaic. The drizzle of dark milk chocolate has set in matte zigzags, and the fleur de sel crystals on top catch the light like little shards of glass. Under your fingers, the bar is firm but not rigid. The first bite reveals a subtle crunch from the toasted quinoa, immediately followed by the soft, caramelized chew of the dates — two textures that should have clashed but live together perfectly.
Why you’ll love this recipe
Ingredient Notes
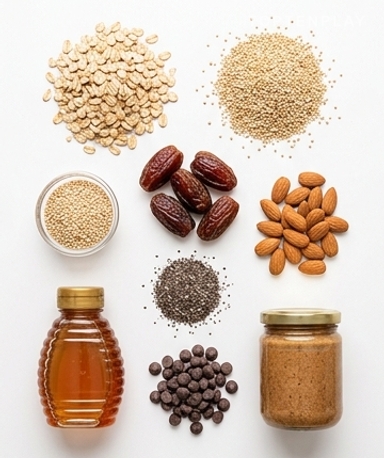
Raw quinoa, rolled oats, Medjool dates, almonds, and chia seeds: simple ingredients for a bar that really keeps you going.
- Medjool Dates : They act as a natural glue — they are what hold everything together. Get Medjool specifically, not Deglet Nour which are too dry and don’t blend well. Once soaked for 10 minutes in very hot water, they turn into a dark brown paste, almost like a thick caramel. This is what gives the bars their characteristic chew.
- Raw Quinoa (uncooked) : The real stroke of genius in the recipe. We don’t cook it — it goes directly into the mix as is, and the oven will toast it lightly. It takes on a golden beige hue and a texture that slightly crunches under the tooth, contrasting with the softness of the dates. Any classic white quinoa will do.
- Almond Butter : It provides the fatty binder and richness in the mouth. Whole almond butter, with the skin, gives more flavor than the white version. If you don’t have any on hand, peanut butter works very well — the bars will be a bit more indulgent, less neutral.
- Old-fashioned Rolled Oats : Get the large flakes, not instant oats. Instant ones are too thin and give a mushy texture once cooked. Large flakes keep a real chew and structure the bar well.
- Dark Chocolate and Fleur de Sel : These are not just decorative finishes. The bitterness of a chocolate with at least 70% cocoa cuts through the sweetness of the dates, and the fleur de sel amplifies all the other flavors at once. Without these two elements, the bars are good but a bit monotonous.
Why I always soak the dates even when I’m feeling lazy
Ten minutes in boiling water, and the dates go from firm and sticky to a supple mass that blends in seconds. Without this soaking, you’ll strain your blender and end up with pieces that don’t integrate well with the rest. The resulting paste should be smooth and thick, a deep brown almost like nutella — that’s the sign it’s ready. It will mix directly with the dry ingredients, no prior cooking needed. Simple.
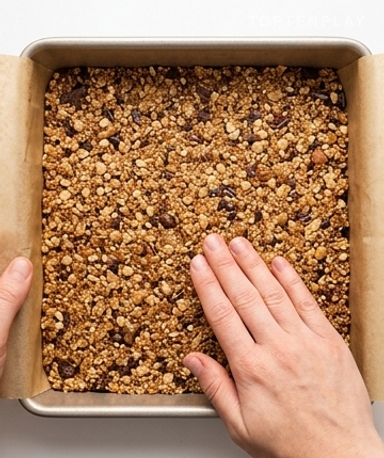
The part everyone fails at: press down like your life depends on it
Once the mixture is in the pan, we press. Really hard. Not just smoothing the surface — compress with the palm of your hand, your knuckles, the bottom of a flat glass. The mixture must be dense and compact, like a monolithic block. This is where the bar’s integrity during cutting is decided: a poorly pressed layer results in bars that crumble as soon as you touch them. Two minutes of work, and it’s sorted.
What happens in the oven: the quinoa waking up
During baking — about 20 to 25 minutes at 175°C — the quinoa toasts. Basically, you’ll start to smell a slightly roasted nutty aroma rising from the oven, and that’s the sign things are going well. The edges will take on a golden hue like light caramel while the center remains paler. This is normal. It will firm up upon cooling, not during baking.
The fridge is not optional
Cutting the bars right out of the oven is the classic mistake. The result: everything collapses. You must first let them cool completely at room temperature — at least 30 minutes — then put them in the fridge for at least one hour. The cold firms up the almond butter and sets the date paste into something truly solid. After that, a sharp knife is all you need to get clean bars. Melted chocolate and fleur de sel are added only to the cold, cut bars.
Tips & Tricks
- Do not skip the fridge rest before cutting — even if it seems solid at room temperature, the bars crumble when sliced. One hour in the cold truly transforms the texture.
- To freeze, wrap each bar individually in plastic wrap before putting them in a freezer bag. This prevents them from sticking together and you can take out one at a time without thawing the whole batch.
- If the mixture seems too dry and doesn’t hold when you press it down, add an extra tablespoon of honey. It’s often just a matter of date size which varies from brand to brand.
How do I store these granola bars?
In the refrigerator in an airtight container, they keep for up to 2 weeks. For long-term storage, wrap each bar individually in plastic wrap and freeze them for up to 3 months. Simply take them out the night before and let them thaw in the fridge.
Why do my bars crumble when I cut them?
There are two possible reasons: either the mixture wasn’t pressed hard enough into the pan before baking, or the bars didn’t cool enough in the fridge before being cut. At least one hour in the cold after cooling to room temperature is essential for the date paste and almond butter to set properly.
Can I replace Medjool dates with other dates?
Medjools are highly recommended because they are fleshier and blend into a smooth paste after soaking. Deglet Nour dates are drier and give a less homogeneous result. If you only have Deglet Nour, extend the soaking time to 20 minutes and add an extra tablespoon of almond butter to compensate.
Can these bars be made nut-free?
Yes, it’s actually planned for. Replace the almonds with sunflower or pumpkin seeds, and the almond butter with sunflower seed butter. The texture and taste will be slightly different, but the bars will remain just as well-bound and filling.
Is it absolutely necessary to bake the bars?
Baking isn’t just for hold — it’s what toasts the raw quinoa and develops that characteristic crunch. Without baking, the quinoa remains hard and floury. Raw date-based bars exist, but that would be a different recipe with a very different result.
Can I replace the honey with another sweetener?
Maple syrup works very well and produces slightly softer bars. The final consistency will be a little less firm than with honey. Avoid classic cane sugar or agave syrup that is too liquid, as they do not provide the same cohesion.
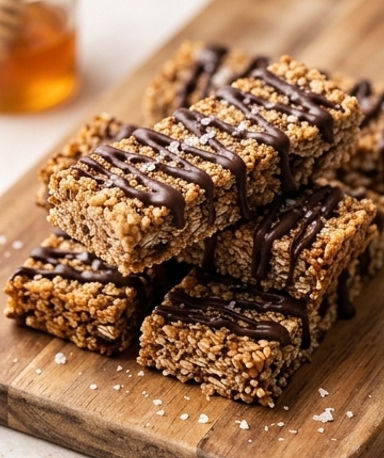
Quinoa-Date Granola Bars with Chocolate and Fleur de Sel
American
Snacks & Energy Bars
Homemade granola bars that stand out from industrial versions: crunchy toasted quinoa, melting dates, dark chocolate, and fleur de sel. Ideal for Sunday meal prep.
Ingredients
- 250g pitted Medjool dates (about 14-15 dates)
- 200g old-fashioned rolled oats (large flakes)
- 70g raw quinoa (uncooked)
- 120g almond butter (or peanut butter)
- 80ml honey (4 tbsp)
- 80g roughly chopped almonds
- 20g chia seeds (2 tbsp)
- 40g dried cranberries
- 1 tsp vanilla extract
- ¼ tsp fine salt
- 80g dark chocolate, at least 70%
- 1 tsp fleur de sel
Instructions
- 1Preheat the oven to 175°C. Line a 20×28 cm rectangular pan with parchment paper, leaving overhanging edges.
- 2Place the pitted dates in a bowl, cover with very hot water and let soak for 10 minutes. Drain, then blend into a smooth, thick paste.
- 3In a large bowl, mix the date paste, almond butter, honey, and vanilla extract until smooth.
- 4Add the rolled oats, raw quinoa, chopped almonds, chia seeds, cranberries, and fine salt. Mix with a spatula until fully incorporated.
- 5Pour the mixture into the pan and press down very firmly with your palms or the bottom of a flat glass — the layer must be very compact.
- 6Bake for 22 to 25 minutes, until the edges are golden like light caramel. Let cool completely in the pan at room temperature (30 min).
- 7Place the pan in the refrigerator for at least 1 hour before cutting.
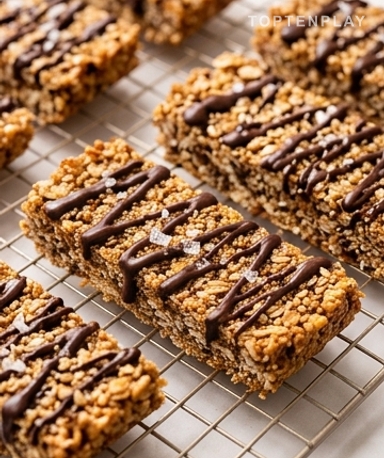
- 8Melt the chocolate in a double boiler or in the microwave in 30-second intervals. Lift the block of bars out of the pan using the parchment paper, then cut into 12 bars.
- 9Drizzle the melted chocolate over the cut bars, sprinkle with fleur de sel and let set for 15 minutes in the fridge before serving.
Notes
• Storage: up to 2 weeks in the refrigerator in an airtight container, or 3 months in the freezer wrapped individually.
• For nut-free bars: replace almonds with sunflower seeds and almond butter with sunflower seed butter.
• Total time includes 30 minutes of cooling at room temperature + 1 hour in the refrigerator — do not skip these steps.
Nutrition Facts (per serving, estimated)
| 245 kcalCalories | 6gProtein | 31gCarbs | 11gFat |