
It starts with a scent. The blender whirs, the herbs tear apart, the garlic hits your nose. Even before turning on the oven, the kitchen already smells amazing.
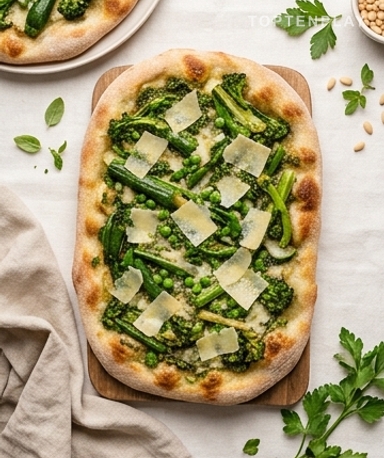
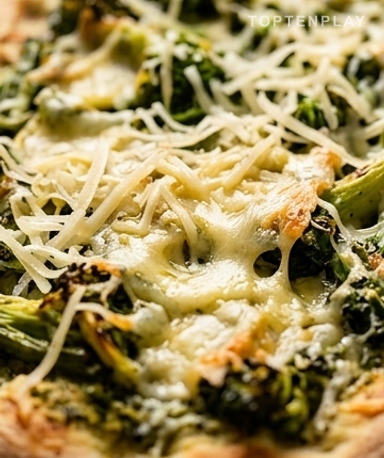
The pinsa comes out of the oven puffed up at the edges, golden like an overbaked shortbread — that beige-caramel hue that crunches under the tooth. The Comté has melted into small, irregular plates, still glistening. The peas have kept their bright green, that deep bottle green that contrasts with the pale cheese. Underneath, the moist and fragrant pesto clings slightly to the vegetables, like a still-warm cream.
Why you’ll love this recipe
Ingredient Notes
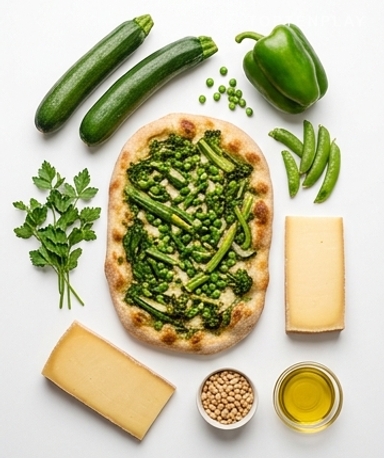
Peas, zucchini, green bell pepper, fresh herbs, and Comté: simple ingredients for an impressive result.
- The pinsa : An Italian base made from rice, soy, and wheat flour — more hydrated and lighter than ordinary pizza dough. You can find it in the fresh pasta/pizza section of supermarkets or at Italian grocers. It cooks directly from the package, no defrosting needed.
- The Comté : Choose one aged at least 12 months: it has that frank nutty taste that holds up during cooking without becoming too oily. Abondance works very well as a replacement if you find it. Avoid young versions; they are too mild and disappear in the heat.
- The pesto herbs : Flat-leaf parsley, basil, chives — the trio works well together. Parsley provides structure, basil adds aroma, and chives give a light allium note. Slightly wilted herbs work perfectly in the blender; they don’t need to be flawless.
- The peas : Fresh if it’s the season, frozen the rest of the year — honestly very good here. Blanch them for 3 minutes in boiling salted water, just enough to make them tender without losing their bright color.
- The pine nuts : They provide fat and richness to the pesto. If you don’t have any on hand, unsalted cashews work very well. Just watch the price of pine nuts depending on the supermarket — the price gap can be absurd for a few grams.
Why I never make pesto with a fork anymore
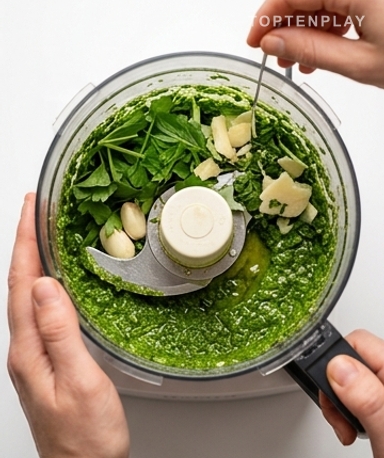
I used to try chopping herbs by hand. Long, tedious, uneven result. Now: blender, 90 seconds, done. Toss in parsley, basil, chives, garlic, pine nuts, grated Comté, and olive oil — and pulse in bursts. Not continuously, otherwise it heats up and turns bitter. The result should remain slightly chunky, not smooth like a cream. Taste, adjust salt. It should be well-seasoned because the vegetables will dilute the overall flavor.
Vegetables: thin is all you need to know
Green bell pepper and zucchini in very thin slices — use a mandoline if you have one, a knife if not, but be consistent. The goal: for them to cook quickly and evenly on the pinsa. A slice that is too thick comes out a bit raw in the middle while the cheese is already melted. The peas, meanwhile, blanch separately in boiling salted water. Three minutes. They should stay green like freshly cut grass — not turn khaki, which means they’ve cooked too long.
Pre-baking: the step we skip and regret
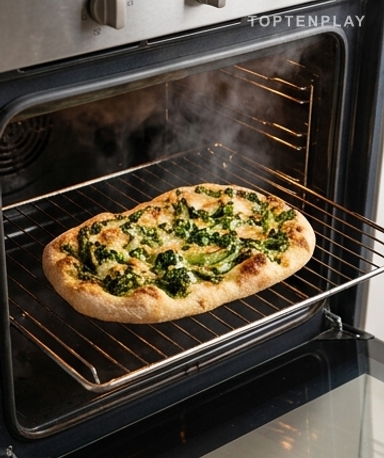
The recipe calls for sliding the plain pinsa into the oven for 5 minutes at 180°C before topping it. It’s tempting to skip this step. Don’t. This first pass slightly dries the surface and prevents the pesto from making the dough soggy. When you take the pinsa out, it’s still flexible and warm — that’s the moment to spread the pesto generously, add the vegetables, and then three-quarters of the Comté. Put it back in the oven for 10 minutes. The crust crackles softly against the rack, the cheese melts and begins to brown in places, the color of light honey.
The final touch that changes the look of the dish
When serving, add the remaining Comté directly onto the hot pinsa — without putting it back in the oven. It softens but doesn’t melt completely, giving two textures: the well-melted cheese underneath and the still-firm shavings on top. The sprouts go on last, just before cutting. They bring a vegetal freshness and that visual contrast between melting heat and crunchy raw.
Tips & Tricks
- Make the pesto the day before and keep it in the fridge with a drizzle of olive oil on the surface — it keeps easily for 3 days and the flavors have time to meld.
- If you have extra pesto, freeze it in an ice cube tray. Thaw exactly what you need, cube by cube, without wasting any.
- Pinsa reheats well in the oven at 160°C for 5 minutes — but always add the sprouts after heating, never before.
Can I replace the pinsa with a classic pizza dough?
Yes, it works. The difference: pinsa is airier and slightly crispier on the edges. With classic pizza dough, increase the pre-baking to 7-8 minutes to prevent the bottom from becoming soggy from the pesto.
Can I prepare the pesto in advance?
Yes, and it’s even recommended. Pesto keeps for 3 days in the fridge in a closed jar with a drizzle of olive oil on top — this prevents it from turning black. You can also freeze it in portions in an ice cube tray.
How to store and reheat leftovers?
Topped pinsa keeps for 24 hours in the fridge, well wrapped. Reheat in the oven at 160°C for 5-6 minutes — never in the microwave, as the dough softens completely. Add fresh sprouts only after reheating.
Fresh or frozen peas: what’s the difference?
Frozen is very good here. They are often harvested and frozen quickly, which preserves their color and taste. The advantage of fresh is the slightly firmer texture — but on a hot pinsa, the difference is minimal.
What can I use instead of Comté if I can’t find any?
Abondance is the best direct replacement, with a very similar taste. Emmental or Gruyère also work for cooking. In the pesto, grated Pecorino gives an interesting sharper note if you want to vary it.
Can I vary the green vegetables?
Absolutely. Blanched green beans, broccoli florets, green asparagus cut into pieces — anything green that cooks quickly is suitable. Avoid watery vegetables like raw tomatoes which would make the dough soggy.
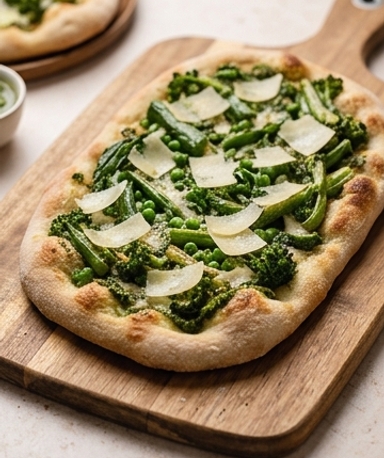
Pinsa with Green Vegetables and Homemade Pesto
Italian
Main course
A light Italian pinsa topped with an express fresh herb pesto, crunchy green vegetables, and melted Comté. Ready in 40 minutes, effortless.
Ingredients
- 1 grande pinsa (approx. 350g)
- 200g peas, fresh or frozen
- 1 green bell pepper
- 1 zucchini (approx. 200g)
- 80g Comté shavings
- 1 handful sprouts
- 25g flat-leaf parsley (½ bunch)
- 15g fresh basil (½ bunch)
- 20g chives (1 bunch)
- 3 garlic cloves
- 80g grated Comté
- 20g arugula leaves
- 2 c. à soupe olive oil (30ml)
- 1 c. à soupe pine nuts (15g)
- salt and pepper
Instructions
- 1Preheat the oven to 180°C.
- 2Blend the parsley, basil, chives, garlic, pine nuts, arugula, grated Comté, and olive oil in bursts until you get a slightly chunky pesto. Season with salt and pepper.
- 3Blanch the peas for 3 minutes in boiling salted water, drain, and set aside.
- 4Cut the pepper and zucchini into thin, even strips.
- 5Bake the plain pinsa on the rack for 5 minutes.
- 6Remove the still-warm pinsa, spread the pesto generously, arrange the vegetables and peas, then sprinkle three-quarters of the Comté shavings.
- 7Return to the oven for 10 to 12 minutes until the cheese is melted and the edges are golden.
- 8When serving, add the remaining Comté shavings and the sprouts. Serve immediately.
Notes
• The pesto can be prepared up to 3 days in advance, stored in the fridge with a drizzle of olive oil on top in a closed jar.
• Variation: replace Comté with Abondance, or add Pecorino shavings to the pesto for a sharper note.
• Leftovers reheat for 5 minutes in the oven at 160°C. Add fresh sprouts only after reheating.
Nutrition Facts (per serving, estimated)
| 575 kcalCalories | 24gProtein | 52gCarbs | 27gFat |