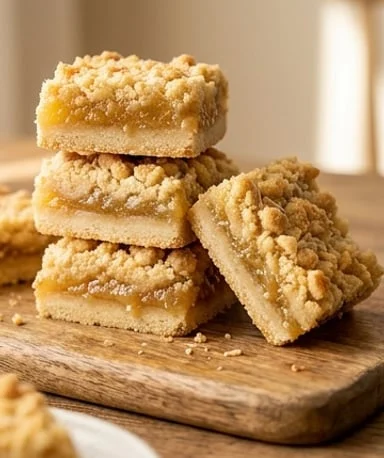
Have you ever looked for an easy dessert to take along, sturdy enough to survive a picnic but good enough that people ask you for the recipe? These pineapple coconut crumble bars fit the bill exactly. Fifteen minutes of prep, twenty-five in the oven, and you get something that resembles a Breton shortbread crossed with a pineapple cake.
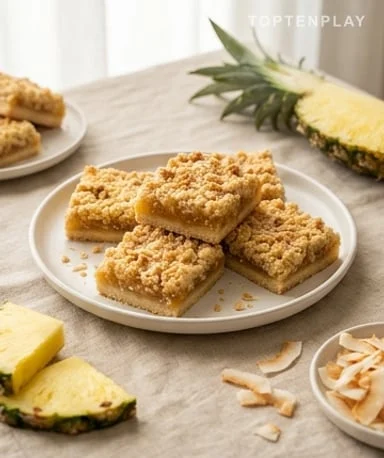
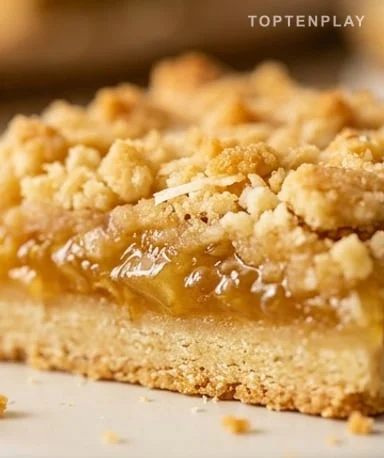
When it comes out of the oven, the top is a uniform caramel color, dotted with lightly toasted coconut flakes that smell like the beach. Underneath, the pineapple filling is translucent and candied, halfway between jam and firm compote. The base stays compact but yields easily under the fork, with that buttery crunch you associate with shortbread. Hot, warm, or cold, it’s a slightly different experience every time.
Why you’ll love this recipe
Ingredient Notes
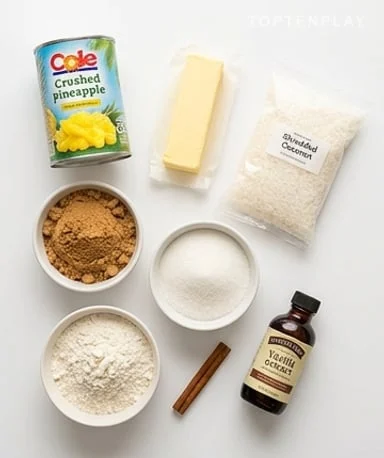
Canned crushed pineapple, melted butter, shredded coconut, flour, two sugars, and a touch of cinnamon: a nearly bare pantry is enough.
- Canned crushed pineapple (570 g) : Canned pineapple in natural juice is preferred over fresh here: it’s already tender, its acidity is mellowed, and its juice directly contributes to the filling. Be sure to choose a can labeled “in juice” not “in syrup” to avoid a cloying result. Draining is the most critical step of the recipe: without it, the base will inevitably become soggy.
- Unsweetened shredded coconut : It adds body to the crumble dough, a slight chew, and that characteristic tropical aroma that intensifies during baking. The unsweetened version is essential: using sweetened coconut would make the whole thing too heavy. If you can only find sweetened, reduce the white sugar in the dough by one tablespoon.
- Cooled melted butter : Melted butter, unlike softened butter, creates a crumbly texture rather than a soft one when baked. It must be cooled before adding to the flour, otherwise it melts the sugar prematurely and you lose the lumps that make the crumble. Using salted butter slightly enhances the pineapple flavor compared to unsalted.
- Cornstarch : It absorbs the excess liquid released by the pineapple during baking and turns it into a semi-gelatinous binder that holds the filling together. Without it, the juice migrates down and saturates the base. One tablespoon is enough for an entire can: no need to add more.
- White sugar + brown sugar : The two sugars have distinct roles. White sugar provides a clean, pure sweetness that balances the pineapple’s bright acidity. Brown sugar, with its residual molasses, adds a caramel note and helps the base and crumble brown evenly. Don’t substitute one for the other; the result would be either bland or too dark.
- Cinnamon and vanilla extract : Cinnamon tempers the pineapple’s acidity and gives it a warm depth reminiscent of summer desserts. Vanilla acts as an aromatic bridge between the fruit and the brown sugar. Half a teaspoon of each is plenty: the goal is to support the pineapple in the background, not to overpower it.
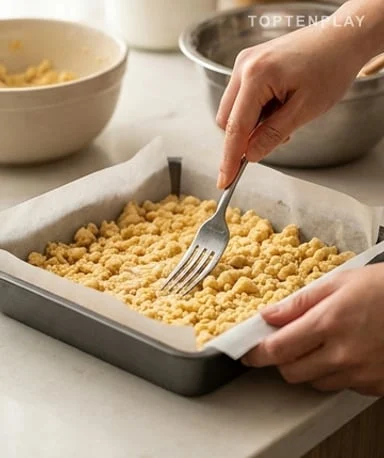
Make one dough for everything
The base and crumble come from exactly the same mixture, and that’s the real advantage of this recipe. In a medium bowl, combine the flour, both sugars, shredded coconut, baking powder, baking soda, and a pinch of salt. Then add the cooled melted butter and mix with a fork—never with your hands, which warm the butter—until you get irregular clumps that look like coarse wet sand. Don’t aim for uniformity: these clumps of varying sizes are exactly what will give that characteristic crunch after baking. Reserve a generous cup of the mixture for the crumble topping, and press the rest into a 20 cm square pan lined with parchment paper. Press firmly with the bottom of a glass to create a compact, even base that won’t crumble when cut.
Prepare the filling without drowning it
Start by draining the pineapple thoroughly: pour it into a fine-mesh sieve over the sink and press several times with the back of a spoon to extract as much juice as possible. The pineapple will still release water during baking—that’s inevitable—and every milliliter removed now preserves the crispness of the base. Once well drained, mix the pineapple in a bowl with both sugars, cornstarch, vanilla, and cinnamon. The mixture should already smell of warm cinnamon and dark caramel before it even goes into the oven. Pour this filling directly over the pressed base, spread it in an even layer to the edges of the pan, then cover with the reserved crumble, sprinkling it evenly without pressing down.
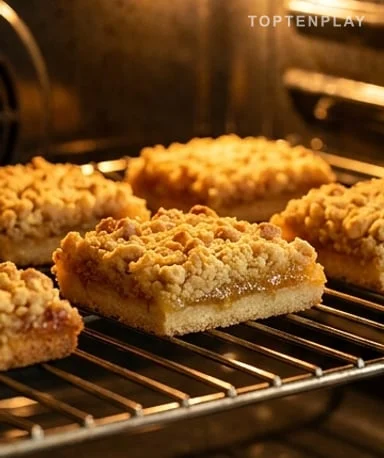
Watch the color, not the timer
Bake at 190°C (375°F) with fan assist on the middle rack for about 25 minutes. The real indicator that it’s done is not the timer, it’s the color of the top. The crumble should be evenly golden—not just slightly blond. A too-pale crumble remains soft, floury, and lacks that browned butter flavor that makes it special. At around 20 minutes, check visually: if the edges are browning significantly faster than the center, slide a tented piece of aluminum foil over the pan for the last 5 minutes. Note that metal pans conduct heat better than glass or ceramic, which typically require 3 to 5 extra minutes.
Let cool completely before cutting
Remove the pan from the oven and place it on a rack to cool to room temperature for one hour. Then refrigerate for at least two hours—ideally overnight—before cutting into bars. The pineapple filling is still liquid when it comes out of the oven and only solidifies as it cools: cutting while hot yields bars that collapse and a filling that runs onto the board. Once thoroughly cold, cut into 9 squares with a sharp, smooth-bladed knife, wiping the blade between each cut. The aroma that wafts up at that moment—cinnamon, browned butter, tangy fruit—tells you exactly what you’re about to eat.
Tips & Tricks
- Press the drained pineapple in a clean kitchen towel and twist firmly: this removes twice as much liquid as a simple sieve and is the main preventive measure against a soggy base.
- Let the parchment paper overhang on two sides of the pan to create handles: once the bars are cold, lift out the whole block before cutting, giving clean cuts with no effort.
- Double the quantities if you have a 20 x 30 cm pan: the recipe scales without adjustment, and the baking time remains the same. Extra bars can be individually frozen in plastic wrap for up to 3 months without losing texture.
- Store cut bars in an airtight container in the refrigerator for up to 5 days: the cold further firms the filling over time and makes them easier to handle. Take them out 15 minutes before serving if you prefer them at room temperature.
Can I use fresh pineapple instead of canned?
Technically yes, but fresh pineapple contains enzymes (bromelain) that soften the filling and make it harder to hold when cut. Canned pineapple in natural juice is milder, already tender, and gives a more stable filling. If using fresh, roughly blend it and let it simmer for 5 minutes in a saucepan before using.
How do I prevent the base from getting soggy?
The draining step is the only real preventive measure. Pour the crushed pineapple into a clean kitchen towel and twist firmly: you remove about twice as much liquid as with a simple sieve. The pineapple still releases water during baking, but if you drained well and used cornstarch, the base stays crisp.
How do I know when the bars are truly baked?
Look at the color of the crumble topping, not the timer. It should be evenly golden—a still pale blond crumble will be soft and floury, without that browned butter flavor that makes it special. If the edges brown too quickly before the center, loosely cover with aluminum foil for the last 5 minutes.
Can I replace the shredded coconut?
Yes, you can simply omit it and compensate with 30g of additional flour to maintain the dough’s texture. To keep a tropical touch, rolled oats (small flake) work well too, giving a slightly more rustic crumble.
Can I make these bars ahead and freeze them?
Absolutely. Once cooled and cut, wrap each bar individually in plastic wrap and place them in a freezer bag for up to 3 months. Always thaw in the refrigerator the day before, never at room temperature, to prevent the filling from softening too quickly.
Should the bars be served cold or at room temperature?
Both work, but cold they hold together better for cutting and handling. If you prefer them at room temperature, take them out of the fridge 15 to 20 minutes before serving. Warm, straight from the oven, they are more melty but crumble easily.
Pineapple Coconut Crumble Bars
American
Dessert
Crunchy yet tender bars with a buttery shortbread base, cinnamon-candied pineapple filling, and a golden coconut crumble. Made in 15 minutes, perfect for picnics and lunchboxes.
Ingredients
- — Crumble Dough (base + topping) —
- 190 g all-purpose flour
- 50 g white sugar
- 55 g brown sugar (packed)
- 45 g unsweetened shredded coconut
- ¼ tsp baking soda
- ¼ tsp baking powder
- ¼ tsp salt
- 115 g cooled melted butter
- — Pineapple Filling —
- 570 g canned crushed pineapple (in natural juice), well drained
- 25 g white sugar
- 28 g brown sugar
- 1 tbsp cornstarch
- 1 tsp vanilla extract
- ½ tsp ground cinnamon
Instructions
- 1Preheat oven to 190°C (375°F) with fan assist. Line a 20 cm square pan with parchment paper, allowing it to overhang on two sides to create handles.
- 2In a medium bowl, mix together flour, white sugar, brown sugar, shredded coconut, baking soda, baking powder, and salt.
- 3Pour in the cooled melted butter and mix with a fork until irregular clumps form. Do not overmix: these clumps make the crumble.
- 4Reserve about 150 g of the mixture for the crumble topping. Press the rest evenly into the bottom of the prepared pan.
- 5Place the drained pineapple in a clean kitchen towel and twist firmly to extract as much liquid as possible.
- 6In a bowl, combine the pressed pineapple, white sugar, brown sugar, cornstarch, vanilla, and cinnamon until well mixed.
- 7Spread the pineapple filling over the pressed base in an even layer. Sprinkle the reserved crumble evenly on top without pressing down.
- 8Bake on the middle rack for 25 minutes, until the crumble is evenly golden. If the edges brown too quickly, loosely cover with aluminum foil for the last 5 minutes.
- 9Let cool on a rack at room temperature for 1 hour, then refrigerate for at least 2 hours. Lift the block out using the parchment paper, place on a cutting board, and cut into 9 equal bars.
Notes
• Draining the pineapple in a towel is the most important step: the more liquid you remove, the crispier the base will be.
• Never cut the bars while hot: the filling is still liquid when it comes out of the oven and only sets after refrigeration.
• Storage: 5 days in the refrigerator in an airtight container. Freezing: wrap individual bars in plastic wrap, up to 3 months.
• For glass or ceramic pans: add 3 to 5 minutes of baking time; metal conducts heat better.
Nutrition Facts (per serving, estimated)
| 280 kcalCalories | 3 gProtein | 40 gCarbs | 12 gFat |