
Light desserts have their moment, but here that would be a mistake. These cream cheese bars are made to satisfy a craving for sweetness with crunch, creaminess, and that hint of vanilla that smells like a warm kitchen.
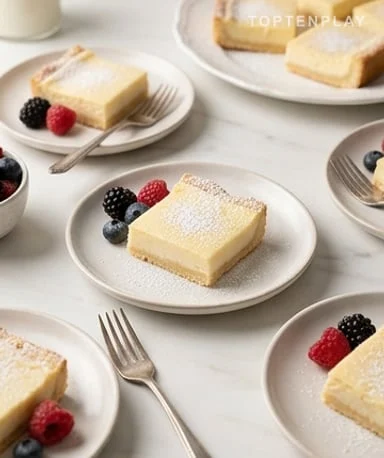
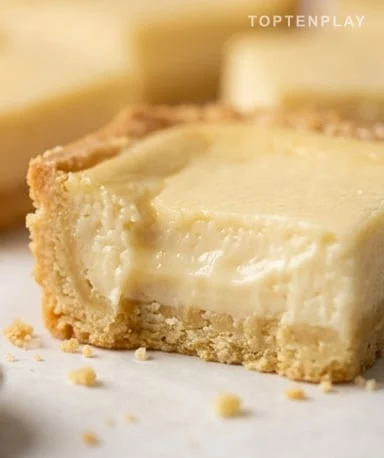
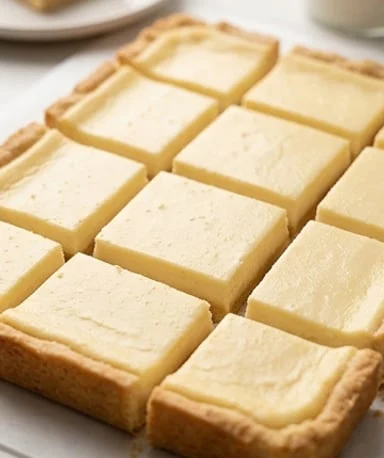
The base is sandy, blond, almost crumbly under the knife. On top, the cream cheese layer stays dense and smooth, with a pale surface that barely trembles when you take the pan out of the oven. At the first bite, it melts softly then clings just enough thanks to the butter in the crust. It’s the kind of dessert you cut into generous squares, not timid portions.
Why you’ll love this recipe
Ingredient Notes
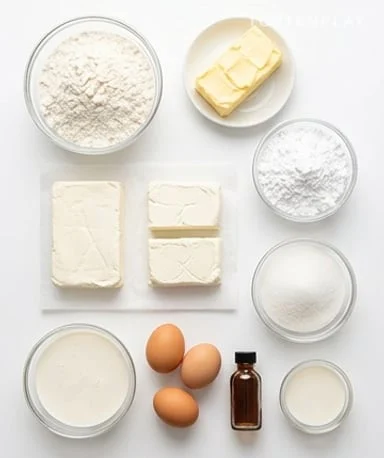
Nothing complicated: flour, butter, sugar, cream cheese, eggs, vanilla, and a little milk or cream.
- Flour : It forms the structure of the sandy base and absorbs the butter to give a crumbly texture. Use a classic all-purpose flour, without leavening, to keep a fine crust that doesn’t puff up.
- Butter : It brings the round flavor and crunchy texture of the crust. Choose it well softened, not melted, otherwise the dough becomes greasy and doesn’t press well in the pan.
- Cream cheese : It gives the dense, fresh, slightly tangy heart. Use a thick plain fresh cheese, like Philadelphia, and let it come to room temperature to avoid small lumps.
- Eggs : They allow the cream to set during baking while keeping a soft texture. Add them without beating like an omelet, otherwise the filling may puff up and then collapse.
- Vanilla : It rounds out the milky side of the cream cheese and gives that sweet smell that comes out of the oven. A decent vanilla extract is enough, but avoid overly chemical aromas that become aggressive after baking.
- Milk or cream : The liquid loosens the filling so it spreads well and bakes evenly. Milk gives a slightly lighter result, cream a more velvety and indulgent texture.
A sandy base that must have character
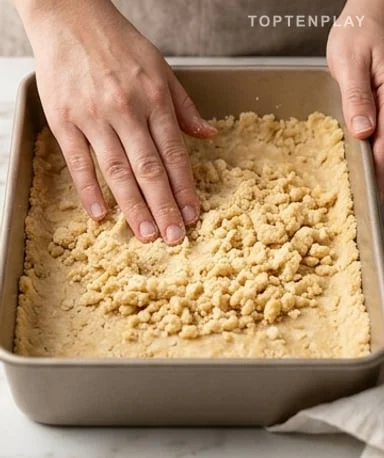
Mix the flour, softened butter, and powdered sugar until you get a damp sand texture, with small crumbs that stick when you press them between your fingers. This isn’t a classic pie dough: don’t work it too long, otherwise it becomes compact instead of staying crumbly. When you spread it in the pan, press it down with the bottom of a glass or the palm of your hand to create an even layer. During baking, it should smell like warm biscuit and take on a golden blond color on the edges, not brown strongly.
The cream must be smooth, otherwise you pay for it when cutting
The cream cheese must be soft before starting, almost creamy under the spatula. Beat it with the sugar until the texture becomes satiny, then add the eggs gently to keep the filling dense and even. The milk or cream then loosens the mixture, just enough so that it flows slowly over the cooled crust. If you still see small white bits, insist gently: those lumps will be felt in the mouth and break the melting quality.
Baking is not a race
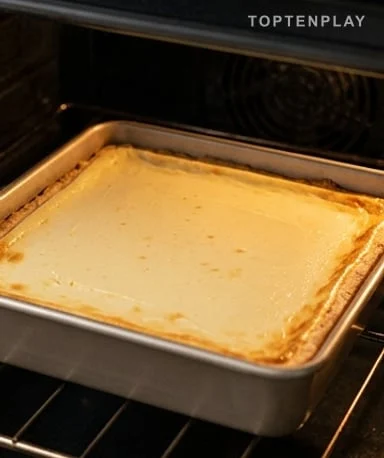
Pour the cream over the pre-baked base, then smooth the surface without pressing so as not to damage the crust. The oven should bake the filling until it is set on the edges but still slightly jiggly in the center, like a thick cream that hesitates. If you extend too long, the top may crack and the texture becomes dry, closer to a tired flan than a melting bar. The smell should remain sweet, buttery, and vanilla, never too toasted.
Resting makes the real dessert
When you take it out of the oven, resist the urge to cut right away. The bars need to cool so that the cream firm up and the crust absorbs just the right amount of moisture. Once cool, put the pan in the refrigerator: the texture becomes cleaner, the knife glides better, and the squares hold without squashing. When serving, a dusting of powdered sugar or a few berries add a fresh touch that awakens the richness of the cream cheese.
Tips & Tricks
- Use cream cheese at room temperature, because cold cheese mixes poorly and leaves a grainy cream instead of a smooth texture.
- Let the crust cool before adding the filling, because a too hot base can start to melt the cream and make the bottom layer soft.
- Watch the center rather than the top color: if it jiggles slightly, it’s good, because residual heat will finish firming it without drying it out.
- Clean the knife between cuts, especially if the bars are very cold, to get clean squares with a visible creamy layer.
Can I prepare these cream cheese bars the day before?
Yes, and it’s even better. A night in the fridge firms the cream, makes cutting cleaner, and gives a more melting texture.
Why does my filling have lumps?
The cream cheese was probably too cold. Let it come to room temperature before beating, and mix with the sugar first before adding the eggs.
How do I know if the bars are baked enough?
The edges should be set and the center should still jiggle slightly. If everything is completely firm in the oven, the cream may be overbaked after cooling.
Can I replace the cream with milk?
Yes, milk works very well and gives a slightly lighter texture. Cream gives a richer, denser, more velvety result.
How long do these bars keep?
They keep 3-4 days in the refrigerator in an airtight container. Serve cold or let them sit 10 minutes at room temperature for a softer texture.
Melting Cream Cheese and Vanilla Cream Bars
American
Dessert
Rich and comforting dessert bars, with a buttery sandy base and a creamy cream cheese filling flavored with vanilla.
Ingredients
- 125g all-purpose flour
- 115g unsalted butter, softened
- 30g powdered sugar
- 450g cream cheese, softened
- 200g granulated sugar
- 2 large eggs
- 1 tsp vanilla extract
- 60ml whole milk or heavy cream
- 1 tbsp powdered sugar for serving, optional
- 150g fresh berries, optional
Instructions
- 1Preheat oven to 180°C and grease a rectangular pan about 23×33 cm.
- 2Mix flour, softened butter, and powdered sugar until you get a sandy texture that compacts under your fingers.
- 3Press this mixture into the bottom of the pan in an even layer, then bake for 15 minutes, until edges are lightly golden.
- 4Let the base cool slightly while preparing the filling.
- 5Beat softened cream cheese with granulated sugar until smooth.
- 6Add eggs one by one, then incorporate vanilla and milk or cream without overbeating.
- 7Pour the filling over the pre-baked base and gently smooth the surface.
- 8Bake for about 25 minutes, until edges are set and center still jiggles slightly.
- 9Let cool completely, then refrigerate at least 2 hours before cutting into bars.
- 10Serve cold, with a little powdered sugar and fresh berries if desired.
Notes
• The cream cheese must be well softened to avoid a grainy filling.
• Don’t overbake: the center finishes setting as it cools.
• For a richer texture, use heavy cream instead of milk.
• These bars keep 3-4 days in the refrigerator in an airtight container.
Nutrition Facts (per serving, estimated)
| 285 kcalCalories | 5gProtein | 25gCarbs | 19gFat |