
It starts with the gentle sizzle of onion in olive oil, then garlic arrives and perfumes the whole kitchen. This light split pea soup has the amazing quality of simple dishes: a thick texture, a deep aroma, and almost nothing to watch.
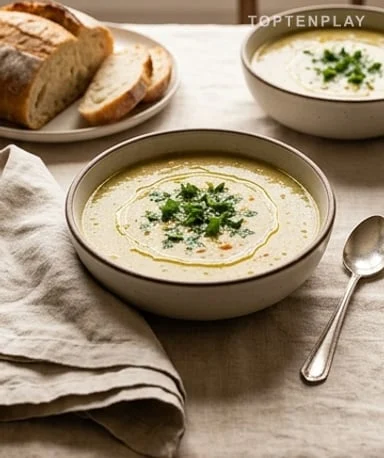
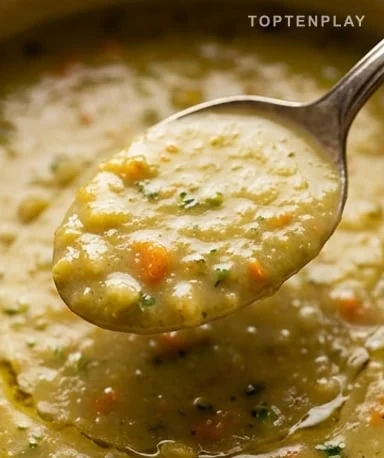
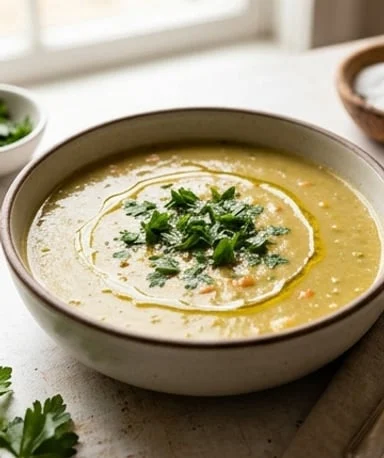
In the bowl, the soup takes on a soft greenish-yellow color, with a smooth surface that lightly coats the spoon. The bay leaf leaves a subtle scent, garlic stays in the background, and the carrot brings a nearly sweet softness. When well blended, it becomes velvety without cream, dense but not heavy. Served piping hot with fresh parsley, it instantly looks more elaborate than it really is.
Why you’ll love this recipe
Ingredient Notes
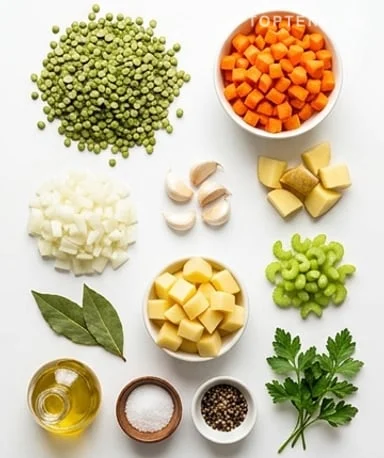
Split peas, a few simple vegetables, garlic, bay leaf: nothing complicated, but a real flavor base.
- Split peas : They are the base of the soup and provide both thickness, vegetal flavor, and a nourishing texture. Choose them well-dried, without dust at the bottom of the bag, then rinse until the water runs clear to avoid a dull soup.
- Carrot : It softens the very vegetal taste of split peas and brings a slight sweetness at the end. Cut into small, even dice so they melt during cooking, or replace with a piece of squash for a warmer color.
- Onion and garlic : This duo provides the initial depth, especially when the onion becomes translucent and the garlic just starts to smell good. Do not let them brown: a too-toasted aroma would overpower the sweetness of the split peas.
- Potato : It’s optional, but it makes the soup rounder and more velvety once blended. Use a small floury potato if you want a well-bound texture, or leave it out for a lighter result.
- Bay leaf : It slowly perfumes the broth with a warm, slightly woody note. One leaf is enough, and you must remove it before blending to keep a smooth mouthfeel.
- Vegetable broth : It replaces water if you want more depth without adding complicated ingredients. Choose a low-salt one, because the soup reduces slightly and salt becomes more prominent as the texture thickens.
Rinsing really makes a difference
Pour the split peas into a colander and rinse under cold water until the water loses its cloudy appearance. This step seems trivial, but it removes the fine dust that can make the soup a bit bland and grayish. You can already smell their dry, almost green-nutty scent, especially as they begin to moisten. No need for soaking here: split peas cook quickly enough, and that’s what makes this soup convenient. If you see small stones or damaged grains, remove them, because a smooth soup doesn’t forgive such details under the tooth.
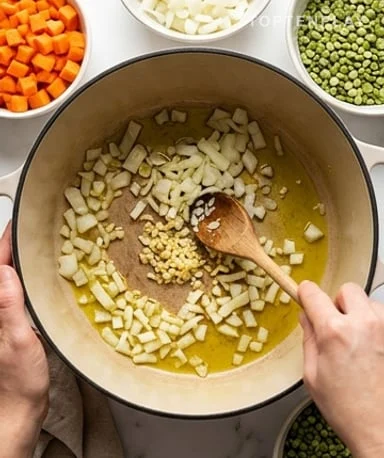
Sautéing builds flavor
Gently heat the olive oil, then add the chopped onion and let it become translucent without seeking color. The sound should remain light, almost a murmur, not an aggressive fry. Then add the garlic, just long enough to perfume the oil, because burnt garlic leaves a dry bitterness that ruins the velvety texture. The diced carrot, potato, and celery can then join the pot to coat themselves in this warm, fragrant base. This little start gives a soup that is rounder, cleaner, with the smell of sautéed vegetables that already announces something serious.
Simmering does the work for you
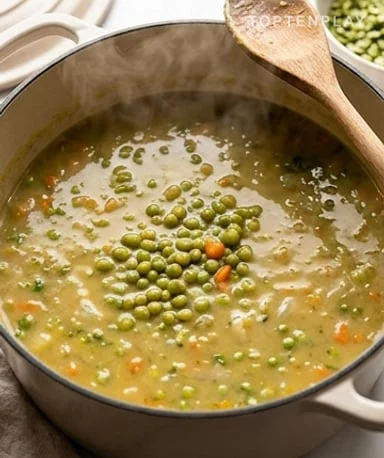
Add the rinsed split peas, bay leaf, then cover with hot water or vegetable broth. When the liquid reaches a gentle boil, lower the heat: you want a steady simmer, with small bubbles rising calmly to the surface. Too high, the soup sticks to the bottom and becomes heavy; too low, the peas stay grainy longer. Stir occasionally with a wooden spoon, especially towards the end, when the texture thickens and the pot makes a duller sound. If the soup becomes too dense before the peas are tender, add a little hot water to keep the cooking smooth.
Blending or keeping chunks: choose depending on the desired effect
When the split peas crush easily against the side of the pot, remove the bay leaf and taste before salting generously. For a more elegant result, blend directly in the pot until you get a smooth, shiny, and thick surface. If you prefer a rustier soup, only mash part of the vegetables with a spoon: you’ll keep small tender pieces that add texture. In both cases, adjust with a little hot water, never cold, to avoid cooling the dish. The right indicator is a soup that coats the spoon without falling in a lump.
Serving makes the difference without complicating things
Serve the soup very hot, in preheated bowls if you want to keep that enveloping warmth longer. A drizzle of olive oil added at the last moment gives a fine shine and a fruity aroma that wakes up the bowl. Fresh parsley provides contrast, both in color and taste, especially on a naturally mild soup. A few homemade croutons can add crunch, but add them just before serving to prevent them from softening too quickly. It’s this contrast between the dense velvety soup and the fresh garnish that gives the impression of a sophisticated dish.
Tips & Tricks
- Salt at the end of cooking rather than at the beginning, because the broth reduces and a thick soup concentrates salt quickly.
- Always keep some hot water on hand to adjust the texture, because split peas continue to thicken even after cooking.
- Blend in short bursts if using an immersion blender, to avoid hot splatters and get a more even texture.
- Add parsley only at serving, because it better retains its fresh aroma and green color on a hot soup.
Do I need to soak split peas before cooking?
No, it’s not necessary for this soup. A good rinse under cold water is enough to remove dust and get a cleaner texture.
Why does my split pea soup become too thick?
Split peas absorb a lot of liquid and continue to thicken after cooking. Add a little hot water or hot broth to get a softer texture.
Can I make this soup in advance?
Yes, it keeps very well for 3 days in the refrigerator. Reheat gently while adding a little water, because it thickens as it rests.
Can I freeze split pea soup?
Yes, it freezes very well once cooled. It’s best to portion it into containers, then reheat over low heat, stirring regularly.
How can I make the soup more flavorful without complicating it?
Use a low-salt vegetable broth instead of water and add a pinch of cumin at the end of cooking. The flavor becomes rounder without masking the split peas.
Light Split Pea Soup
French
Soup
A thick, mild, and nourishing soup made with split peas, simple vegetables, and a gentle simmer. It impresses with its velvety texture without demanding much effort.
Ingredients
- 250 g split peas
- 1 carrot, diced small
- 1 onion, chopped
- 1 small potato, diced
- 1 celery stalk, sliced
- 2 cloves garlic, minced
- 1 bay leaf
- 1 tablespoon olive oil
- 1.1 liters hot water or low-salt vegetable broth
- 1/2 teaspoon salt, to taste
- 1/4 teaspoon ground black pepper
- 2 tablespoons fresh parsley, chopped
Instructions
- 1Rinse the split peas thoroughly under cold water until the water runs clear.
- 2Heat the olive oil in a large pot, then sauté the onion over low heat for 3-4 minutes, until translucent.
- 3Add the garlic, carrot, potato, and celery, and stir for 2 minutes to coat the vegetables.
- 4Pour the rinsed split peas into the pot, add the bay leaf, then cover with the hot water or broth.
- 5Bring to a gentle boil, reduce heat, and simmer for 40-50 minutes, stirring occasionally.
- 6Remove the bay leaf, season with salt and pepper, then blend all or part of the soup to desired texture.
- 7Adjust with a little hot water if the soup is too thick, then serve with fresh parsley.
Notes
• The potato is optional, but it gives a more velvety texture.
• For a thinner soup, add 100-200 ml of hot water at the end of cooking.
• The soup thickens as it cools: this is normal, especially after a night in the refrigerator.
• Estimated nutrition per serving, based on 5 servings.
Nutrition Facts (per serving, estimated)
| 225 kcalCalories | 12gProtein | 36gCarbs | 4gFat |