Everyone thinks making your own puff pastries at home is a weekend project requiring an apron and professional equipment. False. Reality is a three-ingredient dough and half an hour in the fridge. Nothing more.

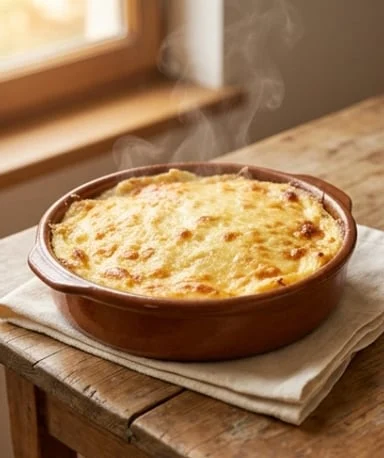
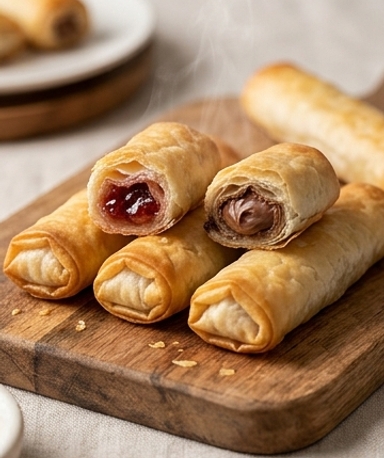
Imagine this sound: the sharp crack of a pastry being snapped in two, the layers separating like the pages of an over-read book. The surface is golden like light caramel, almost amber at the edges. Inside, the filling — jam, chocolate, melted cheese — remains warm. The smell of hot butter permeates the entire kitchen.
Why you’ll love this recipe
Ingredient Notes
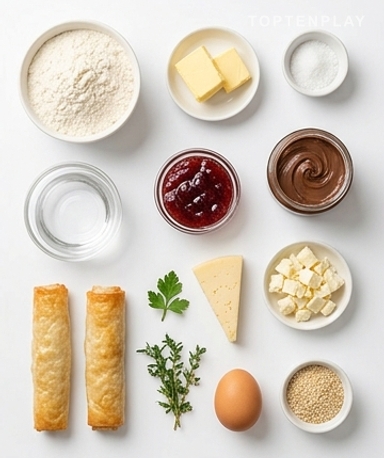
Everything needed to make these pastries: a simple dough based on flour, butter, and cold water, and fillings of your choice.
- All-purpose flour : No need for special flour. Classic supermarket T45 or T55 works perfectly. The important thing is not to overdo it when rolling out — a lightly floured surface, not a snowfield.
- Stone-cold butter : This is the boss of the recipe. The butter must come out of the fridge right when you use it. Cold fragments in the flour create small fat pockets that, when baked, give those crispy layers we’re looking for. Soft butter equals elastic and sad dough.
- Cold water : A few spoonfuls are enough. Add it bit by bit — the goal is a dough that holds together without sticking to your fingers. Better to add more later than to put too much at the start. If you have ice handy, nearly-iced water really makes a difference.
- Filling of your choice : For sweet: thick jam (not too liquid, or it overflows everywhere), chocolate-hazelnut spread. For savory: grated Comté with fresh thyme, or ricotta and spinach. Avoid overly wet fillings that will soak the dough from the inside.
- Melted butter or egg wash : Melted butter gives a matte and very crispy surface. Beaten egg gives a more aesthetic amber glow. Both work — it’s a question of aesthetics, not taste.
Why the cold makes all the difference
The first time someone fails at puff pastry, it’s almost always because the butter was too warm. When the butter is cold and firm, your fingers can break it into the flour in small, irregular pieces — you feel fatty lumps under your palms like coarse wet sand. These little clusters are exactly what we want. During baking, they will melt and create empty spaces between the layers of dough. If the butter is soft, it merges uniformly with the flour and you get a dense dough without character. So: fridge butter, cold water, cool work surface if possible. Thirty minutes in the refrigerator after forming the ball, and everything becomes easier.
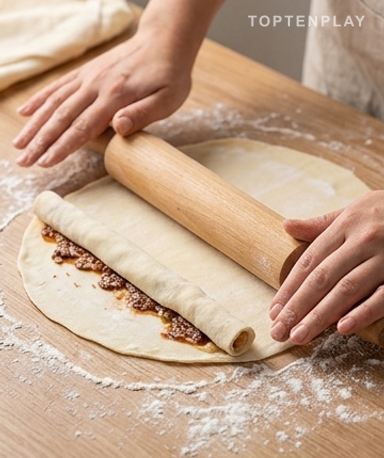
The part everyone fails: rolling out
Rolling the dough thinly without tearing it, that’s the real challenge. The trick: don’t hesitate to go for it with the rolling pin. Steady pressure from the center towards the edges, without brutality. If the dough resists and shrinks, it’s still too cold — leave it for two minutes at room temperature. The ideal thickness is around 3 mm. Thin enough to crunch, thick enough not to tear during folding. For the filling, one tablespoon is enough per pastry. No more — otherwise the edge won’t hold and everything opens during baking.
Roll tight: the advice rarely given
Roll it tight. This is the most important advice in the whole recipe. A loose roll results in a pastry that falls apart, with empty air pockets and filling migrating to the edges. Roll from one edge, delicately but firmly, like rolling a cable around a cylinder. Seal the edges with light finger pressure — a small one-centimeter border without filling helps a lot. For triangular or square shapes, the turnover fold works very well: fold the dough over itself and crush the edges with a fork. This creates a small scalloped border and holds up really well during baking.
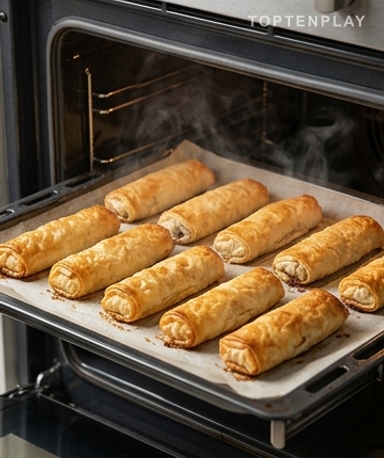
What happens in the oven — and why you shouldn’t open it
At 190°C, the first few minutes are silent. Then comes the moment you start to smell the warm butter, a scent of light pastry filling the kitchen. The surface goes from matte white to straw yellow, then to caramel gold in the space of five minutes. That’s when you watch. Baking takes between 20 and 25 minutes depending on the thickness. Don’t take them out too early: a pale pastry lacks crunch and the filling stays cold in the center. Wait until the edges have taken on a clear amber hue. Sometimes you’ll hear a slight sizzle on the tray — that’s the butter finishing its caramelization under the dough. Good sign.
Tips & Tricks
- Prepare the jam filling the day before if it seems liquid: a night in the fridge thickens it naturally and prevents it from soaking the dough during baking.
- As soon as they come out of the oven, place the pastries on a wire rack rather than leaving them on the tray. Trapped steam underneath softens the bottom in a few minutes — a shame after all that work.
- Unfilled dough freezes flat, wrapped in cling film. Take it out the night before, let it thaw overnight in the fridge, and it rolls out as if you’d just made it.

Can I prepare the dough the day before?
Yes, and it’s even recommended. Dough wrapped in cling film keeps very well in the refrigerator for 24 hours. it will be even easier to work with because the butter will have had time to fully firm up after kneading.
Why do my pastries open during baking?
Two possible reasons: too much filling, or poorly sealed edges. Always leave a one-centimeter margin without filling on the edges, and press firmly with your fingers or a fork to seal well. A little moisture on the edge (a brush of water) also helps with the seal.
Can I freeze cooked pastries?
Yes, they freeze very well once cooled, in an airtight container for up to 2 months. To reheat, put them directly in the oven at 180°C for 8 to 10 minutes without prior thawing. The crunch comes back almost like they just came out of the oven.
My dough sticks to the work surface — what am I doing wrong?
Either the dough got too warm in your hands, or there was too much water. Put it back in the fridge for 15 minutes and lightly flour your work surface. If it still sticks a lot, there was probably too much water — in this case, add a tablespoon of flour and knead quickly.
Can I replace the butter with oil?
Technically yes, but the result will be very different: a denser dough without the characteristic flaky layers. Solid coconut oil (not melted) is the best alternative if you still want a puff effect. Liquid oil will result in an ordinary shortcrust dough.
How to prevent the bottom of the pastries from being soggy?
Two tips: preheat your baking sheet well in the oven before placing the pastries on it, and place them on a wire rack as soon as they come out of the oven rather than letting them cool on the sheet. Steam escaping from the hot filling softens the bottom very quickly if air doesn’t circulate underneath.
Homemade Crispy Pastries
French
Pastry
A three-ingredient shortcrust dough, filled as you like and baked to perfect crispness. Sweet or savory, they take less than an hour to prepare.
Ingredients
- 250g all-purpose flour
- 125g cold butter, cut into small cubes
- 1/2 teaspoon salt (about 3g)
- 70ml cold water (4 to 5 tablespoons)
- 150g filling of your choice (thick jam, chocolate-hazelnut spread, or grated cheese + herbs)
- 1 beaten egg for glazing (or 30g of melted butter)
- 1 tablespoon icing sugar or sesame seeds for sprinkling (optional)
Instructions
- 1Mix the flour and salt in a large bowl. Add the cold butter cubes and rub them in with your fingertips until you get an irregular sandy texture.
- 2Add cold water tablespoon by tablespoon, mixing with a fork, until the dough comes together in a non-sticky ball.
- 3Wrap the dough in cling film and refrigerate for at least 30 minutes.
- 4Preheat the oven to 190°C (fan oven) and line a baking sheet with parchment paper.
- 5Divide the dough into 12 equal portions. On a lightly floured surface, roll out each portion into a rectangle or circle about 3 mm thick.
- 6Place a tablespoon of filling in the center of each piece, leaving a 1 cm margin on the edges.
- 7Roll the dough tightly into a cylinder, or fold it into a turnover. Seal the edges with firm pressure from your fingers or a fork.
- 8Arrange the pastries on the sheet. Brush with beaten egg or melted butter, then sprinkle with icing sugar or sesame seeds if desired.
- 9Bake for 22 to 25 minutes until the pastries are well browned and amber on the edges. Place them on a wire rack as soon as they come out of the oven.
Notes
• Storage: cooked pastries keep for 2 days at room temperature in an airtight container, or 2 months in the freezer. Reheat for 8 min at 180°C to regain crispness.
• Make ahead: raw dough can be prepared up to 24h in advance in the fridge, or frozen flat for 2 months. Thaw overnight in the refrigerator before use.
• Savory variation: grated Comté cheese + fresh thyme, or ricotta + drained spinach. Avoid overly liquid fillings that soak the dough during baking.
Nutrition Facts (per serving, estimated)
| 195 kcalCalories | 3gProtein | 24gCarbs | 9gFat |