
Cake pops are the kind of thing you stare at behind a bakery window, thinking you’ll never make them at home. Yet all it takes is a vanilla cake, buttercream, and a bowl of melted chocolate to get little bites that wow the whole table. Birthday parties, Christmas treats, school bake sales: these homemade cake pops fit any occasion where you want to bring something impressive without spending your life in the kitchen.
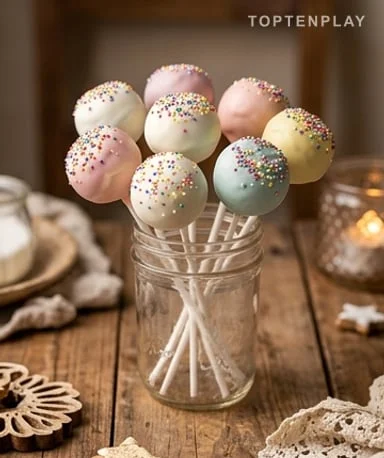
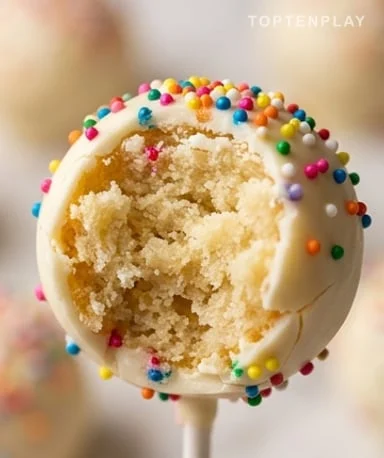
The hardened white chocolate coating gives a slight crunch, followed by the soft, dense vanilla-flavored interior — the texture of a light truffle, less rich, with that characteristic moistness of well-buttered cakes. Colorful sprinkles catch the light and give that instantly recognizable festive look. It smells of vanilla butter, warm sugar, birthday cake. Simple to look at, reassuring to hold, and surprisingly satisfying to bite into.
Why you’ll love this recipe
Ingredient Notes
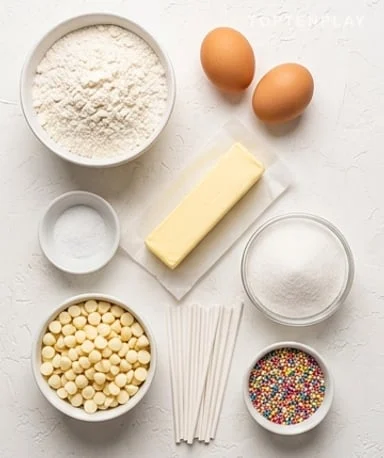
No store-bought mixes here: real ingredients for a flavor that truly comes through.
- Butter (cake and buttercream) : Butter plays two distinct roles: in the cake, it provides moisture and structure after cooling; in the buttercream, it forms the creamy base that binds everything. In both cases, take it out of the fridge at least an hour before starting — cold butter doesn’t incorporate properly into the batter and can cause the buttercream to curdle.
- White chocolate (coating) : The coating gives cake pops their shiny, slightly crunchy shell. Use good-quality white chocolate for baking rather than supermarket bars, which tend to harden unevenly and bloom after drying. Melt it in 20-second bursts in the microwave, stirring between each, or in a double boiler over very low heat.
- Natural vanilla extract : Vanilla flavors both the cake and the buttercream. Natural extract makes a real difference here, since both preparations will be combined — the vanilla should be present and round, not overpowering like artificial flavor.
- Flour and baking powder : Flour provides the cake’s structure. Always sift it with the baking powder to avoid lumps and ensure even rising. A cake that’s too dense will give crumbly cake pops; one that’s too airy won’t hold together as balls.
- Powdered sugar (buttercream) : Unlike granulated sugar, powdered sugar dissolves instantly in butter, giving the buttercream its characteristic smooth texture. Sift it before incorporating — lumps of unsifted powdered sugar create a gritty cream that’s hard to work with and shows in the final texture.
- Eggs (room temperature) : Eggs bind the batter and provide the moisture needed for the cake to stay tender once cooled and crumbled. Take them out of the fridge at the same time as the butter: a cold egg added to a butter batter can cause the mixture to curdle and result in an uneven-textured cake.
The cake, the base that changes everything
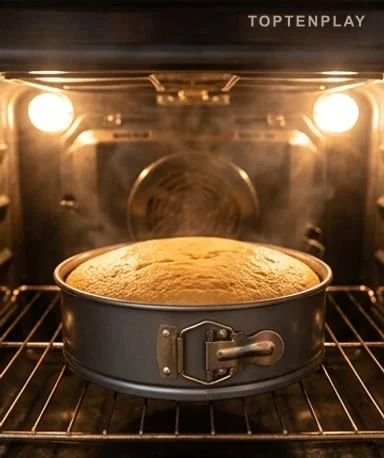
It all starts with a classic vanilla cake, baked in a 23cm springform pan or a 28x18cm rectangular pan. The depth of the pan matters: the batter rises high, a too-shallow pan would overflow. Make a simple batter — cream butter and sugar until light and slightly pale, then add eggs one at a time without rushing, and finally the sifted flour with baking powder alternated with a little whole milk. The finished batter is smooth and thick, already smelling of warm butter and vanilla. After 30 minutes at 175°C, a knife inserted in the center should come out clean and dry. The step many neglect: let the cake cool completely, ideally overnight at room temperature. A still-warm cake yields sticky, unworkable crumbs, and cake pops that fall apart during coating.
Buttercream, a matter of dosage
The buttercream here isn’t for sweetening — it only serves to bind the cake crumbs. Well-softened butter, sifted powdered sugar added in two batches, a teaspoon of vanilla, and two or three tablespoons of heavy cream to soften: the result should be firm but pliable, not runny or grainy. The most common mistake is adding too much to the final mixture. If the buttercream proportion is too high, the balls turn out greasy, heavy, and struggle to stay on the stick. The right technique: add the buttercream little by little, spoon by spoon, mixing by hand, until the crumb mass just holds together when pinched without leaving a greasy trace. No need to go further.
Shaping balls that stay together
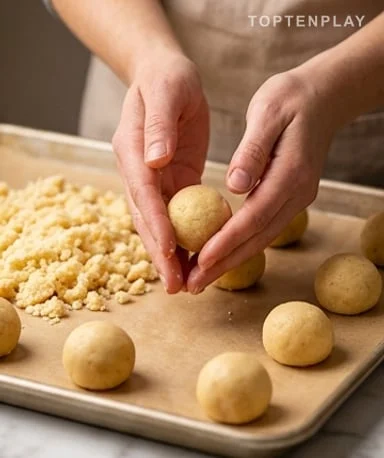
Crumble the cake by hand directly into the bowl with the buttercream. Mash and mix until you get a homogeneous dough that resembles stiff play dough. Drier, denser crust pieces give an unpleasant texture in the mouth — remove them before starting. To shape the balls, take portions of about 30 grams, roughly the size of a large walnut, and roll them between your palms with firm, even pressure. A tightly formed ball will hold up during coating; a loosely assembled one will crack upon contact with warm chocolate. Place them on a baking sheet lined with parchment paper, then refrigerate for at least 30 minutes — an hour if you have time. The cold firms up the fat, stabilizes the shape, and makes the surface less permeable to melted chocolate.
Coating, the most technical step
Melt the white chocolate gently, in 20-second bursts in the microwave stirring between each, or in a double boiler over very low heat. It should be smooth, fluid, and shiny — if it seems too thick, add a teaspoon of sunflower or melted coconut oil to thin it without altering the taste. First, dip the tip of each stick into the chocolate, then insert it into the center of a cold ball without going through. Put back in the freezer for five minutes to set the stick before the full coating. To coat, dip the ball into the chocolate and rotate slowly, then let the excess drip off by tapping the stick lightly against the edge of the bowl — too much chocolate forms a puddle at the bottom of the ball as it dries. Add sprinkles immediately, while the coating is still wet: it sets in just seconds.
Drying and storage
Insert the coated cake pops vertically into a block of polystyrene, an upside-down colander, or a tall glass filled with granulated sugar to keep them upright. The white chocolate coating sets in 15 to 20 minutes at room temperature, less if you put them in the fridge for a few minutes after letting them firm up slightly in the air — do not put them directly in the cold, as thermal shock creates condensation that dulls the chocolate and gives it a matte, streaky appearance. Once completely dry, they keep for two days at room temperature or up to a week in the fridge in an airtight container. For longer advance, uncoated balls freeze very well: thaw them in the fridge the day before and coat on the day.
Tips & Tricks
- Prepare the cake the day before and leave it out overnight: slightly dried on the surface, it crumbles more easily and yields a less sticky dough, simpler to shape into regular balls.
- Don’t skip dipping the stick in chocolate before insertion: that chocolate film bonds the stick to the ball; without it, the stick spins or comes out as soon as you dip in the coating.
- If your white chocolate becomes grainy or seizes during melting, it was heated too quickly or came into contact with a drop of water — start over with a perfectly dry bowl and utensils over much lower heat.
- For truly even balls, weigh each portion on a kitchen scale: 28 to 32 grams per ball gives the ideal size, and uniformity greatly affects the final look on a party table.
Can I use a store-bought cake to save time?
Yes, technically possible, but the texture and taste really suffer. A commercial cake contains more moisture and additives that make the mixture sticky and hard to shape. If you’re looking for a shortcut, a homemade cake baked the day before is already a huge time-saver — that’s the bulk of the work.
Why do my cake pops crack during coating?
The most common cause is chocolate that’s too hot coming into contact with balls that are too cold — the thermal shock slightly expands the ball and cracks the coating as it sets. Let the balls sit in the fridge rather than the freezer before coating, and make sure your chocolate is melted but not hot, around 35°C.
How far in advance can I prepare them?
Uncoated balls freeze for up to 3 months — that’s the most practical option for making them long in advance. Thaw them overnight in the fridge, then coat on the day. Finished cake pops keep for 2 days at room temperature or a week in the fridge in an airtight container.
My white chocolate is too thick and doesn’t flow well, what should I do?
Add a teaspoon of sunflower or melted coconut oil directly into the chocolate and mix well — this thins it without altering the taste or preventing setting. Avoid adding heavy cream, which can cause the chocolate to seize and give a dull, uneven coating.
How do I prevent the sticks from coming loose or spinning?
The key step is to dip the tip of the stick in melted chocolate before inserting it into the ball, then place it in the freezer for 5 minutes before coating. This solidified chocolate film acts like glue between the stick and the cake mass — without it, the stick slips during dipping.
Can I use dark or milk chocolate instead of white chocolate?
Absolutely. Dark chocolate gives a less sweet coating that contrasts nicely with the vanilla interior; milk chocolate is milder and very popular with children. The technique remains the same, but dark chocolate tends to be more fluid and may require less oil for consistency.
Homemade Cake Pops (Better Than Bakery!)
American
Pastry
100% homemade cake pops — vanilla cake, buttercream, and white chocolate coating — no store-bought mix or preservatives. A two-step recipe for results worthy of the best bakeries.
Ingredients
- 190g all-purpose flour, sifted
- 1.5 tsp baking powder
- 1 pinch fine salt
- 115g unsalted butter, room temperature
- 150g granulated sugar
- 2 eggs, room temperature
- 120ml whole milk, room temperature
- 2 tsp natural vanilla extract
- 115g softened unsalted butter (buttercream)
- 240g sifted powdered sugar
- 3 tbsp heavy cream
- 1 tsp vanilla extract (buttercream)
- 400g white chocolate for baking
- 1 tsp sunflower or melted coconut oil
- 30 cake pop sticks
- 50g colorful sprinkles
Instructions
- 1Preheat the oven to 175°C. Butter and line a 23cm springform pan with parchment paper.
- 2Cream the softened butter with the sugar using a mixer for 3 minutes, until the mixture becomes light and fluffy.
- 3Add the eggs one at a time, beating well after each addition, then add the vanilla extract.
- 4Sift together the flour, baking powder, and salt. Add them alternately with the milk in two batches, mixing on low speed until smooth.
- 5Pour into the pan and bake for 28 to 32 minutes. Test with a knife: it should come out clean. Let cool completely, ideally overnight at room temperature.
- 6Prepare the buttercream: beat the softened butter for 2 minutes, add the sifted powdered sugar in two batches, then add the vanilla and heavy cream. Beat until smooth and firm.
- 7Crumble the cooled cake into a large bowl, removing crust pieces. Add the buttercream by hand, spoon by spoon, until the mixture holds together when pinched without leaving a greasy trace.
- 8Form balls of 28 to 32g by rolling them tightly between your palms, place on a parchment-lined baking sheet, and refrigerate for at least 1 hour.
- 9Melt the white chocolate with the oil in the microwave in 20-second bursts, stirring between each, until smooth and fluid.
- 10Dip the tip of each stick into the melted chocolate, insert it into the center of a cold ball without going through. Place in the freezer for 5 minutes to set the stick.
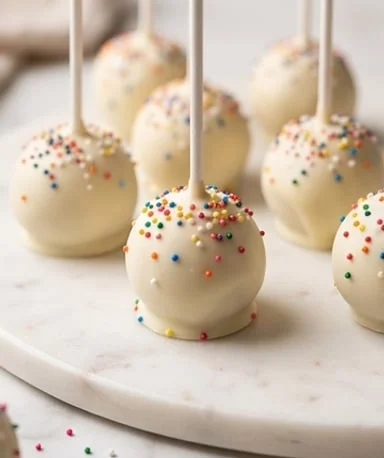
- 11Dip each cake pop into the chocolate, rotating gently, let excess drip off by tapping the stick against the edge of the bowl, then add sprinkles immediately.
- 12Insert the cake pops vertically into a suitable stand and let the coating set for 15 to 20 minutes at room temperature before serving or storing.
Notes
• Add the buttercream gradually to the cake crumbs — the exact amount may vary slightly depending on the cake’s moisture. Stop as soon as the dough holds together without being greasy.
• For a glossier, easier-to-work coating, opt for high-quality white chocolate for baking rather than supermarket bars.
• Uncoated balls freeze for up to 3 months in an airtight bag. Thaw overnight in the fridge and coat on the day.
• To vary, replace the white chocolate with dark or milk chocolate — the technique remains the same.
Nutrition Facts (per serving, estimated)
| 135 kcalCalories | 1.5gProtein | 18gCarbs | 7gFat |