

Craving a crunchy appetizer that doesn’t take an hour in the kitchen? Fried pickles are exactly that kind of everyday recipe that turns a plain jar into golden, tangy bites. They’re quick to prepare, best eaten piping hot, and honestly, that’s when they’re at their peak.
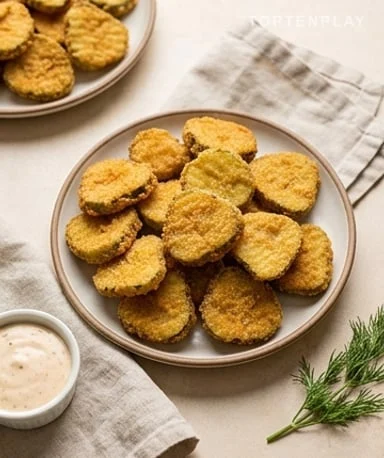
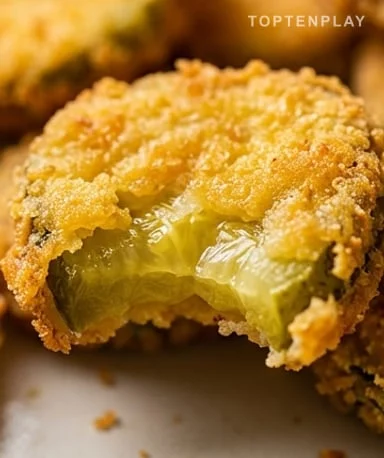
The first thing you notice is the contrast: a light, dry golden crust, then the sharp pickle juice that wakes everything up. In the pan, the oil softly sizzles around the slices and the smell of fried batter fills the air quickly. The result should be crispy outside, almost juicy inside, with that vinegary kick cutting the grease without overwhelming it.
Why you’ll love this recipe
Ingredient Notes
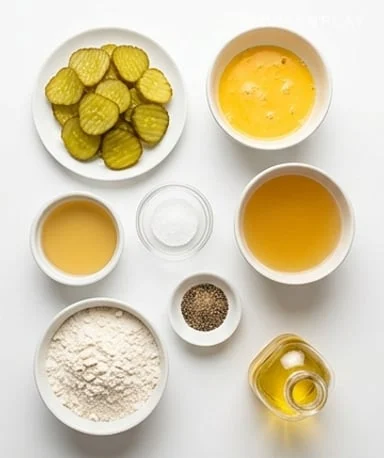
Nothing complicated: dill pickle slices, an egg, a little chicken broth, flour, and seasonings.
- Dill pickle slices : They bring the tangy, crunchy heart of the recipe. Choose thick enough slices so they remain juicy after frying, and drain them very thoroughly with paper towels so the coating sticks.
- Beaten egg : The egg acts as a binder: it helps the flour form a uniform layer around the pickles. Use it well beaten, without visible stringy bits, for a smoother batter and more even cooking.
- Chicken broth : It thins the mixture and adds a rounder savory base than plain water. You can replace it with vegetable broth for a lighter taste, especially if your pickles are already very salty.
- All-purpose flour : It creates the base of the crust and absorbs surface moisture. For more texture, you can mix some flour with fine breadcrumbs or panko, but keep the coating light enough not to mask the pickle.
- Salt and pepper : They wake up the breading, but use them sparingly because the pickles are already salty. Add a pinch of sweet paprika, garlic powder, or freshly ground black pepper if you want character without overdoing it.
- Frying oil : It must withstand high heat and give a clean fry. Use a neutral oil, heat it properly, and avoid crowding the pan, otherwise the temperature drops and the crust becomes soggy.
Drain well
Start by taking the pickle slices out of the jar and laying them on several layers of paper towels. This step seems minor, but it changes everything: a too-wet slice releases juice, the coating slides off, and the oil splatters. Aim for a surface that feels almost dry to the touch while keeping the center crunchy and vinegary. If the pickles still glisten too much, pat them a second time without crushing them.
Prepare the coating
Beat the egg with the broth until smooth, then keep the seasoned flour in a shallow dish nearby. The idea is to create a thin layer that sticks, not a thick shell that drowns the flavor. The batter should smell faintly of broth and pepper, with a supple texture that coats the slices without clumping. If it becomes too thick, add a spoonful of broth; if it runs too fast, add a dusting of flour.
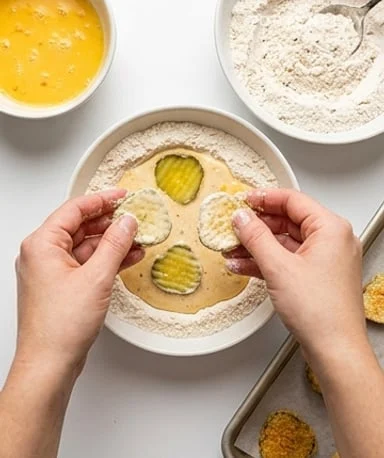
Coat without soaking
Dip the pickles in the egg mixture, then in the flour, turning to cover the edges. Work in small batches because coated slices don’t wait well: moisture eventually seeps through. Gently shake off excess flour to avoid powdery bits that burn in the oil. At this stage, the pickles should be pale, well covered, with a matte and slightly uneven surface.
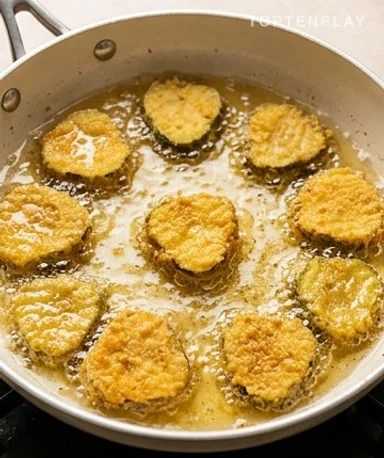
Fry briefly
Heat the oil until a pinch of flour sizzles immediately on contact. Drop the slices without touching, then let them brown for a few minutes, turning once. The sound should remain lively, with small steady bubbles around each piece; if it goes quiet, the oil isn’t hot enough. Remove them when the color is golden blonde, not dark brown, because the coating continues to firm up for a minute after cooking.
Serve immediately
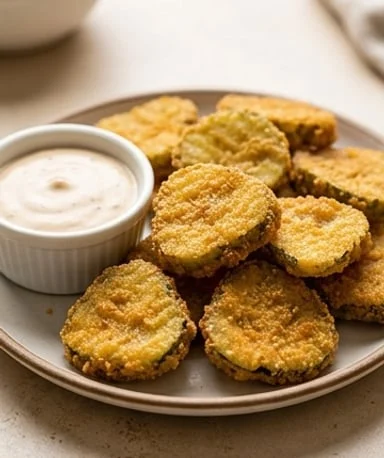
Drain the fried pickles on a rack or paper towels, then serve without delay. This recipe doesn’t like to wait: trapped steam quickly softens the crust and the contrast becomes less sharp. A fresh yogurt, garlic, or herb sauce works very well because it balances the salt and enhances the tanginess. At the table, you should feel the heat, the crunch, then the vinegary juice that comes last.
Tips & Tricks
- Really dry the pickles before coating, because moisture prevents the flour from adhering and gives a soft fry instead of a clean crust.
- Fry in small batches, as too many slices at once cool the oil and absorb more fat.
- Add little salt to the flour initially, because the pickles and broth already bring plenty of salt; adjust after cooking if needed.
- Serve on a rack if you have one, as air circulates under the pickles and keeps the crust crispier than stacking them on a plate.
How do I keep fried pickles from getting soggy?
Drain them very thoroughly before breading, then fry in hot oil. Serve immediately, as steam quickly softens the crust.
What oil should I use for this recipe?
Use a neutral oil that handles high heat well, like sunflower, canola, or peanut oil. Avoid strongly flavored oils, as they would mask the tangy pickle taste.
Can I prepare fried pickles in advance?
It’s not ideal; they’re truly best right after frying. If needed, you can reheat them for a few minutes in a hot oven or air fryer to restore some crunch.
Can I replace the chicken broth?
Yes, vegetable broth works very well and gives a milder flavor. Just avoid a broth that’s too salty, as the pickles are already salty.
What sauce goes with fried pickles?
A yogurt, garlic, and herb sauce works great as it adds freshness. A slightly spicy sauce with paprika or mild chili also works if you like bolder bites.
Crispy Fried Pickles
American
Appetizer
Pickle slices coated in a simple batter and fried until golden and crunchy. A quick recipe, perfect for an appetizer or a small sharing plate.
Ingredients
- 250g dill pickle slices, drained
- 1 large beaten egg
- 120ml chicken broth
- 125g all-purpose flour
- 1/2 tsp ground black pepper
- 1/4 tsp salt
- 500ml neutral oil for frying
Instructions
- 1Drain the pickle slices, then dry them thoroughly with paper towels.
- 2In a bowl, mix the beaten egg with the chicken broth.
- 3In a shallow dish, combine the flour, salt, and pepper.
- 4Dip the pickle slices in the egg-broth mixture, then coat them in the flour.
- 5Heat the oil in a deep pan or pot to about 175°C.
- 6Fry the pickles in small batches for 2 to 3 minutes, turning once, until golden.
- 7Drain on paper towels or a rack.
- 8Serve immediately with a fresh yogurt, garlic, or herb sauce.
Notes
• Dry the pickles well before coating to prevent the batter from falling off during frying.
• Don’t overcrowd the pan, or the oil cools and the pickles absorb more grease.
• Chicken broth can be replaced with vegetable broth.
• For a crunchier coating, substitute 30g of flour with 30g of panko breadcrumbs.
Nutrition Facts (per serving, estimated)
| 245 kcalCalories | 5gProtein | 25gCarbs | 14gFat |


