
We often believe that great desserts require hard work. A whisk, multiple bowls, a failed custard. This cake proves that’s false. Ten minutes of prep, a single dish to wash, and the result puts cakes that took three times longer to shame.
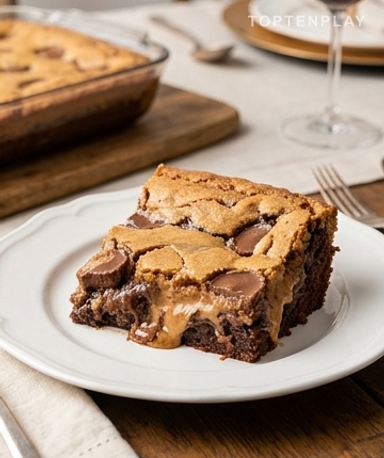
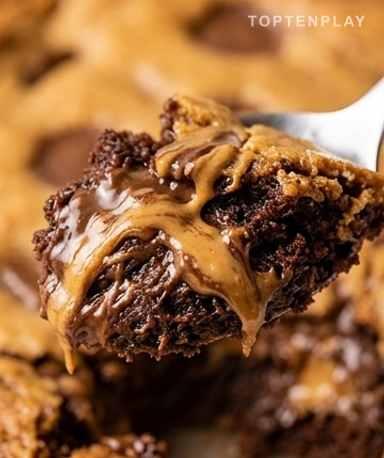
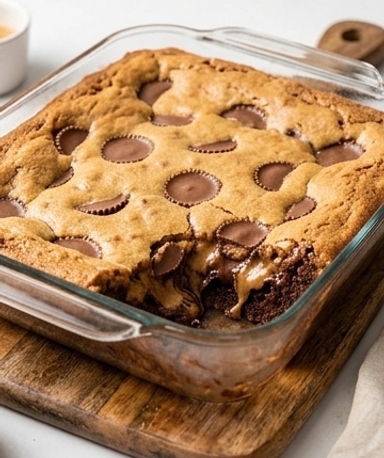
Coming out of the oven, the surface has that chocolate-brown hue, almost black at the edges, with lighter spots where the Peanut Butter Cups have melted through the crust. You can still hear a faint crackle as the dish is placed on the table. The spoon sinks in without resistance, revealing a dense, moist interior marbled with creamy veins of peanut butter. It smells like a warm brownie with something rounder, richer, that catches in your throat in the best possible way.
Why you’ll love this recipe
Ingredient Notes
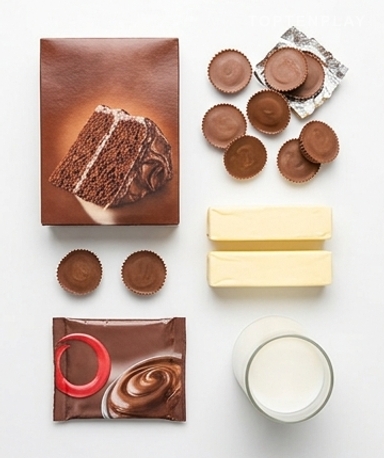
Everything you need for the easiest and most decadent dessert of your week.
- Chocolate Cake Mix : The base. Get the ‘chocolate fudge’ version if you can find it — it gives a more intense flavor than classic chocolate. Any brand will do; it’s really the vessel, not the star.
- Peanut Butter Cups : Mini Reese’s are ideal because they melt faster and distribute better. If you have large ones, cut them into quarters. In France, they are found in the American candy section of supermarkets or online.
- Instant Chocolate Pudding : It’s not mandatory, but it changes everything. It weighs down the batter, making it denser and moister, almost like a brownie. Look for it in the baking aisle or online — Jell-O brand is the gold standard.
- Butter : Melted, poured over the top right before baking. It hydrates the cake mix and creates that slightly crispy crust. No margarine here — the taste is really not the same.
What ‘dump’ really means
A dump cake is a method, not a specific recipe. The principle: you don’t prepare a batter. You pour the ingredients in layers in the dish, in the right order, and the oven does the rest. It’s the opposite of traditional baking where each step depends on the previous one. Here order matters — liquid base at the bottom, dry mix on top, melted butter over that — but nobody measures to the exact gram. It’s a recipe designed for evenings when you have no energy but still want something good.
Starting the batter
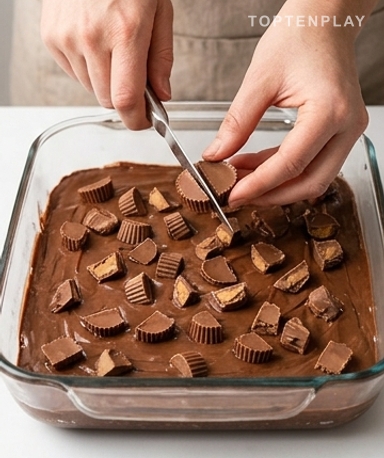
Start by preparing the pudding with cold milk according to the package instructions. Pour it directly into the bottom of the buttered dish — a smooth layer about one centimeter thick. Disperse the Peanut Butter Cups on top without crushing them, whole or halved depending on their size. You can press them slightly with your fingertips; they sink in with a soft resistance, like cold plasticine. Then sprinkle the dry cake mix directly over the Peanut Butter Cups, without mixing. The powder should cover the entire surface relatively evenly — a few lumps are normal.
The critical moment
Pour the melted butter over the entire surface in a steady stream. The goal is for every part of the powder to be wet. If some areas stay dry, they will bake like flour and taste powdery. You can tilt the dish gently so the butter spreads, but do not mix anything. At this stage, it looks quite unappealing — a muddy surface with chocolate bumps. It’s normal. The oven takes care of it.
And now, patience
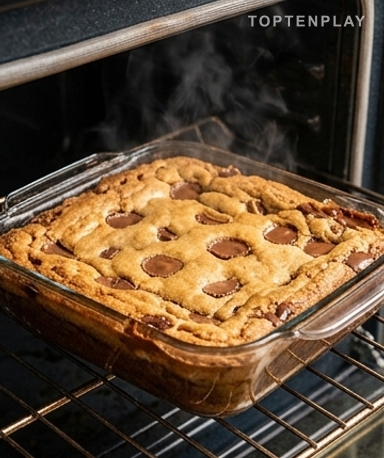
Forty-five minutes at 175°C, without opening the oven. When it’s ready, the surface has that deep brown, almost mahogany color on the edges, and the center should jiggle slightly when you shake the dish — like a crème brûlée before it’s fully set. If the center is still liquid, add five minutes. If the surface browns too quickly, place a piece of aluminum foil loosely over it. Let rest for ten minutes before serving. This is the hardest part.
Tips & Tricks
- Serve it warm with a scoop of vanilla ice cream placed on top right before serving — the ice cream melts on the hot crust and creates an impromptu sauce. That’s when the dessert becomes truly great.
- If you don’t have instant pudding, replace it with 50 cl of milk mixed with a tablespoon of unsweetened cocoa powder. It’s not exactly the same but it works very well.
- Keep leftovers covered at room temperature for the first day, then in the fridge. Reheat for 30 seconds in the microwave — the texture returns to something very close to fresh out of the oven.
Can I make this cake in advance?
Yes, and it’s actually recommended. Prepared the day before and kept in the refrigerator, the cake develops a denser texture and the chocolate-peanut butter flavors blend better. Reheat individual portions for 30 seconds in the microwave before serving.
Is instant pudding really mandatory?
No, you can replace it with 50 cl of milk mixed with a tablespoon of unsweetened cocoa powder. The result will be a bit less dense and rich, but quite alright. If you really want to stay close to the original recipe, look for Jell-O pudding in specialty stores or online.
My cake is still liquid in the center after 45 minutes — what should I do?
Continue baking in 5-minute increments until the center jiggles slightly but is no longer liquid. Every oven is different. If the surface browns too quickly before the center is cooked, cover loosely with aluminum foil.
Can I replace Peanut Butter Cups with something else?
Yes. Peanut butter M&M’s, Kit Kats, or even just dollops of peanut butter dropped on the surface work well. For a different but equally delicious result, try dark chocolate chunks mixed with unsalted roasted peanuts.
How do I store leftovers?
Cover the dish with plastic wrap or transfer to an airtight container. At room temperature, it keeps for 1 day. In the refrigerator, up to 4 days. Freezing is possible for up to 2 months — freeze in individual portions for convenience.
Should I use a glass or metal dish?
Both work. A Pyrex glass dish allows you to see the layers cooking on the sides, which helps gauge doneness. A metal pan cooks slightly faster — in that case, start checking for doneness at 40 minutes.
Chocolate Peanut Butter Dump Cake
American
Dessert
An ultra-fast American dessert: layers of chocolate mix and melting Peanut Butter Cups, assembled in 10 minutes without a mixer or special technique.
Ingredients
- 432g (1 box) chocolate fudge cake mix
- 96g (1 pouch) instant chocolate pudding
- 500ml cold whole milk
- 300g mini Peanut Butter Cups (Reese’s type), about 24 pieces
- 115g unsalted butter, melted
- 1 tablespoon unsalted butter (to grease the dish)
Instructions
- 1Preheat the oven to 175°C. Generously grease a 33×23 cm rectangular baking dish.
- 2In a bowl, mix the instant pudding with the cold milk for 2 minutes until slightly thickened. Pour into the bottom of the dish in an even layer.
- 3Distribute the Peanut Butter Cups over the entire surface without crushing them. Press them in slightly with your fingertips.
- 4Sprinkle the dry cake mix directly over the Peanut Butter Cups, without mixing. Cover the entire surface evenly.
- 5Pour the melted butter in a steady stream over the entire surface of the powder. Tilt the dish slightly to cover dry areas, do not mix.
- 6Bake for 45 minutes without opening the oven. The surface should be dark brown and the center slightly jiggly.
- 7Let rest for 10 minutes before serving. Serve with a scoop of vanilla ice cream.
Notes
• Storage: plastic wrap at room temperature for 1 day, in the refrigerator for up to 4 days. Freezes well in individual portions (2 months max).
• Without pudding: replace the pouch + milk with 500ml of milk mixed with 1 tablespoon of unsweetened cocoa. The texture will be slightly less dense.
• Crunchy variation: sprinkle 50g of crushed toasted unsalted peanuts over the cake mix before pouring the butter.
Nutrition Facts (per serving, estimated)
| 395 kcalCalories | 6gProtein | 54gCarbs | 18gFat |