

The name does it no favors. “Dump cake” evokes lazy cooking, a slapdash thing from the freezer. Yet this dessert is one of the most honestly good things you can make in under half an hour: dense, fudgy, with pockets of peanut butter that sneak into every bite of chocolate.
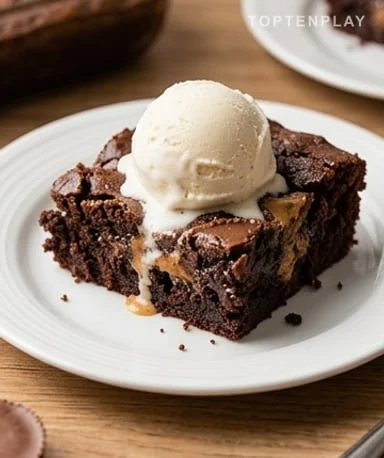
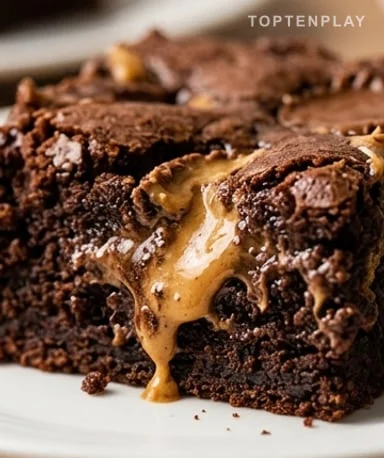
What comes out of the oven doesn’t look perfect, and that’s exactly its charm. The surface is slightly bumpy, golden in spots, with cups that have melted and caramelized into shiny little puddles. As you pull out the dish, the smell of hot chocolate mixed with roasted peanut butter fills the kitchen. The first cut reveals a dense crumb, almost like a brownie, laced with golden-beige streaks that are just begging to ooze.
Why you’ll love this recipe
Ingredient Notes
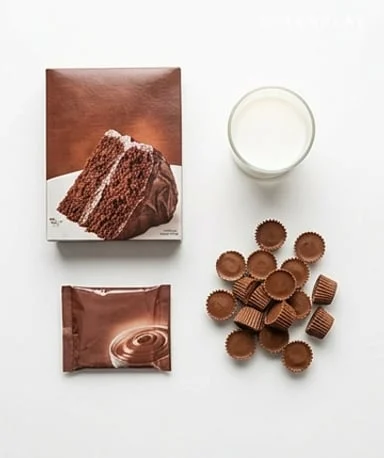
Only four ingredients—cake mix, instant pudding, milk, and mini cups—and that’s it.
- Chocolate cake mix : It plays the role of flour, leavening, and cocoa in one box. The key here is to avoid discount brands: they give a rubbery crumb and an artificial aftertaste that comes through in baking. For a more intense, less sweet result, a devil’s food or dark chocolate mix works great.
- Instant chocolate pudding mix : This is what changes everything compared to an ordinary cake. Added dry to the batter, it absorbs moisture and creates that dense, creamy texture you don’t get with plain flour. It also slows drying: the cake stays moist for days. If you only find cook-and-serve pudding, you need to prepare it according to package directions, let it cool completely, then mix it in—but the texture will be slightly different.
- Whole milk, at room temperature : The milk activates the pudding and binds the batter. Whole milk gives enough fat for a rich mouthfeel. Cold milk makes the mixture slightly grainy and slows pudding hydration—taking the milk out 20 minutes beforehand avoids the issue. Low-fat works, but you lose some richness.
- Mini peanut butter cups : Mini Reese’s melt while keeping two distinct layers: the outer chocolate liquefies and soaks into the crumb, while the peanut butter center stays slightly separate. It’s this two-layer effect that makes every bite unpredictable. Too-old or dry cups won’t melt properly—check the date before buying. You can substitute peanut butter chips for a more uniform, less spectacular but more consistent effect.
The thick batter is not a problem—it’s the expected result
Start with pudding and milk. In a large bowl, whisk them together for a full two minutes—not one, two. Instant pudding needs that time to thicken slightly and form a homogeneous base; if you cut it short, you’ll have powder clumps that won’t disappear during baking. Once the mixture is pearly and slightly sticky on the whisk, pour the cake mix powder directly on top. Stir with a spatula using slow, broad strokes until the last white streaks disappear. The resulting batter looks almost like cookie dough—abnormally dense for a cake—and that’s exactly what you want. Don’t give in to the temptation to add milk to thin it.
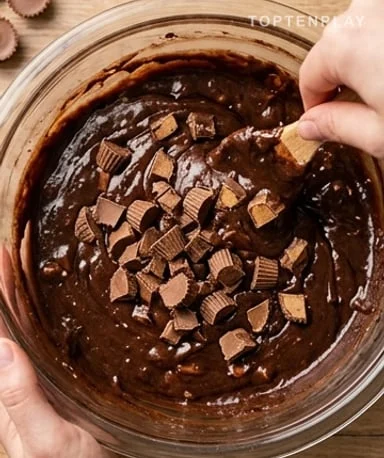
Fold in the cups without overworking
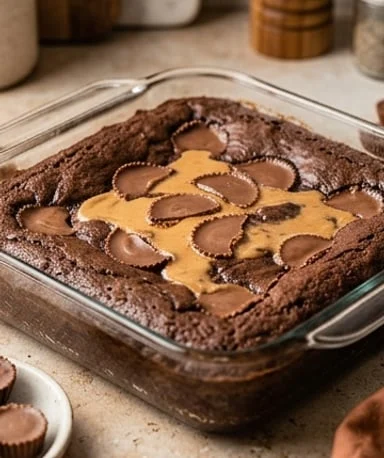
Cut the mini cups into two or three rough pieces, no finer. Too-small pieces get lost in the batter and lose their textural identity; too-large pieces sink to the bottom and burn slightly underneath. Set aside a handful for the top, then fold in the rest with three or four broad spatula strokes. The goal is roughly even distribution, not perfect homogeneity—a few denser zones create surprise bites. Then transfer the batter to the greased dish, spread it without flattening it like a wall, and arrange the reserved pieces on top. These top cups will melt, then set as they cool, forming a shiny finish with some slightly crunchy spots.
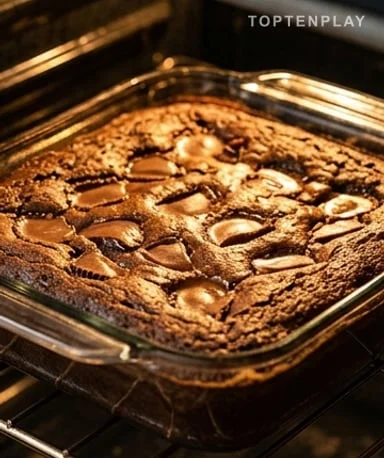
25 minutes at 175°C: knowing when to stop
Oven at 175°C (350°F), middle rack. Too high a heat dries the edges before the center sets—avoid convection/fan mode if you can. After 20 minutes, the smell changes: hot chocolate is joined by a note of roasted, almost toasted peanut. That’s your cue to open and check. Toothpick test: inserted in the center, it should come out with a few moist crumbs attached—not clean, moist crumbs. A clean toothpick means you’ve gone too far. The edges pull away slightly from the dish, the surface is matte rather than shiny. Let rest 10 minutes before cutting: any sooner and the slices collapse.
Hot, warm, or cold: three cakes in one pan
Hot from the oven, it’s almost a fondue—the crumb gives way immediately under the fork, the peanut butter pockets still flow. Served with a scoop of vanilla ice cream that melts slowly on top, it’s probably the most spectacular version. Warm, 30–40 minutes after baking, the texture firms and the slices hold: the ideal compromise if you’re hosting. Cold the next day, it’s a different cake: the crumb is compact, the flavors more concentrated, the peanut butter more present on the finish. All three versions have their fans—choose according to the occasion and your guests.
Tips & Tricks
- Do not mix the batter for more than 30 seconds after adding the cake mix: the mix contains gluten that develops with liquid contact, and the more you mix, the more the cake becomes elastic instead of tender. A few powder streaks will disappear during baking—it’s not a problem.
- Grease the dish with soft butter rather than spray: spray leaves a chemical residue that can brown on the edges at high temperature and give an unpleasant aftertaste. Butter browns the edges cleanly without staining.
- If the cake accidentally overbakes—dry surface, crumbly crumb—cover it immediately with plastic wrap while hot. The steam trapped in the dish during cooling slightly rehydrates the crumb and rescues some of the damage.
- Wait until the cake is completely cool before covering for storage: a still-warm cake under wrap condenses water and softens the surface into a sticky texture. Two days at room temperature, five days in the refrigerator.
Can I use cook-and-serve pudding instead of instant?
Yes, but with an extra step: prepare the pudding according to the package directions, let it cool completely to room temperature, then mix it in. A still-hot pudding will liquefy the batter and give an uneven texture during baking. The final result will be slightly different but still good.
Can I make this cake the day before?
Yes, and it’s even recommended. Baked the day before, covered with plastic wrap once completely cooled, it develops more melded flavors and a compacter crumb. Just reheat slices in the microwave for 15 seconds if you prefer it warm.
Can I replace the peanut butter cups with something else?
Peanut butter chips give a more uniform, less spectacular effect, but work well. Milk chocolate chunks with a generous spoonful of peanut butter mixed directly into the batter is another viable option. The key is to keep the chocolate-peanut butter pairing that structures the cake’s flavor.
How do I avoid overbaking?
The toothpick is the only reliable indicator: inserted in the center at 20 minutes, it should come out with a few moist crumbs attached, never clean. Edges pulling away slightly from the dish and a matte rather than shiny surface confirm doneness. In doubt? Better to underbake by two minutes: the crumb will settle as it cools.
Can I freeze this cake?
Yes, for up to two months. Cut the cooled cake into individual slices, wrap each in plastic wrap and then aluminum foil. To thaw, leave in the refrigerator overnight or microwave on medium power for 45 seconds. The texture after freezing is slightly compacter but still very acceptable.
Why is my batter so thick? Is that normal?
Completely normal. The cake mix added to an already hydrated pudding creates a batter much denser than a classic cake batter—almost like cookie dough. It’s exactly this thickness that guarantees the fudgy, moist texture of the final result. Do not add liquid to thin it.
Chocolate Dump Cake with Peanut Butter Cups
American
Dessert
A dense, fudgy chocolate cake studded with melted peanut butter pockets. Four ingredients, one bowl, 35 minutes from start to finish.
Ingredients
- 1 box (432 g) chocolate cake mix
- 1 box (96 g) instant chocolate pudding mix
- 480 ml whole milk, at room temperature
- 300 g mini peanut butter cups (like Reese’s), roughly chopped
- 1 tablespoon soft butter (for the dish)
Instructions
- 1Preheat oven to 175°C (350°F). Generously grease a 9×13-inch (23×33 cm) dish with the soft butter, making sure to coat the corners.
- 2In a large bowl, whisk the milk and instant pudding mix together for a full 2 minutes until slightly thickened and smooth.
- 3Add the cake mix powder all at once. Fold with a spatula using broad strokes until no dry streaks remain. Do not overmix—the batter will be very thick, which is intentional.
- 4Reserve a handful of the chopped cups for the top. Fold the rest into the batter with 3–4 broad strokes to distribute them without crushing.
- 5Pour the batter into the prepared dish and smooth the top. Scatter the reserved cups over the surface.
- 6Bake for 25 minutes. Check at 20 minutes: a toothpick inserted in the center should come out with a few moist crumbs, never clean.
- 7Let cool in the dish for 10 minutes before cutting. Serve warm for a gooey effect, or at room temperature for cleaner slices.
Notes
• Do not mix more than 30 seconds after adding the cake mix: gluten develops and makes the cake elastic rather than tender.
• Fresh, soft cups melt much better than ones near their expiration date—check before buying.
• Delicious warm with a scoop of vanilla ice cream. Cold leftovers the next day under wrap are even better.
• Storage: 2 days under wrap at room temperature, 5 days in the fridge. Reheat slices for 15 seconds in the microwave.
Nutrition Facts (per serving, estimated)
| 315 kcalCalories | 5 gProtein | 50 gCarbs | 11 gFat |


