

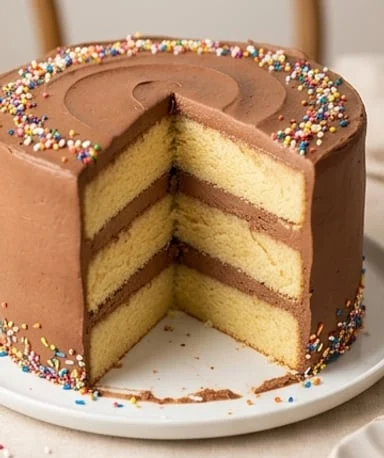
A birthday cake doesn’t need to be complicated to be memorable. This one focuses on what really matters: a soft vanilla crumb, a creamy chocolate glaze, and zero unnecessary fuss.
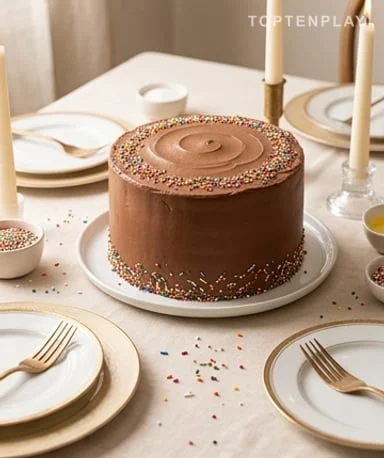
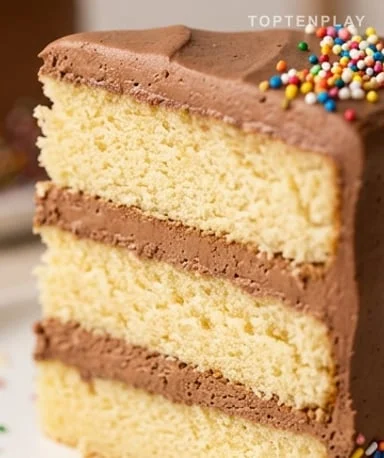
When sliced, the yellow layers are tender and even, with a vanilla aroma that hits before the first bite. The chocolate glaze clings slightly to the knife, dense but not heavy, with a texture close to a thick mousse. The colorful sprinkles add just the right amount of sweet crunch without stealing the show.
Why you’ll love this recipe
Ingredient Notes
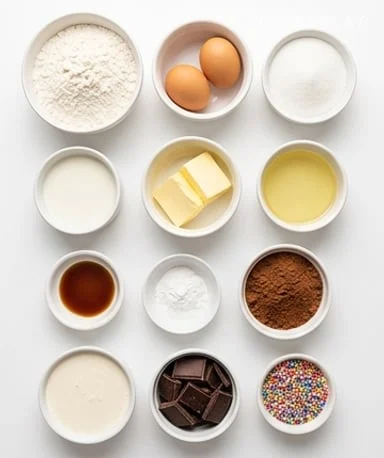
Basic baking staples, but not random: fresh eggs, whole milk, good vanilla, and decent chocolate really make the difference.
- Flour : It gives the cake structure and keeps the layers stable when stacked. Use regular wheat flour, not too fine cake flour or flour with added leavening, otherwise the texture can become unpredictable.
- Eggs : They add volume and lightness, especially when well beaten. Choose fresh eggs at room temperature: they whip better and give a more frothy, almost silky batter.
- Whole milk : It hydrates the batter and rounds out the vanilla flavor. Semi-skimmed milk works, but whole milk gives a softer, slightly richer crumb.
- Vanilla : It carries the entire cake’s aroma, so it’s best to avoid overly artificial flavoring. A good vanilla extract is enough; fresh vanilla beans would almost be lost in this recipe.
- Chocolate : It gives the glaze its depth and appetizing brown color. Use baking chocolate around 50-60% cocoa for a chocolatey taste without excessive bitterness.
- Cocoa powder : It boosts the chocolate flavor without weighing down the cream. Choose unsweetened, dark and aromatic cocoa; pre-sweetened powders give a flat, overly sweet glaze.
Prepare the batter
Start by whisking the eggs with the sugar until pale, thick, and slightly frothy. This step isn’t just for show: it traps air, which gives a tender crumb instead of a dense cake. Then gently fold in the dry ingredients, scraping the sides of the bowl to avoid flour pockets. When the milk, oil, and vanilla are added, the batter becomes smoother, shinier, with a sweet raw-biscuit smell.
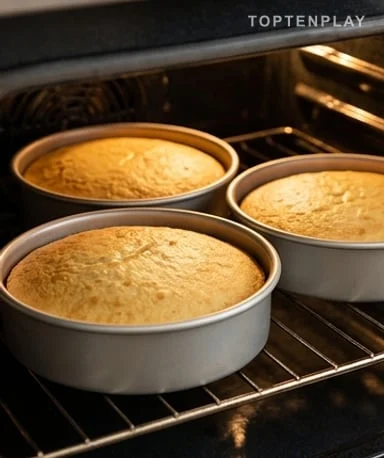
Bake without drying
Divide the batter among three same-size pans for even layers that are easier to stack. Baking must be precise: the top should be light golden, springy to the touch, and a toothpick should come out clean. If the cake smells strongly of toasted butter, it’s likely gone too far. Let the layers cool completely, as a still-warm cake would melt the glaze and make the layers slide.
Make the glaze
The glaze should be creamy, smooth, and firm enough to hold on a spatula without dripping. Melted chocolate brings round flavor, cocoa adds character, and the fat helps achieve that supple texture that spreads like a dense mousse. If the mixture seems too soft, let it rest in the fridge for a few minutes, no longer, as it needs to remain workable. At this point, the chocolate smell should be clear, almost like thick hot chocolate.
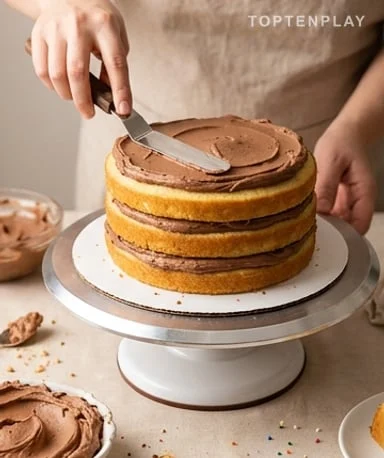
Assemble cleanly
Place a first cake layer on the plate, add a good thickness of glaze, then spread without pressing too hard. The goal is to fill the gap between layers, not crush the crumb. Continue with the remaining layers, then cover the sides while turning the cake gently to keep it even. Even with a few spatula marks, the result is beautiful: shiny chocolate and blond crumbs make you want to cut a slice right away.
Finish and serve
Add the sprinkles while the glaze is still slightly soft, otherwise they will slide off or not stick. Then let the cake rest before cutting, as the layers hold better once the glaze has firmed. Use a large clean knife, wiped between slices, to keep neat cuts. The first bite should combine the vanilla crumb, creamy chocolate, and the sweet little crunch of the decoration.
Tips & Tricks
- Use room-temperature ingredients; they incorporate more easily and give a more homogeneous batter, without cold lumps that break the texture.
- Don’t overmix after adding the flour, as gluten develops quickly and can make the crumb more elastic than tender.
- Cool the cakes completely before assembly, otherwise the glaze softens, drips down the sides, and makes stacking much harder.
- Prepare the layers the day before if you can; a well-rested cake cuts more cleanly and absorbs less glaze during assembly.
Can I make this birthday cake the day before?
Yes, it’s actually a good idea. The cooled cake layers hold up better the next day, and the glaze has time to firm up without drying out.
How do I avoid a dry cake?
Don’t overbake once the toothpick comes out clean. Also use whole milk and a bit of oil: this duo keeps the crumb softer, even after resting.
Can I make only two layers instead of three?
Yes, use two taller pans or divide the batter into two 20 cm pans. The baking time will be a bit longer, so watch the color and test the center.
Which chocolate should I choose for the glaze?
A baking chocolate between 50 and 60% cocoa works great. Darker makes the glaze more intense; sweeter reminds more of classic birthday cakes.
Can I replace the whole milk?
Semi-skimmed milk works fine, with a slightly less rich crumb. Avoid plant-based milks in this version if you want to keep the intended texture.
Birthday Cake with Vanilla and Chocolate Glaze
American
Dessert
A classic three-layer birthday cake with a soft vanilla crumb and a creamy chocolate glaze, lighter than traditional buttercream.
Ingredients
- 260g wheat flour
- 2 1/2 tsp baking powder
- 1/2 tsp fine salt
- 4 eggs at room temperature
- 300g granulated sugar
- 115g unsalted butter, melted
- 250ml whole milk
- 1 tbsp neutral oil
- 2 tsp vanilla extract
- 250g dark or semi-sweet baking chocolate
- 300ml heavy cream
- 45g unsweetened cocoa powder
- 120g powdered sugar
- 90g unsalted butter, softened (for glaze)
- 60g colorful sprinkles
Instructions
- 1Preheat the oven to 180°C. Butter and line three 20 cm round cake pans with parchment paper.
- 2Mix the flour, baking powder, and salt together in a bowl; set aside.
- 3Whisk the eggs and sugar for 6 to 8 minutes until pale, thick, and frothy.
- 4Gently fold in the dry ingredients without overworking the batter.
- 5Add the melted butter, milk, oil, and vanilla; mix just enough to obtain a smooth batter.
- 6Divide the batter among the pans and bake for 22 to 25 minutes, until the cakes are golden and spring back when touched.
- 7Let cool in the pans for 10 minutes, then transfer to a wire rack to cool completely.
- 8Melt the chocolate and let it cool slightly so it doesn’t melt the glaze.
- 9Beat the softened butter, powdered sugar, and cocoa powder, then add the cream and melted chocolate until smooth and creamy.
- 10Place one cake layer on a plate, spread a layer of glaze, and repeat with the remaining two layers.
- 11Cover the top and sides with the remaining glaze, then add the colorful sprinkles.
- 12Let rest for 20 to 30 minutes before cutting for clean slices.
Notes
• The cakes must be completely cool before assembly, otherwise the glaze will soften and slide.
• For a milder version, use chocolate around 50% cocoa.
• The cake can be made the day before and stored covered at cool room temperature.
• If the glaze becomes too firm, let it sit at room temperature for a few minutes before spreading.
Nutrition Facts (per serving, estimated)
| 520 kcalCalories | 7gProtein | 62gCarbs | 28gFat |


