
Banoffee pie: most people think it’s a restaurant-only dessert, a British thing you order but never recreate at home. Complete mistake. It is actually one of the most accessible desserts out there — three layers, supermarket ingredients, and no techniques that require special training.
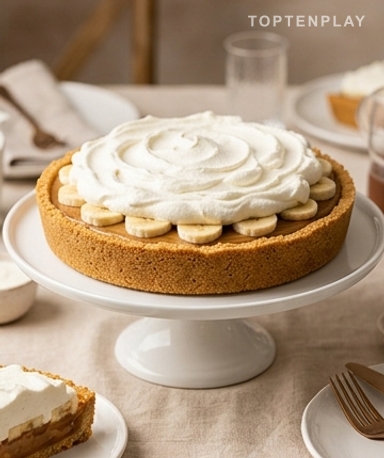
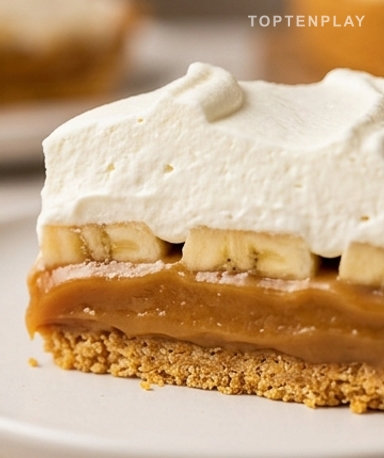
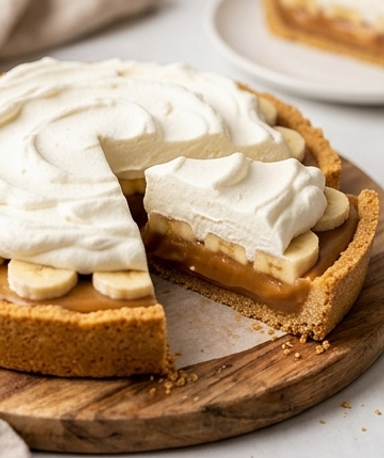
Look at it for a second before cutting. The whipped cream forms soft waves on top, off-white, with slices of pale yellow banana peeking through in places. Underneath, the toffee caramel — tan like a light caramel, leaning towards dark hazelnut — holds firm, neither liquid nor truly solid. The buttery biscuit crust cracks slightly when you press your fork. And that smell of butter and cooked sugar that rises as soon as you take out a slice — it precedes the pie throughout the room.
Why you’ll love this recipe
Ingredient Notes
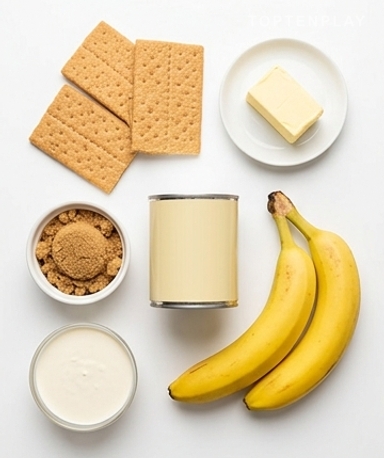
Everything you need for the most indulgent pie of the season.
- Sweetened condensed milk : This is what makes the toffee. Use about half a can. Don’t buy unsweetened evaporated milk by mistake — the result really wouldn’t be the same. The brand doesn’t matter; Nestlé or store brands work just as well.
- Salted butter : It’s everywhere in this recipe: in the crust and in the toffee. The salt balances the sugar without you even noticing. If you only have unsalted butter, add a good pinch of sea salt to the toffee when incorporating the condensed milk.
- Shortbread or digestive biscuits : The original recipe uses graham crackers, which aren’t always easy to find in France. Shortbread, light speculoos, or digestive biscuits work very well. Avoid biscuits that are too fatty — the crust would become compact and difficult to cut.
- Very ripe bananas : They should have black spots on the skin. A banana that is still yellow and firm will be bland and slightly astringent. If yours aren’t ripe enough, wait a day or two. They provide the natural sweetness that balances the toffee.
- Full-fat heavy cream : Minimum 30% fat content, cold from the fridge. Light cream won’t whip — there’s no compromise here. No need to buy special whipping cream, classic heavy cream works perfectly.
Crush the cookies by hand, not in a blender
Put the biscuits in a freezer bag and crush them with the bottom of a glass or a rolling pin. The goal: uneven crumbs, not a fine powder. A few larger chunks give the crust character. Mix with sugar and melted butter — it should have the consistency of wet sand that holds together when you squeeze your fist. Press this mixture into your mold with your fingers, going slightly up the sides. Bake for 10 minutes at 180°C. When you take the mold out, the crust smells like warm buttery biscuits, slightly caramelized. Let it cool completely before continuing — this is important.
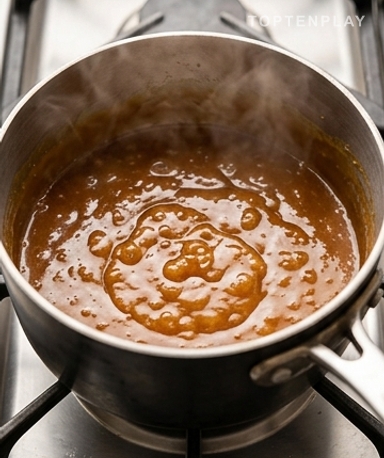
Stir without ever putting the spoon down
In a heavy-bottomed saucepan, melt the butter with the brown sugar over medium-low heat. As soon as the mixture starts to simmer, set a timer for 5 minutes and stir constantly. The mixture will go from butter yellow to a deep amber brown, with small bubbles bursting on the surface like wet sand. Then add the sweetened condensed milk, and start again: another 4 to 5 minutes, still stirring. The color will darken further, and the consistency will thicken — you’ll see the spoon leave lines that take half a second to close. It’s ready.
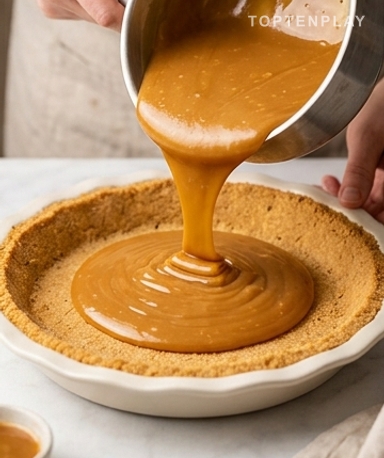
Pour and don’t touch anything for 2 hours
Pour the hot toffee over the cooled crust. It should flow easily, thick but fluid. Give the mold a slight circular motion to even the surface — don’t smooth it with a spatula, it leaves marks. Set it on the counter and wait. Two hours at room temperature, or one hour in the refrigerator. The toffee will set and go from a shiny liquid to something resembling soft caramel — supple, dense, and no longer flowing when you tilt the mold.
Whip the cream at the very last moment
Arrange the banana slices on the toffee, overlapping them slightly. Work fast — bananas turn brown as soon as they are cut. For the cream: take it out of the fridge at the last moment, whisk it with sugar and vanilla until it forms soft peaks that drop slightly from the spoon. Not too firm. Spread it over the bananas, leaving irregular waves. Serve within the hour — if the pie waits too long, the bananas release water and the cream collapses.
Tips & Tricks
- Never take your eyes off the pan while cooking the toffee. It goes from good to burnt in less than a minute, and you can’t speed it up by turning up the heat — medium-low heat and patience are key.
- Take the pie out of the fridge 20 to 30 minutes before serving. When cold, the crust becomes hard like a dry biscuit and the toffee loses its suppleness. A slight rise in temperature changes everything in the mouth.
- If preparing in advance, keep the bananas whole and the cream separate. Assemble the final layers a maximum of 2 hours before serving — no earlier.
Can I prepare Banoffee pie the day before?
Yes, and it is even recommended. Prepare the crust and toffee the day before and let them rest in the refrigerator. Only add the bananas and whipped cream on the day of serving, at most 2 hours before.
How do I prevent bananas from browning?
Cut them at the last moment, just before assembling. You can also rub them lightly with a little lemon juice, but in a thin layer so as not to alter the taste. The key: do not place them on the toffee more than 2 hours in advance.
I don’t have graham crackers, what can I use instead?
Shortbread, digestive biscuits, or light speculoos work very well. Avoid biscuits that are too fatty or too flavored, as they would overpower the taste of the toffee.
My toffee came out of the pan liquid — is it a failure?
No. Toffee sets as it cools: it always appears too liquid when hot, which is normal. Let it rest for 2 hours at room temperature or 1 hour in the refrigerator before judging. If it’s still too soft after that, it just needed 1 or 2 more minutes of cooking.
How long can leftovers be kept?
The assembled pie can be kept for 24 hours in the refrigerator, covered with plastic wrap. Beyond that, the bananas brown and the cream collapses. If you know there will be leftovers, keep the cream separate and assemble on demand.
Can I make Banoffee pie without an oven?
Yes. The uncooked crust holds well if you press it firmly and let it rest for 30 minutes in the refrigerator before adding the toffee. It will be a bit more crumbly when cut, but the result is perfectly fine.
Banoffee Pie
British
Dessert
The British pie with a buttery shortbread crust, melting toffee caramel, fresh bananas, and homemade whipped cream. Simple to prepare, impossible to forget.
Ingredients
- 200g shortbread or digestive biscuits (about 12 biscuits)
- 60g granulated sugar (5 tbsp)
- 100g melted salted butter — for the crust (7 tbsp)
- 115g salted butter — for the toffee (½ cup)
- 100g packed brown sugar (½ cup)
- 225g sweetened condensed milk (about ½ of a 400g can)
- 2 large ripe bananas
- 300ml cold full-fat heavy cream (min. 30% fat)
- 50g granulated sugar — for the cream (¼ cup)
- 1 tsp vanilla extract
Instructions
- 1Preheat the oven to 180°C. Crush the biscuits into crumbs in a freezer bag, mix with the sugar and melted butter until you get a wet sand texture.
- 2Press the mixture into a 23 cm pie dish, going slightly up the sides. Bake for 10 minutes. Let cool completely.
- 3In a heavy-bottomed saucepan, melt the butter with the brown sugar over medium-low heat. Stir continuously for 5 minutes until amber in color.
- 4Add the sweetened condensed milk, mix and maintain a gentle simmer for another 4 to 5 minutes while stirring constantly. The mixture should thicken and turn a light caramel brown color.
- 5Pour the hot toffee over the cooled crust. Let sit for 2 hours at room temperature (or 1 hour in the refrigerator) until firm.
- 6Slice the bananas and arrange them on the toffee in an even layer.
- 7Whisk the cold heavy cream with the sugar and vanilla until soft peaks form. Spread over the bananas and serve within the hour.
Notes
• Make ahead: prepare the crust and toffee the day before. Add bananas and cream on the day of serving, at most 2 hours before.
• Storage: 24 hours in the refrigerator covered with film. Beyond that, the bananas brown and the cream collapses.
• No-bake: the crust can be made without baking — press it firmly and let it set for 30 minutes in the refrigerator before pouring the toffee.
Nutrition Facts (per serving, estimated)
| 620 kcalCalories | 5gProtein | 68gCarbs | 38gFat |