

You might imagine a ‘diet’ cake as a disguised punishment: dry, flavorless, eaten out of guilt rather than desire. The banana oat cake doesn’t fall into that category—it’s comfort food that delivers, satisfying and fragrant, without the compromises you’d expect. The difference is that every ingredient serves a specific purpose: bananas sweeten, oats nourish, yogurt moistens.

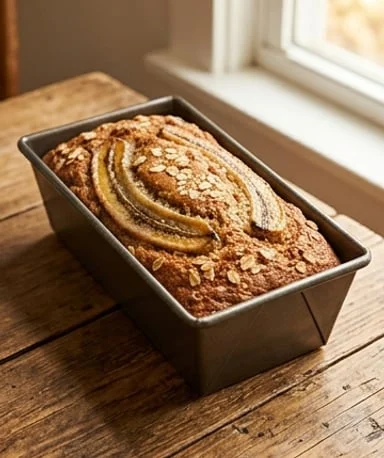
When it comes out of the oven, the golden crust gives off a warm aroma of caramelized banana blended with a hint of cinnamon—the kind of smell that draws you back to the kitchen for no particular reason. The crumb is dense, slightly moist, with that golden beige color of cooked grains. Sliced, it holds together without crumbling, something you wouldn’t expect from a cake without butter or flour. And the texture in your mouth—compact yet tender, neither rubbery nor brittle—is more reminiscent of banana bread than a lightened substitute.
Why you’ll love this recipe
Ingredient Notes
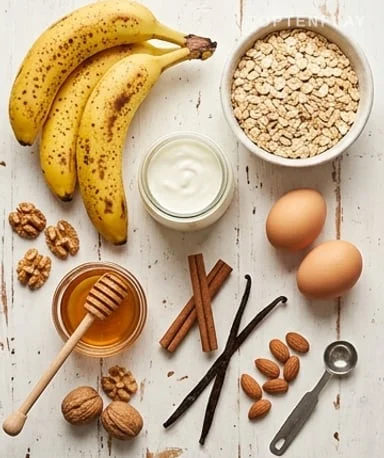
Very ripe bananas, rolled oats, plain yogurt—simple ingredients that do the job.
- Very ripe bananas (3) : They act as sweetener, binder, and moisturizer all at once. The more black-spotted they are, the better—their starch has turned into simple sugars, they mash in thirty seconds with a fork, and they perfume the cake far more than a still-firm yellow banana. If yours aren’t ripe enough, 15 minutes in the oven at 150°C with the skin on will soften them effectively.
- Rolled oats (100 g) : They replace flour and provide the cake’s structure. Fine or thick, both work: fine oats give a more uniform crumb, thick oats a chewier, rustier texture. For a middle ground, you can quickly pulse the oats in a blender for a few seconds before adding them—you get a coarse oat flour that blends better into the crumb without losing fiber.
- Plain yogurt (125 g) : It brings softness and moisture that banana alone doesn’t always guarantee, especially if the bananas weren’t at their peak ripeness. Greek yogurt will give a denser, protein-rich cake; low-fat yogurt something lighter. 0% cottage cheese works just as well without changing anything about the result.
- Eggs (2) : They ensure cohesion—without them, the cake wouldn’t unmold cleanly and would collapse when sliced. For a vegan version, two tablespoons of chia seeds soaked for 10 minutes in water form a gel that fulfills the same binding role.
- Baking powder (1 tsp) : This gives some height and lightness to a naturally compact batter. Without it, the result would be more like an energy bar than a cake. One teaspoon is enough—adding more won’t help it rise further and will leave an unpleasant chemical aftertaste.
- Cinnamon + vanilla (optional) : These two spices make the difference between a functional cake and one that really smells good. Cinnamon adds a warm note that enhances banana without overpowering it. Vanilla rounds out the whole and gives a feeling of greater sweetness, even without added sugar. Hard to do without once you’ve included them.
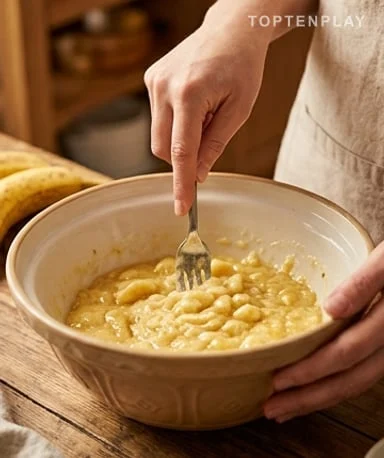
Overripe bananas, not one less
It all starts with mashing the bananas, and that’s where you understand why ripeness determines everything else. A still-firm banana gives a lumpy puree, hard to incorporate evenly, with a faint flavor that will disappear during baking. A very ripe banana, on the other hand, mashes in a few fork strokes into a smooth, creamy puree whose sweet smell already fills the room. Then add the eggs and yogurt, and whisk briefly—just enough for everything to come together without seeking perfection. The base then looks like a thick, slightly stringy beige cream, with a few banana streaks still visible. That’s normal, and it will all meld during baking.
When the oats transform the batter before your eyes
Pouring the oats into the wet mixture is the most surprising moment of the recipe. The batter thickens instantly and its appearance changes completely: you go from a flowing texture to something almost firm, which you’d think is a cookie dough. The first time, you feel it’s too thick, that there’s not enough liquid. That’s not the case. The oats absorb moisture during baking and then gradually release it into the crumb—this is exactly the mechanism that makes the cake tender in the center despite its apparent density. If the oats are very thick and the batter seems really too compact, a tablespoon of milk is enough to loosen it. Add the baking powder and spices next, mixing just enough to distribute everything, without overworking the batter.
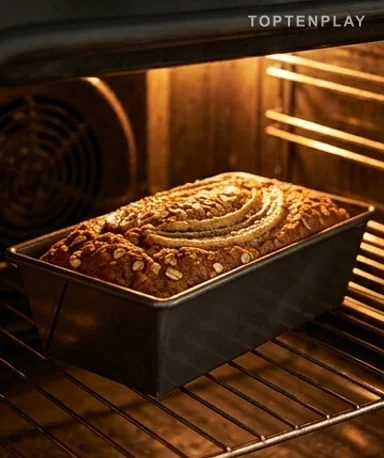
180°C and no shortcuts
The oven must be preheated to 180°C—not 160°C out of excessive caution, not 200°C to go faster. At this temperature, the crust has time to brown gradually while the crumb cooks through without drying out. Pour the batter into the pan and lightly smooth the surface with the back of a spoon. If you’ve reserved a banana slice, now is the time to place it on top: while baking, it will caramelize slightly and give a glossy finish that looks great with little effort. Around 25 minutes, the smell coming from the oven is already convincing—warm, sweet, with that toasted note of cooked grains. The last 10 minutes will firm up the crust. To know when it’s done, the knife test remains the reference: clean blade or slightly moist, never sticky. A still-moist blade indicates a tender crumb that will firm up as it cools—that’s a good sign.
Cooling is not optional
Taking the cake out and wanting to cut it immediately is the classic mistake with this recipe. While hot, the crumb is too fragile: the slice collapses, breaks, loses its structure. As it cools, the egg proteins stabilize and the whole thing firms up. Twenty to thirty minutes at room temperature is enough for a warm, still fragrant tasting. For a clean cut, it’s better to wait until it’s completely cool and use a serrated knife that slices without compressing the crumb. It keeps well for three days in an airtight container—and it’s often better the next day, once the flavors have melded and the crumb has slightly densified.
Tips & Tricks
- Use blackened bananas rather than yellow ones: their starch has fully turned into simple sugars, making the puree smoother, sweeter, and more flavorful. If yours are too firm, 15 minutes in the oven at 150°C with the skin on will soften them quickly.
- Don’t unmold the cake while it’s still hot: the crumb is too fragile to hold when sliced. Let it cool for at least 30 minutes to prevent the cake from collapsing and ensure clean slices.
- Taste the raw batter before baking: if your bananas lacked ripeness and the mixture seems not sweet enough, this is the right time to add a spoonful of honey. Once baked, it’s too late to fix a lack of sweetness.
- For a finer texture, pulse the oats for 5 seconds in a blender before adding them: the resulting coarse oat flour yields a more uniform crumb, almost like a classic cake, while retaining the fiber and satiating power of whole oats.
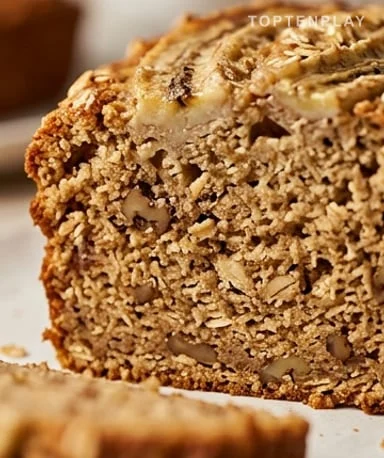
Why is my cake denser than a classic cake?
This is completely normal and intended. Oats behave differently from flour: they absorb moisture without creating the gluten network that gives lightness to classic cakes. The result is naturally more compact, similar to banana bread—dense, filling, with a crumb that holds up well when sliced. If you prefer a slightly airier texture, grinding the oats into a coarse flour before adding them reduces this effect.
How do I know if the bananas are ripe enough?
The skin should be brown-spotted to largely blackened—a still-yellow, firm banana will yield a much less sweet and less flavorful cake because its starch hasn’t yet turned into simple sugars. If you’re in a hurry, bake the unpeeled bananas for 15 minutes at 150°C: the skin will blacken and the flesh will soften exactly like a naturally overripe banana.
Can I make this cake without eggs?
Yes, with a binder substitute. Two tablespoons of chia seeds soaked in six tablespoons of water for 10 minutes form a gel that fulfills the same role as eggs. The cake will be slightly less moist but will hold together well when sliced. Unsweetened applesauce (50 g for two eggs) is another option that works well with the flavors of this recipe.
Can the cake be frozen?
Very well, and it’s even a practical way to use it. Let it cool completely, slice it, then freeze the slices separated by parchment paper in a sealed bag. When ready to eat, 30 seconds in the microwave or overnight in the refrigerator is enough to restore its tenderness. The texture is not affected, unlike many airier cakes that crumble after freezing.
Fine or thick oats, what’s the actual difference?
Fine oats incorporate more easily and give a more uniform crumb, almost like a whole-wheat flour cake. Thick oats remain more visible in the crumb and create a chewy, more rustic texture. Both work perfectly—it’s a matter of personal preference. If you’re unsure, opt for fine oats for a first try.
How should I store it and for how long?
In an airtight container at room temperature, it keeps without issue for three days. It’s often better the next day, once the flavors have had time to meld. In the refrigerator, it keeps up to five days but the crumb becomes firmer—just let it sit at room temperature for a few minutes before eating, or briefly microwave it.
Banana Oat Cake
French
Dessert / Breakfast
A cake without butter or flour, naturally sweetened by very ripe bananas and structured by oats. Dense, moist, and fragrant with cinnamon, it comes together in one bowl in ten minutes.
Ingredients
- 3 very ripe bananas (brown-spotted skin)
- 100 g rolled oats (fine or thick)
- 2 eggs
- 125 g plain yogurt (1 pot)
- 1 tsp baking powder
- 1 tsp ground cinnamon (optional)
- 1 tsp vanilla extract (optional)
- 1 tbsp honey (optional, depending on banana ripeness)
- 30 g chopped nuts or almonds (optional)
Instructions
- 1Preheat the oven to 180°C. Line a loaf or round pan with parchment paper.
- 2Peel the bananas and mash them with a fork in a large bowl until smooth.
- 3Add the eggs and plain yogurt. Whisk until the mixture is homogeneous.
- 4Fold in the oats, baking powder, cinnamon, and vanilla. Mix with a spatula until a thick, uniform batter forms.
- 5Add honey and chopped nuts if desired. Mix briefly.
- 6Pour the batter into the pan. Smooth the surface. Optionally place a few banana slices on top.
- 7Bake for 35 minutes. Check doneness by inserting a knife blade into the center: it should come out clean or slightly moist.
- 8Let cool in the pan for 20 minutes before unmolding. Wait until completely cool to slice cleanly.
Notes
• The riper and more spotted the bananas, the sweeter the cake will be naturally—with very ripe bananas, honey becomes unnecessary.
• For a finer, more even texture, pulse the oats for 5 seconds in a blender before using.
• The cake is better the next day, once flavors have settled. It keeps for 3 days in an airtight container at room temperature or 5 days in the refrigerator.
• To freeze: slice, separate slices with parchment paper, store in a sealed bag for up to 2 months.
Nutrition Facts (per serving, estimated)
| 220 kcalCalories | 8 gProtein | 35 gCarbs | 5 gFat |


