The smell of chocolate melting in a warm bowl, that sweet, steamy vapor rising—it’s the signal that something good is happening. No oven, no candy thermometer, no special technique. Just chocolate, condensed milk, and two hours in the fridge.
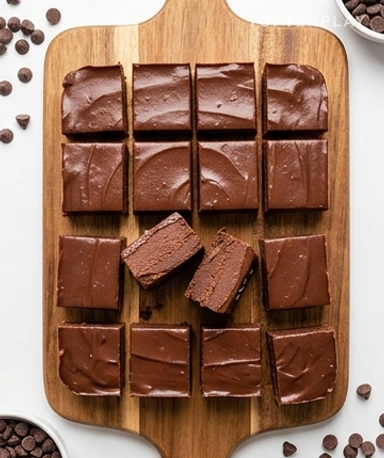
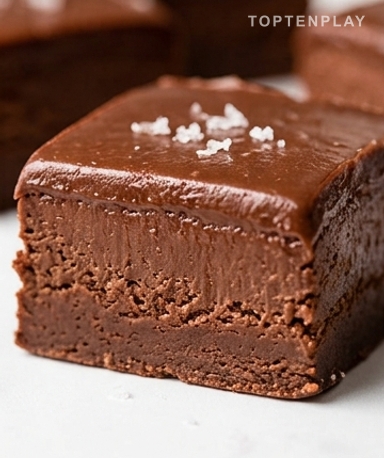
A square between your fingers feels cold and dense. You bring it to your mouth and the resistance lasts for a fraction of a second before it gives way completely—melting, rich, with that sweet bitterness of chocolate lingering just long enough. The surface is smooth as satin, deep brown, almost black in places, with reflections reminiscent of winter hot chocolate. Nothing like industrial fudge.
Why you’ll love this recipe
Ingredient Notes
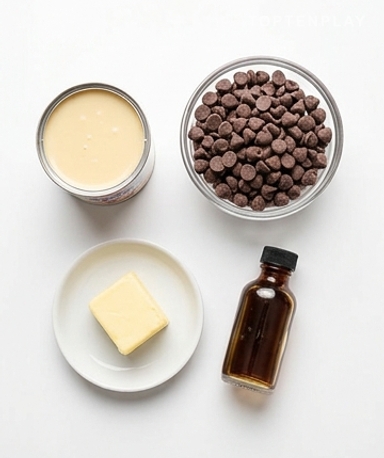
Four ingredients are enough for an impressive fudge—the chocolate does all the work.
- Sweetened condensed milk (1 can of 397g) : This is the real secret. It replaces the sugar syrup cooked at precise temperatures in traditional fudges and guarantees a creamy texture even without experience. Any brand will do—the important thing is that it’s ‘sweetened’, not ‘unsweetened’, otherwise the result won’t be the same.
- Chocolate chips (3 cups, about 500g) : Avoid low-end baking chocolate. Chips between 50 and 55% cocoa give a balanced fudge—not too bitter, not cloying. If you only have bars on hand, chop them coarsely; they melt exactly the same way.
- Butter (2 tablespoons) : It provides the silkiness and helps the mixture not stick to the bowl. Semi-salted butter works very well here—the salt enhances the chocolate without needing to add anything else.
- Vanilla extract (1 teaspoon) : It seems anecdotal but it changes the aftertaste. Real extract is better than artificial flavoring. One teaspoon, no more—the idea is to support the chocolate, not cover it up.
The setup — thirty seconds
Start with the mold. A 20×20 cm square, lined with parchment paper with an overhang on both sides—like ears—to lift the block without breaking it when unmolding. Then, everything in the bowl: condensed milk, chocolate chips, butter cut into pieces. No need to melt the butter separately. A large microwave-safe bowl, and you’re good to go.
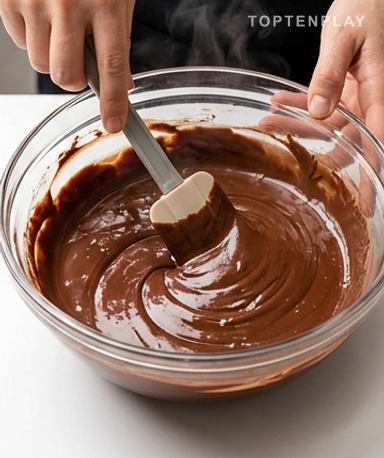
The melting — watch every thirty seconds
Microwave at maximum power, thirty seconds. Stir. Thirty seconds again. Stir again. By the second or third pass, the chocolate starts to give—at first a few shiny patches that spread, then the entire mixture transforms into a dark, thick cream that sticks slightly to the spatula. Stop as soon as it’s smooth. Add the vanilla and stir for another twenty seconds. The smell rising at this moment—hot chocolate mixed with vanilla—is the best indicator that it’s ready.
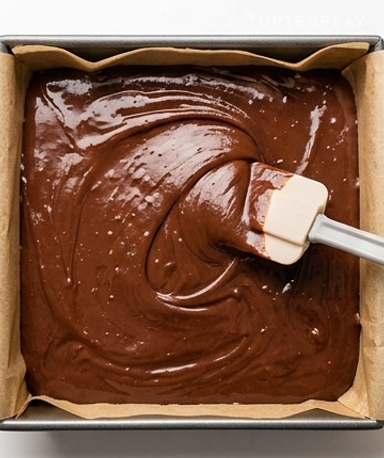
Quickly into the mold
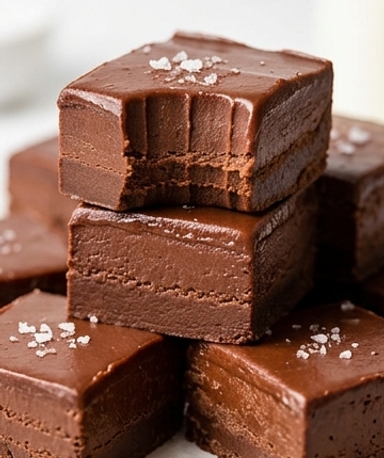
Pour immediately. The mixture is thick but still pourable—wait too long and it starts to set in the bowl. Use a flexible spatula, a few movements to level it. If you want to add toppings—coarsely chopped nuts, sea salt, pistachio pieces—it’s now, before the surface cools. Press lightly with the back of the spatula so they adhere well.
And now, patience
Fridge. Two hours minimum, ideally four. Fudge left overnight is even better—the texture tightens, the flavors settle. When you take the mold out, the top is matte and firm under your finger. Lift the block with the parchment paper, place it on a board. A smooth-bladed knife, firm strokes without sawing—you’ll hear a sharp little crack with each cut, a sign that the texture is exactly where it should be.
Tips & Tricks
- A chocolate with at least 50% cocoa changes the final result—chips below 40% yield a fudge that is too sweet and a bit plasticky in the mouth, even with the best technique in the world.
- If the fudge is still soft after two hours in the fridge, leave it for one more hour before panicking—the firmness depends on the fat content of the chocolate used.
- For clean squares, wipe the knife blade between each cut with a damp cloth—this avoids crushing the edges and dragging chocolate across the slice.
How long does fudge keep and how to store it?
Fudge keeps for up to 2 weeks in the refrigerator in an airtight container. To prevent it from drying out or absorbing fridge odors, place parchment paper between the layers of squares. At room temperature, it stays good for 3 to 4 days if the room isn’t too hot.
Can dark chocolate be replaced with milk chocolate?
Yes, but the result will be much sweeter—the condensed milk already provides a good dose of sugar. If using milk chocolate, slightly reduce the quantity or add a pinch of salt to balance it. With white chocolate, the texture remains correct but it is very sweet.
My fudge came out too soft from the fridge—what went wrong?
Two frequent causes: either the mixture wasn’t melted and integrated well enough, or the fudge didn’t have enough time in the fridge. Leave it for another one to two hours. If after 5 hours it remains soft, it’s likely a ratio problem—next time, measure the chocolate chips carefully, because below 500g for a can of condensed milk, the texture won’t hold.
Can fudge be frozen?
Absolutely. Wrap the squares individually in plastic wrap, then place them in a freezer bag. They keep for up to 3 months. To thaw, put them in the fridge the day before—avoid the microwave which softens the texture unevenly.
Can this be done without a microwave?
Yes, in a double boiler over low heat. Place the bowl over a saucepan of simmering water (without the bottom of the bowl touching the water), and stir regularly until everything is melted and smooth. It takes a bit longer—about 8 to 10 minutes—but the result is identical.
Ultra-Fast Chocolate Fudge
American
Dessert
A meltingly creamy chocolate fudge ready in a few minutes of preparation, without oven baking or a thermometer. The kind of dessert you’ll make over and over again.
Ingredients
- 1 can (397g) sweetened condensed milk
- 500g (3 cups) dark chocolate chips (50-55% cocoa)
- 30g (2 tbsp) butter
- 1 tsp vanilla extract
- optional toppings: sea salt, chopped nuts, pistachio pieces
Instructions
- 1Line a 20×20 cm square mold with parchment paper, leaving the edges overhanging.
- 2In a large microwave-safe bowl, combine the sweetened condensed milk, chocolate chips, and butter.
- 3Microwave in 30-second intervals, stirring after each pass, until a smooth and homogeneous cream is obtained (2 to 3 passes are enough).
- 4Stir in the vanilla extract and mix for another 20 seconds.
- 5Immediately pour into the lined mold and spread the surface with a spatula.
- 6Sprinkle with chosen toppings and press lightly to make them adhere.
- 7Refrigerate for at least 2 hours until the fudge is very firm.
- 8Lift the block with the parchment paper, place on a board, and cut into 16 squares with a smooth blade.
Notes
• Storage: up to 2 weeks in the refrigerator in an airtight container, or 3 months in the freezer.
• For very clean squares, wipe the knife blade with a damp cloth between each cut.
• The fudge holds better after a full night in the fridge—prepare the night before if possible.
Nutrition Facts (per serving, estimated)
| 250 kcalCalories | 4gProtein | 31gCarbs | 13gFat |