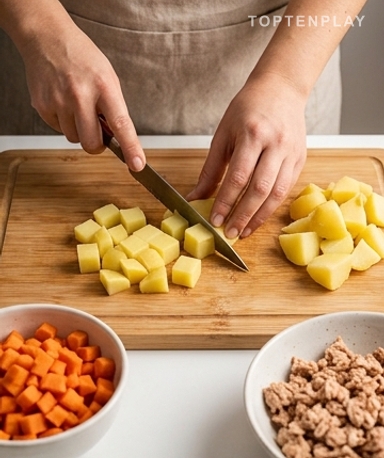
Saturday morning, when there’s no reason to rush, is the perfect time to make a Russian salad. A pot simmering gently on the stove, two eggs boiling next to it — nothing complicated. Prepare it before lunch, eat it in the evening or the next day.
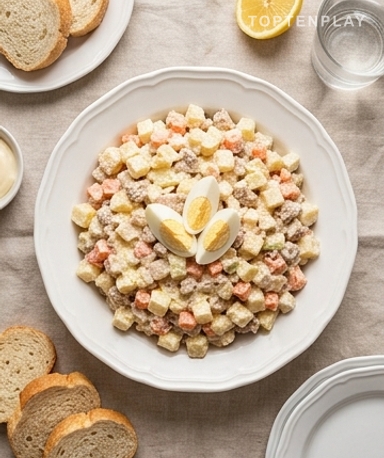
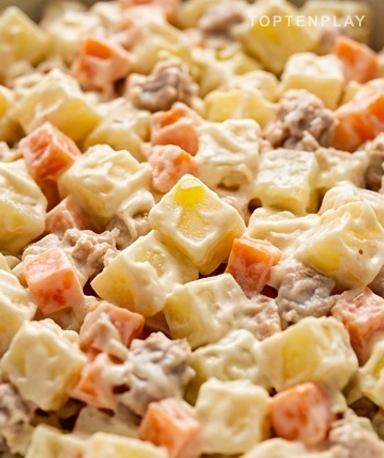
In the bowl, it has that creamy hue with orange flecks of carrot and pieces of tuna that almost melt into the mayonnaise. The potato cubes are dense, each piece well coated. When you dip the spoon in, the resistance is light — it holds together, but yields easily. A sweet, slightly tangy smell that brings back memories of family meals.
Why you’ll love this recipe
Ingredient Notes
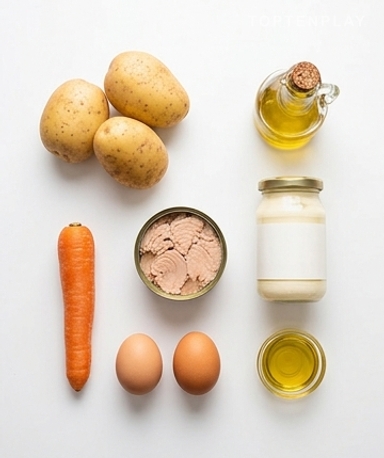
All the simple ingredients that make this salad: tuna, eggs, potatoes, carrot, and a good mayonnaise.
- Potatoes : Choose Charlotte or Amandine — waxy varieties. They hold their shape after cooking and don’t get smashed during mixing. Floury varieties, like Bintje, give a texture close to mashed potatoes, which isn’t what we want here.
- Canned tuna : In brine rather than oil. Tuna in oil makes the salad too greasy when you add the mayonnaise on top. Drain it well, flake it with a fork for a light and consistent texture.
- Mayonnaise : 350 ml is generous. Stir it in gradually — you adjust the consistency to your liking. Homemade mayo really changes the result. A good store-bought mayo works perfectly well too.
- Olive oil : 50 ml added before the mayo. It lubricates the ingredients, binds them slightly, and prevents the mayonnaise from clumping all at once.
- Eggs : Hard-boiled, 10 minutes from boiling — not a minute more, otherwise the yolk gets greyish around the edges. Run them immediately under cold water as soon as they come out of the pot.
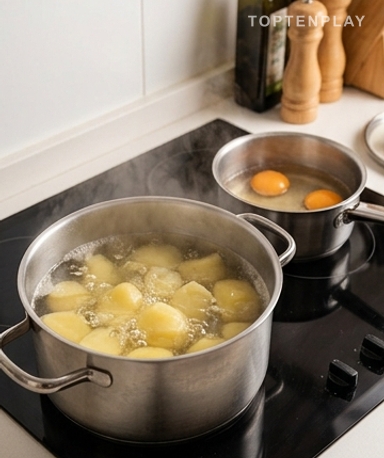
Put the potatoes in cold water, not hot water
Start cold: potatoes in the large pot, covered with salted cold water, gradually brought to a boil. It cooks more evenly than a direct plunge into boiling water. Count 20 to 25 minutes depending on the size of the pieces. Meanwhile, cook the diced carrot in a separate small pot — 10 minutes is enough, it should remain slightly firm to the bite. The eggs too in their own pot: cold water, boil, 10 minutes. Three burners on at the same time, and everything finishes roughly together.
Don’t touch anything while it’s still hot
This is where many people rush. Hot potatoes smash easily and absorb the mayo too quickly, making everything heavy. Drain, peel while still warm — it’s easier — but wait until everything is truly cooled before assembling. Lay the potato dice flat on a large plate, not piled in a bowl: they cool down much faster that way. The carrot and eggs too. Half an hour at room temperature is enough.
Incorporate the mayonnaise in several stages, with a wooden spoon
In the large bowl, start by mixing the potatoes, carrot, flaked tuna, and eggs with the olive oil. Use wide motions, from bottom to top, without crushing. Then stir in the mayo in three or four additions. The texture changes with each addition: first grainy, then gradually creamy, until every piece is coated in a glossy, uniform layer. Taste and salt at the end — the tuna is already quite salty.
Leave it in the fridge for at least an hour — that’s when it all comes together
Cover the bowl and slide it into the refrigerator. The cold firms up the mayonnaise slightly, the flavors really mingle, and the carrot finishes softening gently without losing its shape. One hour minimum. Two hours is better. The next morning is perfect. When you take out the bowl, the surface is smooth, a slightly golden white like a very pale caramel — the mayonnaise has taken on an almost silky consistency. Mix one last time before serving.
Tips & Tricks
- Cut your cubes to about 1 cm, no larger. Pieces that are too big make the salad hard to eat with a spoon and the mayo won’t coat them properly.
- If you prepare the salad the day before, keep 2 spoons of mayo aside. It absorbs a bit while resting in the fridge — add them just before serving to get the right consistency back.
- A generous pinch of salt in the potato cooking water really changes the final taste — they absorb the salt during cooking, not just on the surface.
How long does Russian salad keep in the refrigerator?
It keeps for 2 to 3 days in an airtight container in the fridge. Beyond that, the mayonnaise starts to release water and the potatoes soften. Never leave it at room temperature for more than 2 hours.
Can I prepare Russian salad the day before?
Yes, and it’s even recommended — it’s better after a night in the fridge. Just keep 2 tablespoons of mayonnaise aside: the salad absorbs some while resting, so add it at serving time to restore the right consistency.
Why is my Russian salad watery?
It’s almost always a temperature issue: the vegetables were still warm when you added the mayonnaise. Heat makes the ingredients sweat and destabilizes the emulsion. Let everything cool completely at room temperature before assembling.
What can I substitute for tuna?
Shredded cooked chicken works very well — the result is more neutral but just as filling. Peeled shrimp provide a more festive version. If you want a fully vegetarian salad, drained and slightly mashed chickpeas do the trick.
Can I freeze Russian salad?
No. Mayonnaise and potatoes do not handle freezing well — upon thawing, the mayo breaks and the vegetables become spongy. Prepare it in small batches rather than trying to store it long-term.
How do I prevent the potatoes from smashing when mixing?
Two things: choose a waxy variety (Charlotte, Amandine) and mix with wide motions from bottom to top, never stirring vigorously. If you use a wooden spoon, you control the pressure better than with a rigid spatula.
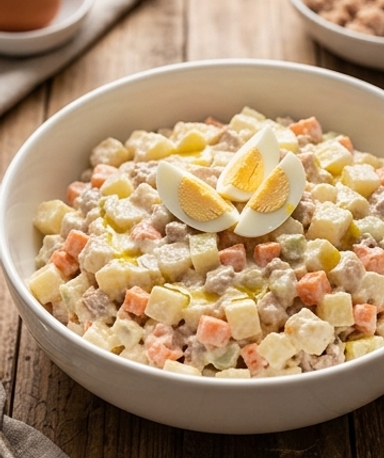
Tuna Russian Salad
International
Starter
A creamy and generous salad made with potatoes, tuna, carrots, and mayonnaise. Simple to prepare, even better after a night in the fridge.
Ingredients
- 500g waxy potatoes (Charlotte or Amandine)
- 1 carrot (about 100g)
- 2 eggs
- 150g canned tuna in brine, drained (1 can)
- 350ml mayonnaise
- 50ml olive oil
- 1 tsp salt (+ cooking water)
Instructions
- 1Place the whole potatoes in a large pot of cold salted water. Bring to a boil and cook for 20 to 25 minutes, until a knife enters easily. Drain, peel while warm, and cut into cubes of about 1 cm.
- 2Peel and cut the carrot into small cubes. Cook in a pot of boiling salted water for 10 minutes — it should be tender but still slightly firm. Drain.
- 3Place the eggs in a pot of cold water, bring to a boil, and cook for 10 minutes. Cool immediately under cold water, peel, and cut into small pieces.
- 4Drain the tuna thoroughly and flake it with a fork to obtain a light texture.
- 5Let all ingredients cool to room temperature, then combine them in a large bowl. Add the olive oil and mix gently.
- 6Incorporate the mayonnaise in three additions, mixing with wide motions from the bottom up. Taste and adjust salt.
- 7Cover the bowl and refrigerate for at least 1 hour before serving, ideally 2 hours or overnight.
Notes
• Storage: 2 to 3 days in the refrigerator in an airtight container. If prepared in advance, keep 2 spoons of mayo aside to add just before serving.
• Variations: add cooked peas, minced pickles, or green olives for more character.
• Texture key: never assemble while hot — the vegetables must be completely cooled before adding the mayonnaise.
Nutrition Facts (per serving, estimated)
| 580 kcalCalories | 11gProtein | 17gCarbs | 50gFat |