Who said crispy breading took hours? Homemade chicken strips take 35 minutes from start to finish — and the local fast-food version can’t compete. This is the kind of recipe you make on a Tuesday night without even thinking about it.
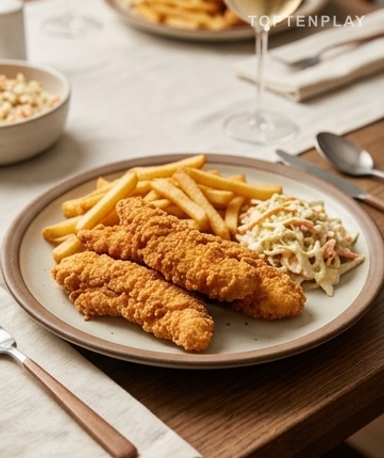
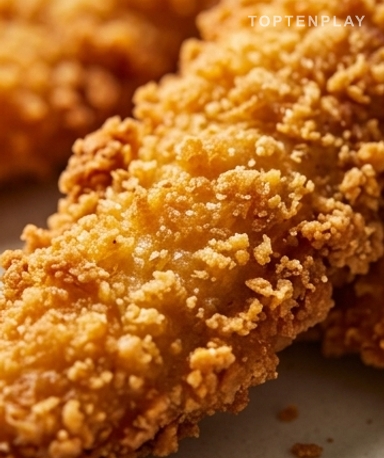
Imagine the sound. That sharp crunch when your tooth pierces the breading, dry and precise, like compressed sand. The crust is a light caramel color — not burnt, just right. Inside, the chicken remains tender, still juicy, with that slight steam escaping as you cut it. The smell of smoked paprika filling the kitchen as soon as they start searing is what gets people off the couch.
Why you’ll love this recipe
Ingredient Notes
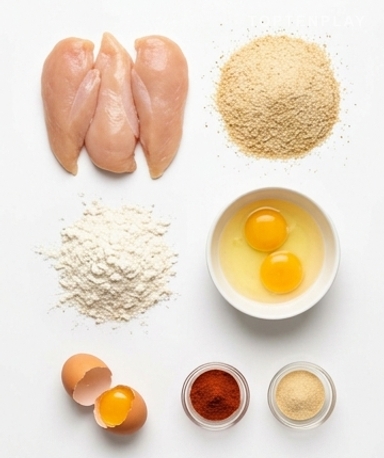
All the ingredients for crispy chicken strips: simple, effective.
- Chicken breast : Get thick fillets, not thin cutlets that dry out in two seconds. Cut them yourself into 2 cm wide strips — this thickness allows the meat to cook at the same time the breading browns. Too thin, and it cooks before it colors. Too thick, and it’s the opposite.
- Panko breadcrumbs : This is where it all happens. Classic breadcrumbs give a stuck-on, dense, slightly soft breading. Panko — found in the world food or organic aisle in most supermarkets — creates an airy texture that really crunches. If you can’t find it, ordinary breadcrumbs work, but the result will be significantly less crispy.
- Smoked paprika : Not the mild paprika powder that’s been sitting in the cupboard since 2019. Smoked paprika, called pimentón, is what gives that reddish-orange color and that slightly smoky background that you can’t quite identify but notice when it’s missing.
- Cornstarch : A tablespoon in the flour. It’s the little addition that keeps the breading crispy even after cooling — it absorbs the moisture rising from the chicken to the crust. Not mandatory, but you will taste the difference.
- Eggs : At room temperature if you can — they spread better over the chicken and help the breadcrumbs adhere better. Two eggs are more than enough for four servings.
Cut the strips to 2 cm — no more, no less
Dry the chicken fillets well with paper towels before starting. A damp surface means breading that slides and won’t stick. Then cut each fillet lengthwise into regular strips about 2 cm thick. Regular is the key word — if some are 1 cm and others 4, they won’t cook at the same pace and you’ll end up with dry strips next to strips still pink in the center. Season the chicken directly with salt and freshly ground black pepper. No need for more at this stage.
Season the breadcrumbs, not just the flour
Mix the flour with cornstarch, a good pinch of salt, pepper, and half a teaspoon of garlic powder. In the bowl of panko breadcrumbs, that’s where you put the rest of the spices — smoked paprika, dried oregano, a pinch of Cayenne pepper if you want depth without too much heat. Many people only season the flour, which leads to bland breading on the surface. By mixing the spices into the panko, they stay visible on the final crust and flavor every bite. The smell coming from the seasoned breadcrumb bowl is already a good sign.
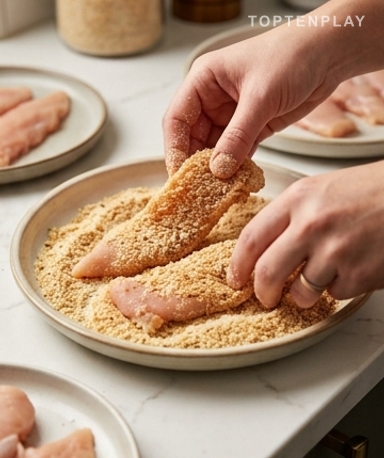
Follow the order: flour, egg, panko
Three bowls in front of you. Flour on the left, beaten eggs in the center, panko on the right. In that order and not the reverse. Pass each strip through the flour, tapping it to remove the excess — a thin layer is enough, not a coat. Dip it in the egg, let the excess drip off for two seconds, then roll it in the panko, pressing firmly with your fingers to make it stick. You should feel the breadcrumbs slightly crushing against the meat. Place the coated strips on a plate, without overlapping, and let them rest for 5 minutes before cooking — this sets the breading.
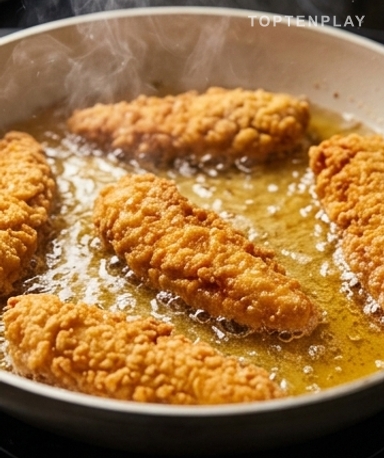
Cook over medium-high heat and flip only once
Heat a layer of neutral oil in a large skillet — the oil must be hot before putting anything in. To check, a small piece of breadcrumb should sizzle immediately on contact. Place the strips without crowding them, leaving space between each — an overloaded pan lowers the temperature and the strips steam rather than fry. Three minutes without touching them. Flip only once when the bottom has taken that precise amber color, between caramel and light mahogany. Another 3 minutes on the other side. The breading should sound hollow when tapped lightly — a sign that the crust is well-formed and the inside is cooked.
Tips & Tricks
- Place the first cooked strips on a rack in an oven at 80°C while you cook the next ones — never in aluminum foil, which traps steam and softens everything you just managed to make crispy.
- If you want to bake them in the oven instead of a pan, preheat to 220°C fan, place the strips on an oiled rack (not directly on the tray), and flip them halfway through. It takes 20 minutes instead of 6, but it’s hands-free.
- Breading sticks better to cold chicken — if you have time, let the coated strips rest for 10 minutes in the fridge before cooking. The difference is real.
Can chicken strips be cooked in the oven instead of a pan?
Yes, and it’s a good option if you want to cook a large quantity at once. Preheat the oven to 220°C fan, place the strips on a slightly oiled rack (not directly on the tray), and flip them halfway through. Count on about 18-20 minutes total — the breading will be slightly less golden than in a pan, but the result is still very good.
How to keep the breading crispy the next day?
Absolutely avoid the microwave, which softens everything in 30 seconds. Reheating in the oven at 180°C on a rack for 8-10 minutes is enough to get almost all the crunch back. Aluminum foil is a no-go too — it traps steam.
Can chicken strips be frozen?
Yes, in two ways. Either you freeze the raw coated strips (on a tray, then in a bag) and cook directly without thawing, adding 4-5 minutes of cooking time. Or you freeze the already cooked strips and reheat them in the oven at 200°C. The first option gives better results for texture.
Is panko really indispensable?
Not indispensable, but the difference is real. Classic breadcrumbs give a denser and softer breading. If that’s all you have, it works — but toast the breadcrumbs for 2 minutes dry in a pan before using them to lightly brown them and gain a little crispiness.
Why does my breading fall off during cooking?
Two possible causes: the chicken was too damp before coating (it must be dried well with paper towels), or the oil wasn’t hot enough at the start and the strips stuck to the pan. Oil at the right temperature sears the breading immediately and forms a crust that releases naturally.
What sauces to serve them with?
Homemade garlic mayo remains unbeatable (mayo + grated garlic + lemon). Otherwise: honey mustard, barbecue sauce, or simply ketchup. For a spicier version, a 30-second honey-sriracha sauce — a spoonful of each, that’s it.
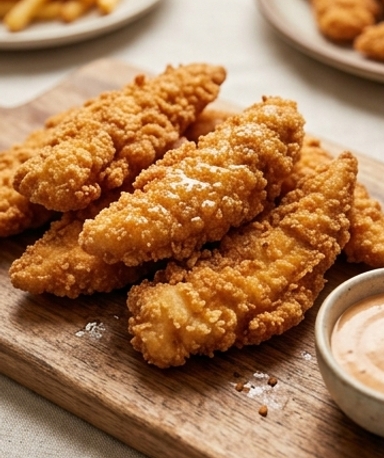
Super Crispy Homemade Chicken Strips
American
Main course
Chicken strips coated in spiced panko, crispy on the outside and juicy on the inside. Ready in 35 minutes.
Ingredients
- 600g chicken fillets (thick breasts)
- 150g panko breadcrumbs
- 80g wheat flour
- 10g (1 tbsp) cornstarch
- 2 eggs
- 2 tsp smoked paprika (pimentón)
- 1 tsp garlic powder
- 1 tsp dried oregano
- 1 pinch Cayenne pepper (optional)
- 1 tsp fine salt
- ½ tsp ground black pepper
- 6-8 tbsp neutral oil (sunflower or grapeseed)
Instructions
- 1Dry the chicken fillets with paper towels, then cut them lengthwise into strips about 2 cm thick.
- 2Prepare three bowls: (1) flour + cornstarch + salt + pepper + garlic powder; (2) beaten eggs; (3) panko + smoked paprika + oregano + Cayenne pepper + a pinch of salt.
- 3Coat each strip in the flour, tapping off excess, then in the egg letting it drip, then in the panko, pressing with your fingers to adhere well.
- 4Place coated strips on a plate without overlapping and let rest for 5 minutes at room temperature.
- 5Heat 3-4 mm of oil in a large skillet over medium-high heat until a crumb sizzles immediately on contact.
- 6Place the strips without crowding and cook for 3 minutes without touching, until the bottom is light caramel color.
- 7Flip once and cook another 3 minutes on the other side. Work in two batches if the pan is too small.
- 8Drain on a rack or paper towels and serve immediately with the sauce of your choice.
Notes
• Storage: 2 days in the refrigerator in an airtight container. Reheat in the oven at 180°C on a rack (8-10 min) — never in the microwave.
• Freezing: raw coated strips can be frozen on a tray, then in a bag. Cook directly from frozen, adding 4-5 minutes of cooking time.
• Oven variation: 220°C fan, 18-20 minutes on an oiled rack, flipping halfway through.
Nutrition Facts (per serving, estimated)
| 490 kcalCalories | 40gProtein | 43gCarbs | 14gFat |