Sweet cheese balls are underrated. Seriously underrated. You place this in the center of the table, hand out some crackers, and the conversation stops — because everyone is eating.
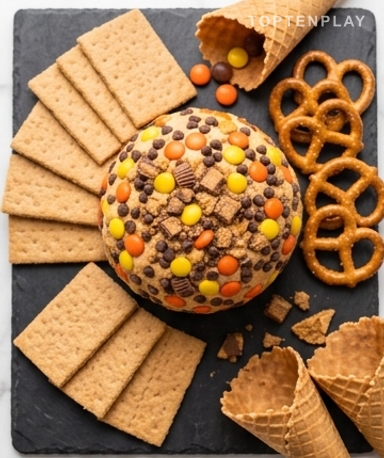
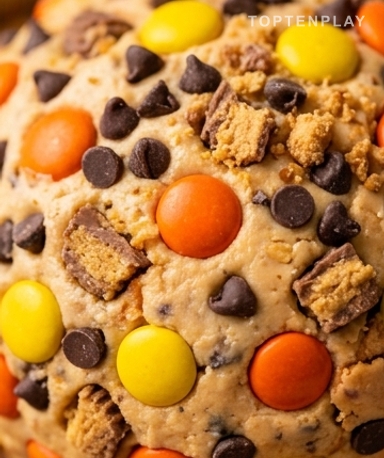
The ball is covered in a mosaic of small orange, yellow, and brown candies that catch the light like confetti. Press the surface lightly with your fingertip: it resists just enough, then gives way to a creamy, almost melting interior. The smell of peanut butter rises immediately — rich, slightly sweet, with that chocolate undertone that reminds you of the Reese’s bars you ate as a child. It tastes exactly like that, but in a dessert-to-share version.
Why you’ll love this recipe
Ingredient Notes
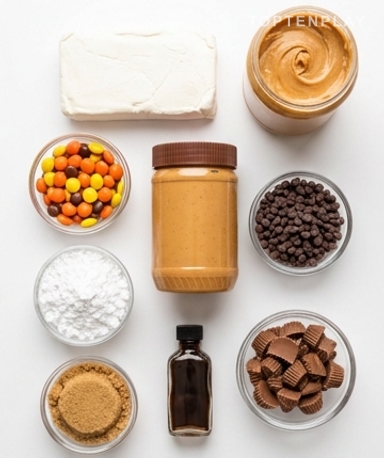
Cream cheese, peanut butter, and a mountain of Reese’s: all the culprits gathered before the crime.
- Cream cheese : 240g, one standard block. Full fat only — original Philadelphia, not the low-fat version. The light version makes the dough too runny and it won’t hold its shape. Take it out of the fridge at least an hour before: cold cream cheese results in impossible-to-smooth lumps.
- Creamy peanut butter : Use classic industrial peanut butter — like Skippy or equivalent — not natural. Natural versions have unstable oil content that can make the dough greasy and difficult to work with. The goal here is a smooth, homogeneous texture.
- Reese’s Pieces : These are the small orange, yellow, and brown lenticular candies — not the Reese’s Cups. The Cups are crushed to be incorporated into the dough and the coating. If you can’t find them easily, peanut butter M&Ms work very well.
- Icing sugar : It sweetens, yes, but above all, it absorbs moisture from the cream cheese and stabilizes the dough. Sift it before adding — one minute of work that avoids unpleasant little white lumps.
- Mini chocolate chips : Mini chips incorporate better than classic ones because they distribute more evenly throughout the mass. Preferably dark or semi-sweet: the cream cheese and peanut butter are already very sweet, so a slightly bitter chocolate balances everything well.
Starting the dough
In a large bowl, place the softened cream cheese and peanut butter. Beat them together — by hand with a sturdy spatula, or with an electric mixer if you prefer — until you get a perfectly smooth mass with no visible white streaks. Then add the sifted icing sugar and brown sugar, followed by the vanilla. The texture at this stage should be smooth, slightly sticky, with that sweet, buttery scent filling the kitchen. Taste it. Adjust the sugar if needed — some peanut butters are already very sweet.
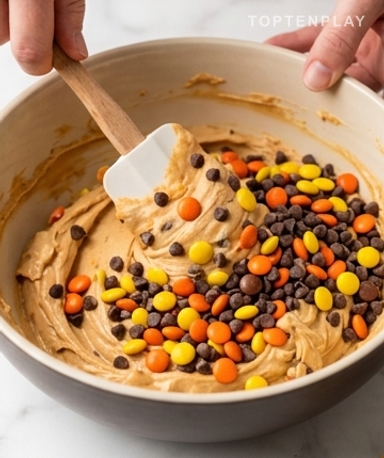
Incorporating the colorful chaos
Pour the Reese’s Pieces, chocolate chips, and crushed peanut butter cups into the bowl. Fold them in with a spatula, not the mixer — the goal is to distribute them without crushing them. You’ll see the little orange and yellow candies sink into the cream dough, bright spots marbling the whole thing like confectionery. A few turns of the spatula are enough. Resist the urge to overmix.
And now, patience
Spread a large square of plastic wrap on the work surface. Scoop the dough into a mound in the center — don’t try to shape it here, it’s still too soft. Fold the edges of the wrap over and start rolling to form a sphere. Under your hands, the dough resists slightly, elastic and rich through the plastic. Place the wrapped ball in the refrigerator for at least an hour, two hours is even better. It needs to be firm, almost hard to the touch, to handle the coating step without collapsing.
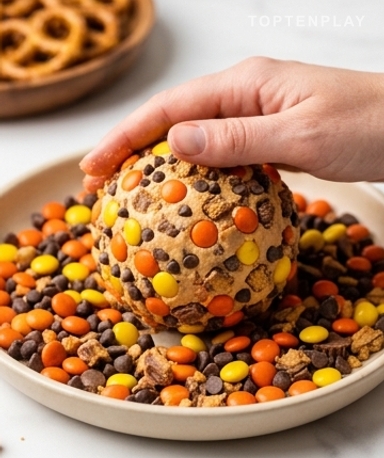
The candy shell
In a shallow dish, mix the Reese’s Pieces, chocolate chips, and crushed peanut butter cups reserved for the coating. Unwrap the cold ball and place it directly into the mixture. Roll it while pressing firmly — the candies embed themselves into the cold dough with a satisfying little ‘click’ at each press, and the surface gradually takes on that colorful orange, brown, and yellow globe look. Transfer to a serving platter and let it rest for twenty minutes at room temperature before calling everyone over.
Tips & Tricks
- Don’t skip the room temperature rest before serving. A ball straight out of the fridge is too hard — crackers will break, and people will get frustrated. Twenty minutes on the counter and the texture becomes perfectly creamy again.
- For a neat coating, make sure the ball is very cold when you roll it in the candies. If it starts to soften while you’re working, pop it in the freezer for five minutes.
- This ball freezes very well without its coating. Two layers of plastic wrap, up to one month in the freezer. Thaw overnight in the fridge, add the coating just before serving.
Can I prepare this cheese ball several days in advance?
Yes, and it’s actually recommended. The ball can be prepared up to 48 hours in advance, wrapped in plastic wrap without the coating. Add the candy coating on the day, just before serving, so it stays crunchy.
How long do leftovers keep?
Cover the started ball with plastic wrap and store in the refrigerator for up to 4 days. The texture remains good, although the coating candies may soften slightly after 24 hours in contact with the moist dough.
Can I use natural peanut butter?
It is not recommended. Natural peanut butter has variable oil content which unbalances the texture of the dough and can make it too greasy or too runny to hold a ball shape. Stick with a classic industrial version, smooth and homogeneous.
The dough is too soft and won’t hold a ball shape — what should I do?
Increase the refrigeration time: two hours in the fridge, or 30 minutes in the freezer if you’re in a hurry. If the dough remains very soft despite the cold, your cream cheese was probably too liquid — next time, drain it slightly on paper towels before using.
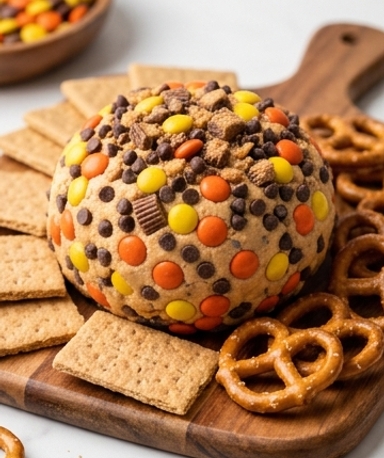
What should I serve this cheese ball with besides Graham crackers?
Thick pretzels work very well — the salt creates a nice contrast with the sweetness of the dough. Broken waffle cones, apple slices, or shortbread cookies are also excellent. Avoid thin or flaky crackers that break as soon as you apply pressure.
Can I freeze this cheese ball?
Yes, without the coating. Wrap the ball in two layers of plastic wrap and freeze for up to one month. Thaw for a full night in the refrigerator, then roll it in the candy mix just before serving.
Reese’s Style Chocolate Peanut Butter Cheese Ball
American
Dessert
A no-bake shared dessert made from cream cheese and peanut butter, covered in a crunchy shell of Reese’s Pieces and chocolate chips.
Ingredients
- 240g full-fat cream cheese, softened at room temperature
- 130g (½ cup) creamy peanut butter (Skippy style, not natural)
- 60g (½ cup) sifted icing sugar
- 55g (¼ cup) packed brown sugar
- 1 tsp vanilla extract
- 130g (1 cup) Reese’s Pieces (mini candies)
- 85g (½ cup) mini dark chocolate chips
- 75g (½ cup) crushed peanut butter cups (optional)
- 40g (¼ cup) extra Reese’s Pieces — for coating
- 40g (¼ cup) extra mini chocolate chips — for coating
- 40g (¼ cup) extra crushed peanut butter cups — for coating
Instructions
- 1Beat together the softened cream cheese, peanut butter, sifted icing sugar, brown sugar, and vanilla until a perfectly smooth, lump-free paste is obtained.
- 2Gently fold in the Reese’s Pieces, chocolate chips, and crushed peanut butter cups with a spatula in a few turns, without overmixing.
- 3Place the dough on a large square of plastic wrap, fold over the edges and form a smooth ball by rolling. Refrigerate for at least 1 hour, until the ball is firm.
- 4In a shallow dish, mix the coating ingredients. Unwrap the cold ball and roll it in the mixture, pressing firmly to make the candies stick to the entire surface.
- 5Transfer to a serving dish. Let rest for 20 minutes at room temperature before serving with Graham crackers, thick pretzels, or broken waffle cones.
Notes
• Prepare the ball up to 48h in advance without the coating, wrapped in the fridge. Add the candy coating on the day for maximum crunch.
• Keeps for 4 days in the refrigerator well wrapped. Can be frozen for up to 1 month without coating — thaws overnight in the fridge before finishing.
• Nut-free version possible: replace peanut butter with sunflower seed butter and Reese’s Pieces with classic M&Ms.
Nutrition Facts (per serving, estimated)
| 395 kcalCalories | 8gProtein | 38gCarbs | 24gFat |