
We often imagine fudge as a finicky confection, requiring a thermometer, hot sugar, and precise movements. In reality, this version is made with a bowl, a spatula, and a few minutes of gentle heat. The result is truly comforting: dense, chocolaty, almost creamy to the bite.
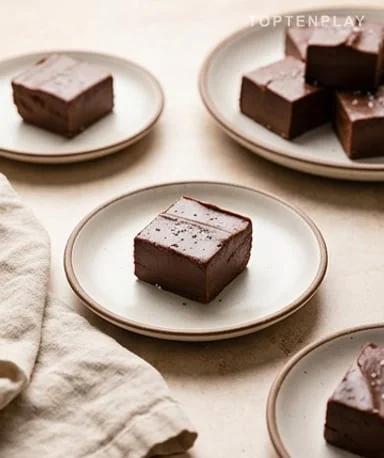
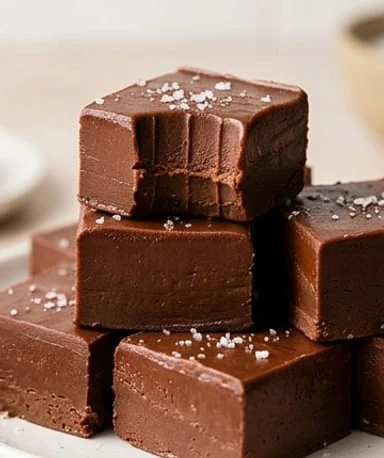
The melted chocolate becomes shiny, thick, almost satiny when mixed with condensed milk. You immediately smell that warm cocoa scent, round and reassuring, that lingers in the kitchen. Once cut, the fudge gives dark squares, clean on the edges but tender in the center. It’s the kind of bite that melts slowly, with a texture between firm truffle and chocolate caramel.
Why you’ll love this recipe
Ingredient Notes
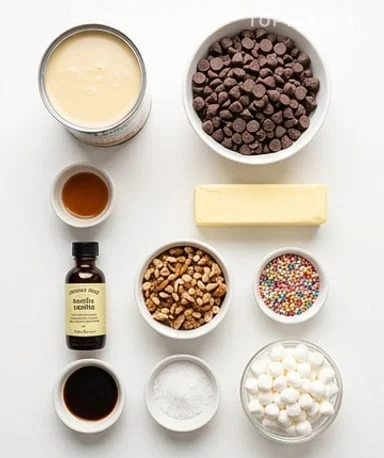
Sweetened condensed milk, chocolate chips, butter, and alcohol-free vanilla: the base is short, so the chocolate must be good.
- Sweetened condensed milk : It provides the sugar, creaminess, and structure of the fudge, so do not replace it with regular milk. Use a thick can and pour it all in, scraping the sides with a spatula to keep the right proportion.
- Semi-sweet chocolate chips : They form the solid base of the fudge and give its main flavor. For a less sweet and more intense result, replace part of the chips with dark chocolate (60-70% cocoa) chopped.
- Butter : It softens the texture and gives a smoother, almost velvety finish. Use unsalted butter if you want to control the salt yourself, or a small pinch of extra salt if your chocolate seems too round.
- Vanilla extract (alcohol-free) : It rounds out the chocolate taste without stealing the show. Vanilla powder or alcohol-free vanilla flavor works very well, especially if you want a clean, sweet flavor.
- Toppings : Nuts, sprinkles, sea salt, or mini marshmallows add contrast in a very melty bite. Cut large additions fairly small, otherwise the fudge breaks unevenly and loses its neat square shape.
Prepare the pan
Before melting the chocolate, line a square pan with parchment paper, leaving overhang. This detail seems trivial, but it avoids having to scrape a stuck fudge block, which would ruin the clean corners. The paper should be well pressed into the corners because the mixture comes out thick and heavy, with a shiny ganache look. When everything is ready next to you, you can work quickly without panicking.
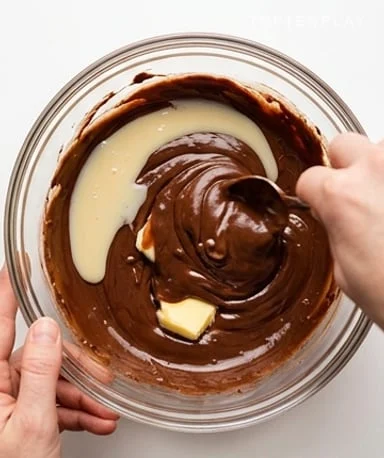
Melt gently
Put the condensed milk, chocolate chips, and butter in a microwave-safe bowl or a saucepan over very low heat. Heat in short bursts, stirring between each, until you get a smooth, dark, shiny mass. If you heat too much, the chocolate can become grainy and lose its silkiness. The right signal is a spatula that leaves a thick trail before the mixture slowly closes.
Mix without delay
Add the alcohol-free vanilla off the heat, then stir vigorously to incorporate. At this point, the fudge already starts to thicken, and you feel resistance under the spatula. If you want to add nuts or mini marshmallows, do it now, but without turning the bowl into a topping salad. The chocolate must remain the center of the game, dense, warm, and fragrant.
Spread and smooth
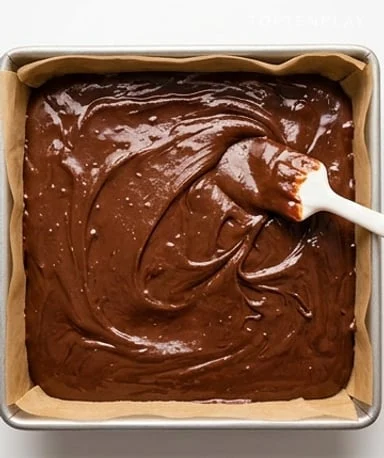
Pour the mixture into the prepared pan and push it into the corners with a spatula. The surface won’t be liquid like cake batter: it settles, wrinkles a bit, then becomes smooth if you run the spatula at a slight angle. Add a pinch of sea salt on top if you want to awaken the chocolate and break the sweetness. This small contrast gives a cleaner, less heavy bite.
Let set
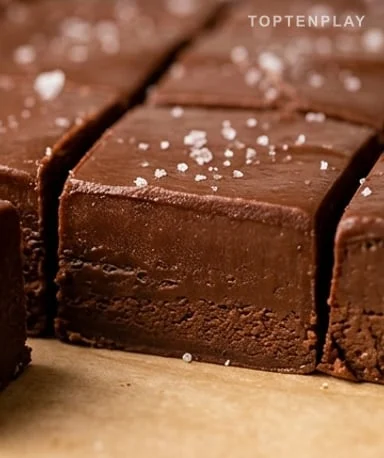
Place the pan in the fridge until the fudge is firm to the touch, usually around two hours. It should resist under the finger while keeping a slight give, like a well-chilled truffle. To cut it cleanly, lift the block with the parchment paper and use a long knife, wiped between cuts. The squares will be prettier, with clean edges and a very fudgy center.
Tips & Tricks
- Heat in short bursts and stir often, because chocolate burns quickly and then becomes dry, dull, and grainy.
- Use parchment paper with overhanging edges, because the fudge becomes firm after resting and unmolds much better as a block.
- Lightly salt the top if the result seems very sweet, because salt awakens the cocoa and makes each bite less monotonous.
- Let the fudge sit at room temperature for a few minutes before serving, because cold hardens the texture and masks some of the chocolate flavor.
Why is my fudge grainy?
The chocolate was probably heated too high or too long. Melt in short bursts and stir often to keep a smooth and shiny texture.
How long should the fudge set?
About 2 hours in the refrigerator to get nice clean squares. If it’s still too soft in the center, let it rest 30 minutes more before cutting.
Can I make this fudge without a microwave?
Yes, use a saucepan over very low heat or a double boiler. The mixture must melt slowly, without boiling, to stay creamy.
How can I make the fudge less sweet?
Replace some of the semi-sweet chips with dark chocolate at 60 or 70% cocoa. A small pinch of sea salt on top also helps balance the sweetness.
How to store chocolate fudge?
Keep it in an airtight container in the refrigerator for 5 to 7 days. For a softer texture, take the squares out 5 to 10 minutes before serving.
Quick Chocolate Fudge
American
Dessert
A dense, melty chocolate fudge that’s very easy to make with sweetened condensed milk, chocolate, and a little butter. Perfect when you want a real comfort food bite without getting into complicated candy making.
Ingredients
- 397g sweetened condensed milk
- 510g semi-sweet chocolate chips
- 30g unsalted butter
- 1 tsp vanilla powder or alcohol-free vanilla extract
- 40g chopped nuts, sprinkles, or mini marshmallows, optional
- 1 pinch sea salt, optional
Instructions
- 1Line an 8-inch (20 cm) square pan with parchment paper, leaving overhang.
- 2Put sweetened condensed milk, chocolate chips, and butter in a microwave-safe bowl.
- 3Heat in 30-second bursts, stirring each time, until smooth and shiny.
- 4Add vanilla powder or alcohol-free vanilla extract, then stir quickly.
- 5Fold in toppings if desired, without overmixing.
- 6Pour into the pan, smooth the surface with a spatula, and add a pinch of sea salt if desired.
- 7Refrigerate for about 2 hours until firm.
- 8Unmold using the parchment paper, cut into 24 squares, and serve chilled or slightly at room temperature.
Notes
• For a less sweet fudge, replace 150g of semi-sweet chips with chopped dark chocolate.
• Avoid overheating the chocolate: too much heat can make the fudge grainy.
• Wipe the knife between cuts for cleaner squares.
• Store fudge in an airtight container in the refrigerator for 5-7 days.
Nutrition Facts (per serving, estimated)
| 155 kcalCalories | 2gProtein | 21gCarbs | 8gFat |