Pizza dough, in the collective imagination, is a baker’s thing — yeast, six-hour rise, millimetric timing. This recipe contradicts all that with two ingredients and fifteen minutes of work. The weekend is precisely the time to discover that some culinary truths are mostly habits.

The dough comes out of the bowl a little lumpy, almost disappointing to the eye. But after about ten minutes of kneading, it completely changes character: supple, slightly elastic, with a satiny surface that just sticks to the palms without being tacky. Baking at 260 °C makes the edges puff up, brown quickly, and the kitchen fills with that smell of very hot oven mixed with melted cheese. No yeast, no waiting — just chemistry working for you.
Why you’ll love this recipe
Ingredient Notes
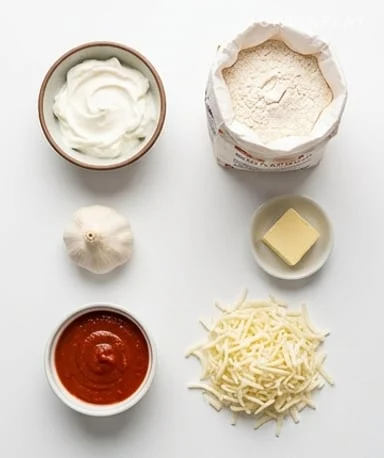
Whole Greek yogurt and self-raising flour: that’s all you need for the dough. The rest is the topping.
- Self-raising flour : The central ingredient of the recipe. It already contains salt and baking powder, replacing baker’s yeast. Can’t find it in your cupboard? Mix 240 g plain flour with 1.5 tsp baking powder and a quarter tsp salt — identical result.
- Whole or 2% Greek yogurt : The fat from whole yogurt gives a softer dough and a slightly rounder flavor. 0% yogurt technically works, but the texture is firmer and drier — less pleasant to work with and slightly less tasty once baked.
- Butter and garlic : One tablespoon of melted butter with one finely chopped garlic clove, sautéed for 30 to 60 seconds over medium-high heat — just long enough for the garlic to release its aroma without browning or becoming bitter.
- Pizza tomato sauce : No more than 3 to 4 tablespoons spread in a thin layer. A sauce that is too thick or too runny softens the dough during baking and gives a soggy center.
- Shredded mozzarella : Preferably shredded yourself: block mozzarella melts better, stretches more, and isn’t coated with anti-caking starch like the pre-packaged industrial version.
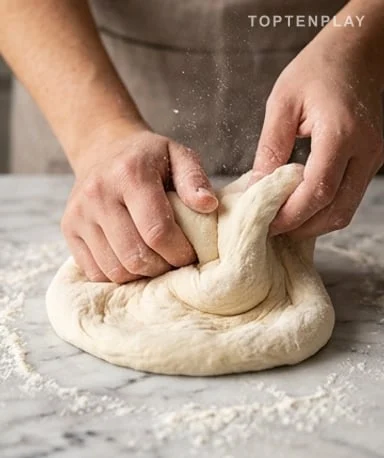
Kneading is the only effort in the recipe
Let’s not lie: the first two minutes are thankless. The dough resists, tears in places, remains sticky in patches. That’s normal. Keep going, folding the dough over itself and pressing with the palm, steadily, without stopping. After five minutes, something changes — it begins to smooth out, yielding under your fingers rather than pushing back. At ten minutes, it’s supple, slightly extensible, and its surface is almost silky. That’s when you know it’s ready. Not before.
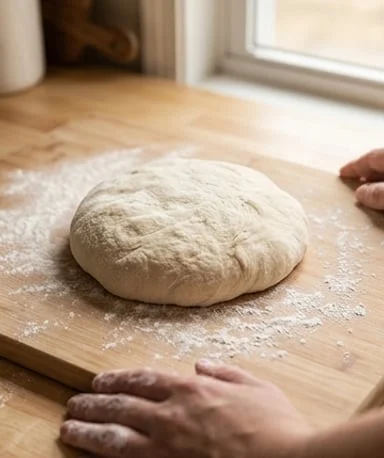
Spread by hand, not with a rolling pin
A rolling pin crushes the few air bubbles that formed during kneading. Fingers, on the other hand, let you feel resistance and adjust thickness in real time — press more at the center, leave the edges thicker so they puff up nicely when baked. The dough shrinks slightly as you work. If it’s too pronounced, let it rest under a towel for five minutes: it will then spread without forcing.
The oven at 260 °C, no compromise on heat
This dough has no yeast to give it height — it’s the intense heat that creates bubbles and browns the surface quickly. At 180 °C, the result is pale and rubbery. At 260 °C, in 10 to 14 minutes, the edges brown, the cheese develops small golden spots, and the underside of the dough cracks slightly when you lift a slice. Preheat the oven at least 20 minutes in advance so that the baking sheet itself is hot before loading the pizza.

Tips & Tricks
- If the dough sticks too much during kneading, add flour one spoonful at a time — not all at once, or you risk a dough that is too dry and cracks when spreading.
- Let the dough rest for 5 minutes covered with a towel after kneading: it will be more docile to spread and the edges will hold up better during baking.
- Brush the garlic butter starting from the edges and moving toward the center — this prevents the edges from drying out without flavor during baking.
- To check doneness, gently lift a corner of the pizza with a spatula: the underside should be golden and slightly firm, not white and soft.

Can I replace self-raising flour with plain flour?
Yes, no problem. Mix 240 g plain flour with 1.5 tsp baking powder and a quarter tsp salt — the result is strictly identical. It’s actually useful to know this substitution if you make the recipe often, because plain flour is cheaper.
Does 0% fat Greek yogurt give the same result?
It works, but the dough is slightly drier and a bit less supple to work with. Full-fat or 2% gives a softer texture and a rounder flavor — if you have the choice, go with that.
Is this crust really comparable to a traditional yeast dough?
It is different, not identical. The yogurt dough is slightly denser and less alveolated than a risen dough, but it has real chew and crisps nicely on the edges. For an everyday pizza made in 30 minutes, it’s a serious alternative — not a makeshift substitute.
Can I prepare the dough in advance?
Yes, the kneaded dough can be stored in the refrigerator for up to 48 hours, covered tightly with plastic wrap to prevent a skin from forming. Simply take it out 15 minutes before spreading so it returns to room temperature and regains its suppleness.
Can I freeze this dough?
Absolutely. After kneading, shape into a ball, wrap well in plastic wrap, and freeze for up to one month. The day before use, let it thaw overnight in the refrigerator, then at room temperature for 20 minutes before spreading.
What if the dough remains too sticky despite kneading?
Add flour one spoonful at a time, no more at once, continuing to knead between each addition. If you add too much at once, the dough becomes dry and cracks when spreading — better to go gradually.
Quick 2-Ingredient Pizza Dough (No Yeast)
Italian
Pizza
A pizza dough without yeast, no rising time, made only of Greek yogurt and self-raising flour. Soft inside, crispy on the edges — ready to top in 15 minutes.
Ingredients
- 240g self-raising flour (or 240g plain flour + 1.5 tsp baking powder + ¼ tsp salt)
- 245g whole or 2% Greek yogurt (about 1 cup)
- 1 garlic clove, finely chopped
- 15g butter
- 80ml pizza tomato sauce (about 4 tbsp)
- 120g shredded mozzarella (about 1 cup)
- 1 tbsp extra flour for the work surface
Instructions
- 1Preheat the oven to 260 °C (500 °F) with the rack on the bottom. Heat for at least 20 minutes.
- 2In a large bowl, add the flour and Greek yogurt. Mix with a spatula or your hands until a rough, lumpy dough forms.
- 3Turn the dough out onto a lightly floured work surface. Knead energetically for 8 to 10 minutes, folding and pressing with the palm, until the dough is smooth, supple, and slightly elastic. Add flour one spoonful at a time if it sticks too much.
- 4Cover the dough with a clean towel and let rest for 5 minutes.
- 5Spread the dough with your fingers into a circle about 30 cm in diameter, keeping the edges slightly thicker. Transfer to a pizza pan or a lightly oiled baking sheet.
- 6Melt the butter in a small saucepan over medium-high heat. Add the chopped garlic and sauté for 30 to 60 seconds, stirring, until fragrant.
- 7Brush the entire surface of the dough with the garlic butter, starting from the edges.
- 8Spread the tomato sauce in a thin layer over the entire surface, leaving a 1 cm border.
- 9Distribute the shredded mozzarella evenly.
- 10Bake for 10 to 14 minutes, until the edges are golden brown and the cheese is melted with a few slightly colored spots.
- 11Let rest for 2 minutes before cutting and serving.
Notes
• For a version without self-raising flour: mix 240g plain flour + 1.5 tsp baking powder + ¼ tsp salt.
• 0% yogurt works but gives a drier dough — prefer whole or 2% for better texture.
• The raw dough freezes for up to 1 month. Thaw in the refrigerator overnight, then 20 minutes at room temperature before spreading.
• Do not use too much tomato sauce: a thin layer is enough to prevent a soggy center.
Nutrition Facts (per serving, estimated)
| 390 kcalCalories | 19gProtein | 51gCarbs | 11gFat |