
Coconut smells sweet as soon as you open the bag, with that milky fragrance that makes you want to lick the spatula. This no-bake coconut pie keeps the classic spirit, but in a direct, cold, and frankly practical version.
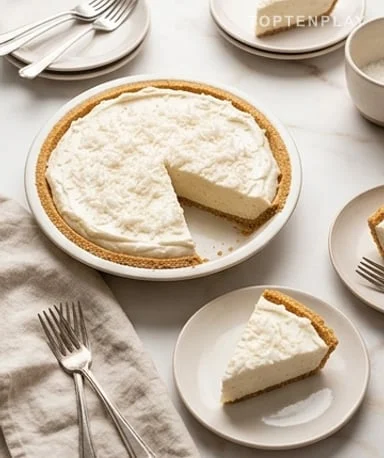
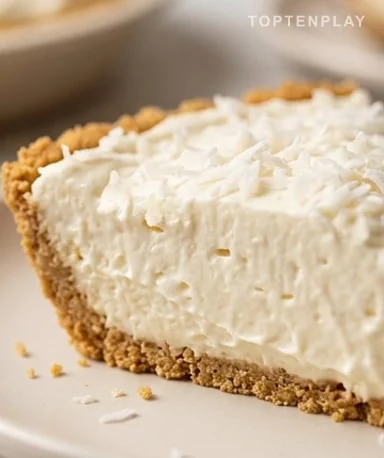
The cream is supple, almost satiny, then it firms up after a few hours in the fridge. The biscuit base crunches slightly under the knife, just enough to contrast with the fluffy filling. You get the simple taste of family pies, no oven on, no complicated dough, with a coconut scent that lingers on your fingers.
Why you’ll love this recipe
Ingredient Notes
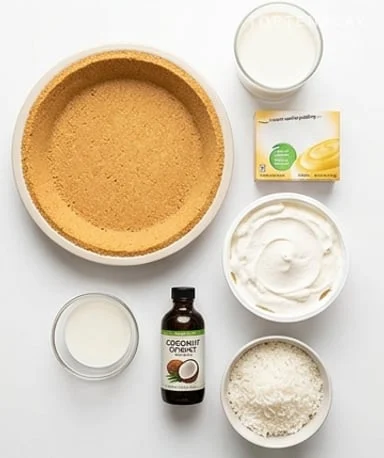
Few ingredients, but you mainly need instant pudding, whipped topping, and a good amount of shredded coconut.
- Biscuit pie crust : It provides the crunch and that toasted flavor that balances the cold cream. Choose a firm crust, not too crumbly, to avoid it falling apart when serving.
- Cold milk : It loosens and activates the pudding base. Use it well chilled, straight from the fridge, to help the cream thicken quickly and stay neat.
- Instant vanilla pudding : It’s the shortcut that sets the pie without baking. The vanilla softens the coconut, but a coconut pudding gives a more direct flavor if you want a bolder pie.
- Whipped topping : It gives the creamy, light, and fresh mouthfeel. Fold it gently with a spatula to keep air in the cream, not with a vigorous whisk.
- Shredded coconut : It flavors the filling and adds a fine texture. If very dry, rub it between your fingers before adding to break up clumps.
- Coconut extract : It boosts the flavor without adding extra liquid. Go easy, as a few drops are enough to give a clear, sweet scent.
Mix the base
Pour the cold milk into a large bowl, then add the instant pudding. With the first whisks, the powder disappears and the cream begins to thicken, with a sweet vanilla scent rising from the bowl. Whisk enough to get a smooth texture, without dry grains on the sides. If you’re using coconut extract, add it now, as it will distribute better in this still-liquid base. The cream should coat the whisk but remain fluid enough to accept the rest without forming lumps.
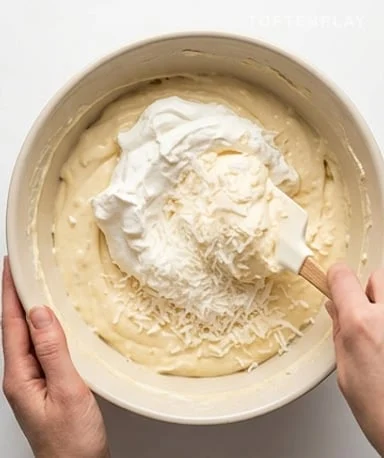
Lighten the cream
Add the whipped topping in several batches, using a wide spatula. The motion really matters here: lift the cream from the bottom to the top, turn the bowl, repeat. You should see the mixture pale and take on a fluffier texture, like a cold cream with soft waves on the surface. If you mix too vigorously, it will still taste good but be less airy. This is when the pie gains its fresh, light quality, the one that melts on the tongue rather than sticking to the palate.
Add the coconut
Fold in the shredded coconut when the cream is already homogeneous. It should be evenly distributed, not form a dry pile in the center of the bowl. With the spatula, you immediately feel the resistance change: the cream becomes a bit more textured, with those little coconut flecks that catch slightly. Taste a bit if needed. If the flavor seems too subtle, add a tiny touch of extract, but keep a light hand. A successful coconut pie should smell of coconut, not remind you of an overpowering perfume.
Fill and smooth
Place the cream into the biscuit pie crust, starting from the center. Spread toward the edges without pressing like you’re troweling a wall, otherwise the crust might crack and crumbs rise into the filling. Smooth the top with the back of a spoon or spatula, leaving small waves if you like the homemade look. The surface should be glossy, thick, almost silky. Add a little shredded coconut on top to hint at the flavor at first glance and give a simple, clean finish.
Chill to set
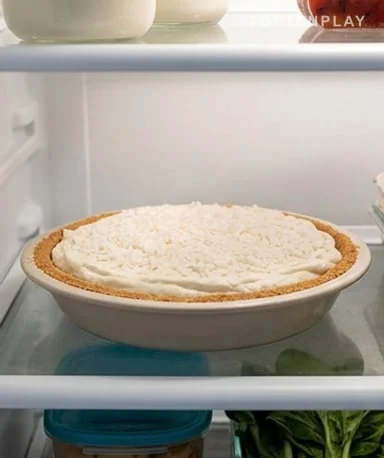
Place the pie in the refrigerator and leave it alone for at least four hours. It’s frustrating, but that’s where the magic happens: the cream firms up, the biscuit base absorbs just enough moisture, and the slice becomes much cleaner. Cover it lightly if your fridge contains strong-smelling foods, as the cold cream quickly picks up odors. When serving, use a thin knife dipped in hot water and wiped. The blade glides better, the edge stays clean, and the slice keeps that contrast between fluffy cream and crunchy crust.
Tips & Tricks
- For a clean slice, respect the resting time. A too-young pie smells good, but the cream collapses and the crust breaks more easily.
- If you want a rounder flavor, lightly toast some of the coconut in a dry pan. It will give a deeper scent and a slight warm biscuit note.
- Keep the pie chilled until serving. At room temperature, the cream softens quickly and loses that fresh feel that makes it so appealing.
- For a more homemade version, replace the whipped topping with a firmly whipped sweetened cream. It will be more delicate, but the flavor will be more milky.
Can I make this no-bake coconut pie the day before?
Yes, it’s even better. The cream has time to firm up in the fridge and the slice will be cleaner the next day.
Can I substitute vanilla pudding with coconut pudding?
Yes, coconut pudding gives a stronger flavor. With vanilla pudding, the pie remains milder and more classic.
How long should I refrigerate it?
At least 4 hours. Less than that, the filling risks being too soft and the slices won’t hold as well.
Can I use homemade whipped cream?
Yes, as long as it’s firmly whipped and lightly sweetened. It will give a fresher taste, but the pie will be a bit more fragile when cutting.
How do I keep the biscuit base from getting too soggy?
Keep the pie well chilled and avoid making it several days in advance. An overnight rest is ideal, but beyond that the crust becomes more moist.
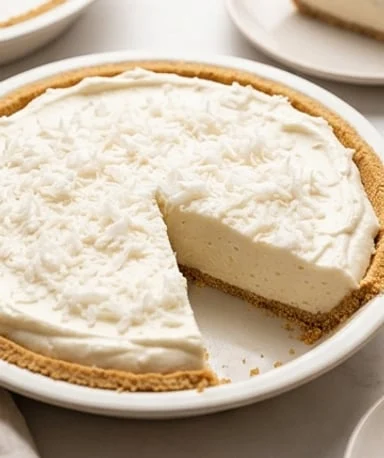
No-Bake Coconut Pie
American
Dessert
A cold, creamy, and very simple pie with a fluffy coconut filling in a biscuit crust. The classic dessert simplified, no oven and ready in minutes.
Ingredients
- 1 piece ready-to-fill biscuit pie crust, about 9 inches (23 cm)
- 360ml cold milk
- 1 box (96g) instant vanilla pudding mix
- 225g cold whipped topping
- 80g sweetened shredded coconut
- 1/2 teaspoon coconut extract
- 15g shredded coconut for topping
Instructions
- 1Pour cold milk into a large bowl, add vanilla pudding mix, and whisk until smooth and slightly thickened.
- 2Add coconut extract, then mix briefly to distribute the flavor.
- 3Fold in whipped topping with a spatula, lifting the cream to keep it light and fluffy.
- 4Add 80g shredded coconut and gently fold until evenly distributed.
- 5Pour filling into the biscuit crust, then smooth the top with the back of a spoon.
- 6Sprinkle with the remaining 15g shredded coconut.
- 7Refrigerate for at least 4 hours before serving, until the pie is well chilled and firm when sliced.
Notes
• For a more intense flavor, use coconut instant pudding instead of vanilla.
• The pie keeps for 2 days in the refrigerator, well covered.
• For cleaner slices, cut with a thin knife dipped in hot water and wiped.
Nutrition Facts (per serving, estimated)
| 310 kcalCalories | 4gProtein | 34gCarbs | 18gFat |