The cream cheese has been sitting on the counter for an hour, softening gently under your finger — that’s the beginning. No oven to preheat, no timer to watch. These cheesecake cups are the dessert you make when you want to treat everyone without complicating your life.
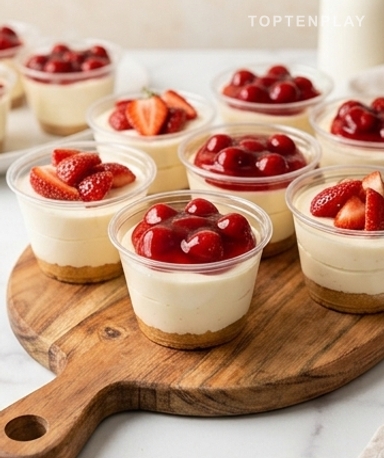
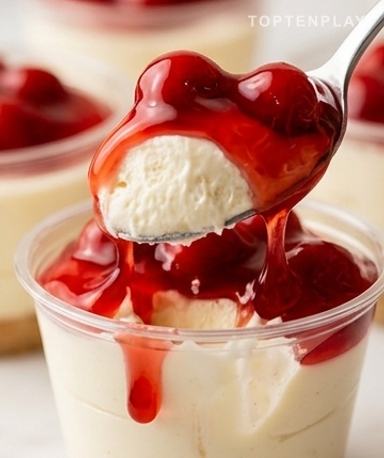
Imagine the scene: a small transparent cup, and through the plastic, the layers stack up. The off-white of the cream, dense and silky. Then the deep red of a cherry coulis that shines like fresh lacquer. A spoon goes in and it resists just enough before giving way — that texture between light mousse and classic cheesecake, fresh, melting, with that biscuit base that has softened and sticks gently to the palate.
Why you’ll love this recipe
Ingredient Notes
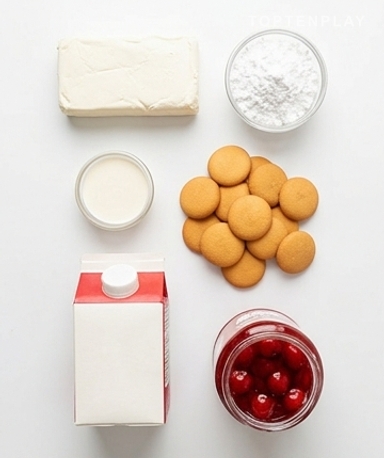
All the simple ingredients to make these no-bake cheesecake cups.
- Cream cheese : Get a whole block, not the low-fat version or the spreadable fresh cheese in a tub. Classic Philadelphia does the job perfectly. The key: it must be completely softened at room temperature. A cold block will create lumps that the mixer won’t catch, even with five extra minutes.
- Heavy cream : It must come out of the fridge at the last moment, very cold. A cream with 30-35% fat whips correctly and holds its shape over time. Low-fat versions don’t make worthy whipped creams — avoid them.
- Vanilla wafers : The original recipe uses American vanilla wafers which aren’t found everywhere. Shortbread, Petit-Beurre, or Spritz cookies do exactly the same job. The idea: the biscuit will soften in contact with the cream during refrigeration and become melting, not crunchy — that’s intentional.
- Fruit topping : Canned cherries in syrup, slightly sweetened fresh strawberries, or homemade lemon curd. One rule: place it on the cream just before serving if you want visually sharp layers. Otherwise, the juice migrates into the white and everything gets tinted.
- Cornstarch : Half a teaspoon in the whipped cream might seem trivial. Yet it changes everything regarding stability: the cream stays firm for several hours in the fridge without collapsing. A detail that makes the difference when preparing in advance.
The base is the cream cheese
Your cream cheese yields under your finger without resistance. That’s a good sign — it’s ready. Beat it alone with an electric mixer for two good minutes, until it becomes white and smooth like soft modeling clay, without a single lump. Add the powdered sugar and vanilla, and continue beating. The smell changes then: it smells like birthday cake even before turning on the oven. Set the bowl aside.
The whipped cream, don’t rush it
Cold bowl, cold whisk, cold cream. Start the mixer at low speed for one minute — the cream starts to take on a slightly thick texture, almost like condensed milk that resists. Add the cornstarch at this stage, not before. Then whip at full power. When the whisk leaves tracks that no longer close and the cream holds a firm peak on the inverted whisk, it’s ready. Not a second more.
Assembly, step by step
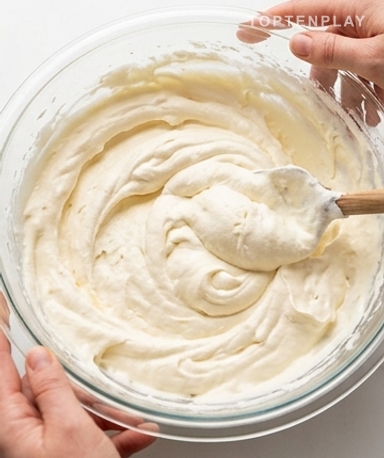
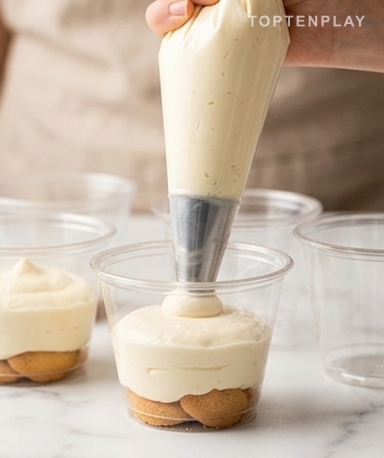
Fold the whipped cream into the cream cheese mixture with a spatula, lifting the mass rather than mixing. You want to keep the air you just trapped in the cream — if you beat it, you lose everything. One biscuit in the bottom of each cup. Then fill with a piping bag if you have one, or a spoon if you don’t care about the presentation. Leave a centimeter free at the top.
And now, patience
Minimum one hour in the fridge. Two or three is better. A whole night is perfect: the cream sets, the bottom biscuit soaks through and becomes melting, almost moist, with that vanilla flavor spreading through the whole cup. At the moment of serving — and not before — add the topping. The cherries in syrup shine a dark red, almost burgundy. It’s the only slightly spectacular moment of the recipe.
Tips & Tricks
- Don’t skip the step of softening the cream cheese. Minimum thirty minutes on the counter, one hour is better. A cold block results in lumpy cream that five extra minutes of mixing won’t fix.
- To freeze these cups — because they freeze very well — do it without the fruit topping. Take them out the day before, let them thaw overnight in the fridge, and add the topping just before serving.
- If you want perfect layers for photos, use a piping bag and a smooth round tip. The result is sharp, clean, without cream on the edges — it takes thirty seconds longer and changes everything about the presentation.
Can I prepare these cups the day before?
Yes, and it’s even recommended. A night in the refrigerator allows the cream to set well and the bottom biscuit to soften into a melting layer. Just add the fruit topping at the last moment for clean layers.
How long do they keep in the fridge?
Up to 5 days in closed cups or covered with plastic wrap. The texture remains good, but if you’ve added the fruit topping, the juice may slightly migrate into the cream after 2-3 days.
Can they be frozen?
Very well, for up to 2 months — without the fruit topping. Simply thaw them for a full night in the refrigerator before serving, then add the topping just before going to the table.
What can I replace vanilla wafers with if I don’t have any?
A Petit-Beurre, a Breton shortbread, a Spritz, or even an Oreo (without the cream if you want a less sweet base) work very well. The goal is to have a biscuit that softens in contact with the cream during refrigeration.
How to avoid lumps in the cream?
The cream cheese must be entirely softened at room temperature — minimum 30 minutes, 1 hour is better. A cold block will not beat correctly, even with a powerful mixer and lots of patience.
What toppings other than fruit work well?
Homemade or store-bought lemon curd, gooey salted butter caramel, slightly cooled melted chocolate, or simply fresh cut fruit (strawberries, mango, kiwi). Always add the topping at the last minute to prevent it from making the cream soggy.

No-Bake Cheesecake Cups
American
Dessert
Ultra-creamy no-bake cheesecake cups with a melting shortbread base and a fruity topping. Ready in 15 minutes, perfect for a make-ahead dessert.
Ingredients
- 450g cream cheese (Philadelphia type), softened at room temperature
- 120g powdered sugar (about 1 cup)
- 1 tsp vanilla extract
- 240ml cold heavy cream (30-35% fat)
- ½ tsp cornstarch
- 16 vanilla wafers (or Petit-Beurre, shortbread cookies)
- 400g canned fruit topping (cherries, strawberries, or blueberries)
Instructions
- 1Beat the softened cream cheese with an electric mixer until perfectly smooth, about 2 minutes.
- 2Add powdered sugar and vanilla extract, beat until fully incorporated. Set aside.
- 3In a cold bowl, beat the heavy cream at low speed for 1 minute, then add the cornstarch.
- 4Increase to maximum speed and beat for 3 to 4 minutes until firm peaks form.
- 5Gently fold the whipped cream into the cream cheese mixture using a spatula, lifting the mass without breaking the mousse.
- 6Place one wafer at the bottom of each cup, then fill with cheesecake cream up to 1 cm from the rim.
- 7Refrigerate for at least 1 hour, ideally overnight.
- 8Place the fruit topping on each cup just before serving.
Notes
• Storage: up to 5 days in the refrigerator in covered cups. Can be frozen for 2 months without the topping.
• Make ahead: prepare the cups the day before without the topping. The cream sets better and the biscuit softens perfectly overnight.
• For a cleaner and faster filling, use a piping bag with a smooth round tip.
Nutrition Facts (per serving, estimated)
| 240 kcalCalories | 3gProtein | 22gCarbs | 16gFat |