
In winter, when meals linger around the table, this molten chocolate cake becomes the perfect dessert. It’s one of those recipes you pull out for a romantic dinner or a gathering with friends—ones that make it look like you’ve spent hours in the kitchen. The reality is much simpler than that.
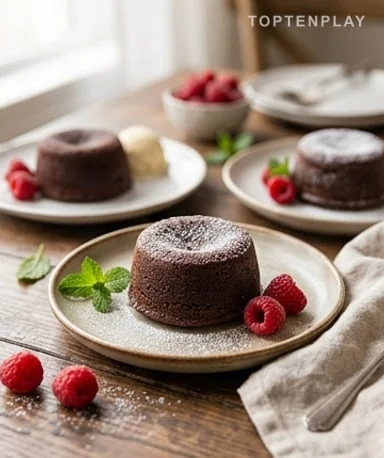
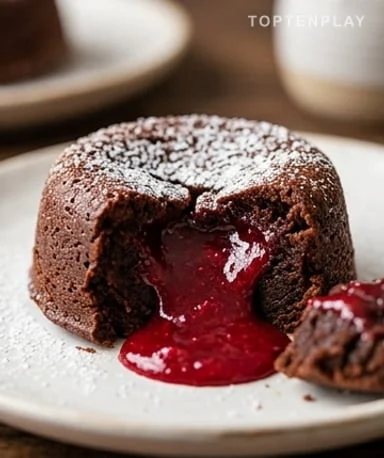
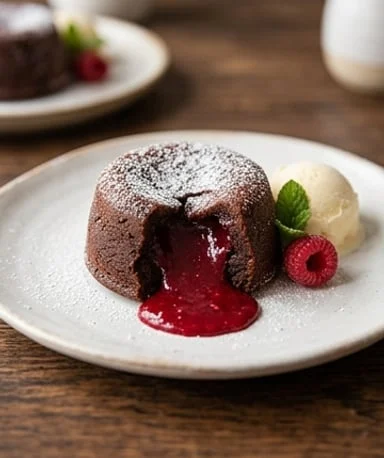
When cut, the raspberry coulis slowly escapes, brilliant and ruby red, against the dark chocolate crust. The aroma arrives well before the first bite—warm cocoa, slightly buttery, with a fruity undertone that gently tingles the nostrils. The texture plays on two fronts: a slight resistance under the spoon, then the immediate melting of the center. It’s this precise contrast that makes this dessert unforgettable.
Why you’ll love this recipe
Ingredient Notes
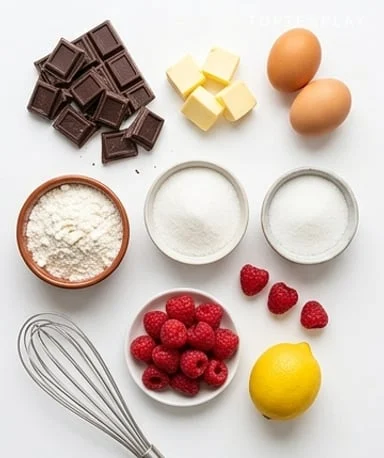
Dark chocolate, fresh raspberries, butter, eggs, flour: simple ingredients for a result that always impresses.
- Dark baking chocolate : At least 60% cocoa. This gives the dessert its character. Low-quality chocolate will result in a flat, overly sweet outcome—this is not the time to skimp on this ingredient.
- Raspberries : Fresh in season, frozen the rest of the year—both work perfectly for the coulis. Frozen ones even provide a more consistent result because they are picked at peak ripeness.
- Butter : It goes into the batter and is used to grease the molds. No substitute here: butter provides a roundness on the palate that nothing can replace in a chocolate fondant.
- Whole eggs : Briefly whisked with sugar before incorporating the slightly cooled melted chocolate. If the chocolate is too hot when added, the eggs will cook on contact—that’s the only real mistake to avoid.
- Flour : Only 50g. That’s little, and it’s intentional. Too much flour kills the fudginess—you end up with an ordinary chocolate cake instead of a molten one.
The center to prepare the day before
This is the step done in advance, and it’s what makes the recipe so convenient. The raspberries cook for a few minutes with sugar and a splash of lemon juice: they quickly break down, releasing a tangy-sweet aroma and turning the saucepan a vibrant red. Blend, strain through a sieve to remove seeds, and pour into small silicone molds or an ice cube tray. Two hours in the freezer is enough. Any leftover coulis can be kept in the fridge to drizzle over plates when serving.
The batter, without complicating things
Melt the chocolate with the butter—in a double boiler if you’re patient, in the microwave in 30-second bursts if you prefer speed. Stir until smooth, slightly shiny, almost silky. Then let it cool for a few minutes—this is important. Add the eggs whisked with sugar, then finally the flour, without overmixing. The batter should be homogeneous and dense, not aerated—we’re not trying to make anything rise.
Assembly: a single gesture, not a technique
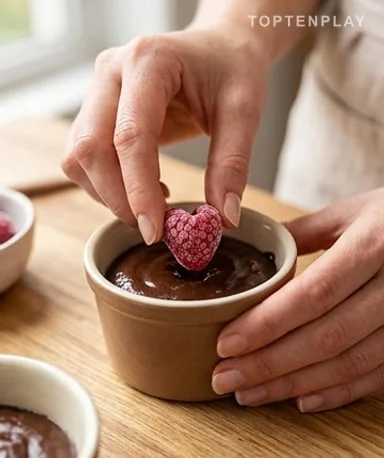
Well-buttered ramekins, or silicone molds if you prefer clean unmolding. Fill halfway with chocolate batter, place the frozen insert in the center, pressing lightly so it sinks in, then cover with the remaining batter. The center must be completely enveloped—if it’s too close to the surface, the coulis will leak out during baking and the effect will be lost. At this point, the assembled cakes can wait several hours in the refrigerator before baking.
The baking that makes all the difference
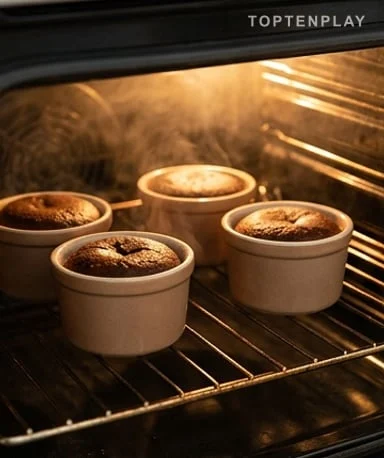
200°C, 12 minutes. No more. The top should look just set, still slightly jiggly in the center—that’s exactly what we’re aiming for. If the edges are well baked and the center still gives slightly under the pressure of a spoon, it’s a good sign. The cake continues to cook for a few seconds out of the oven. Wait two minutes before unmolding, no longer: served too cold, it loses that comforting warmth that makes all the difference on the palate.
Tips & Tricks
- Do a test cake before the meal if it’s your first time. Open it, check the texture of the center, adjust the baking time by 30 seconds if necessary—every oven is different.
- Vanilla ice cream is not a mere accessory: the temperature contrast between the cold cream and the hot center really amplifies the sensation of the runny core.
- If using metal molds instead of silicone, reduce the baking time by one minute—they conduct heat faster than silicone.
Can you prepare the cakes in advance?
Yes, and it’s even recommended. The raspberry inserts can be frozen up to a week in advance, and the assembled cakes (batter + center) can be kept in the refrigerator for several hours before baking. On the day of the meal, simply take them out of the fridge 10 minutes before baking.
How do you know when the baking is done?
The top of the cake should look just set and slightly jiggly in the center. If the edges are well baked and the center still gives a little under gentle pressure, it’s time to take them out. The first time, nothing beats a test cake: open it, check, and adjust the next baking.
Can I use frozen raspberries for the center?
Absolutely—frozen raspberries work just as well as fresh for the coulis, even better outside of season. They are picked at full ripeness and give consistent results year-round. No need to thaw them before cooking.
Can I replace raspberries with another fruit?
Yes. Tart red fruits work well: sour cherries, blackcurrants, redcurrants. Acidity is what balances the richness of the chocolate—avoid overly sweet fruits like strawberries or mango, which would make the dessert cloying. The frozen center technique remains the same regardless of the fruit compote chosen.
What if the center doesn’t flow when cut?
The center was baked too long. Reduce the baking time by 1 to 2 minutes on your next attempt. Also ensure the insert was well frozen at the start—a barely frozen center will cook through during the 12 minutes.
How do you unmold cleanly without breaking the cake?
Generously butter the molds before pouring the batter, and wait 2 minutes out of the oven before unmolding—no longer. Silicone molds make unmolding easy without risky handling. If using ceramic ramekins, a thin knife run around the edges is enough to loosen the cake.
Molten Chocolate Cake with Raspberry Center
French
Dessert
A dark chocolate cake with a slightly crispy crust and a runny center of raspberry coulis. The fruit’s acidity cuts through the depth of the cocoa—a dessert that impresses every time, prepared with less than 30 minutes of active work.
Ingredients
- 200g dark baking chocolate (min. 60% cocoa)
- 120g butter, plus extra for the molds
- 100g granulated sugar
- 3 whole eggs
- 50g sifted flour
- 1 pinch salt
- 150g fresh or frozen raspberries
- 30g granulated sugar (for the coulis)
- 1 tsp lemon juice
Instructions
- 1Cook the raspberries with 30g sugar and lemon juice over low heat for 5 minutes. Blend, strain through a sieve, then pour into small silicone molds or an ice cube tray. Freeze for at least 2 hours.
- 2Preheat the oven to 200°C. Generously butter the ramekins or molds.
- 3Melt the broken chocolate with the butter in a double boiler or microwave in 30-second bursts. Stir until smooth and shiny. Let cool for 5 minutes.
- 4In a bowl, whisk the eggs with 100g sugar until slightly frothy. Add the slightly cooled melted chocolate and mix.
- 5Add the sifted flour and salt. Mix just enough to combine—do not overwork.
- 6Fill each mold halfway with batter. Place a frozen coulis insert in the center, pressing lightly, then cover with the remaining batter. The center must be completely enveloped.
- 7Bake for 12 minutes. The top should look just set and the center slightly jiggly. Let rest for 2 minutes out of the oven before unmolding.
- 8Unmold onto a plate and serve immediately, optionally with a scoop of vanilla ice cream or fresh raspberries.
Notes
• Total time includes 2 hours of freezing the inserts, which can be prepared up to 1 week in advance.
• Every oven is different: the first time, sacrifice a test cake to check the baking and adjust by 30 seconds if necessary.
• Assembled (unbaked) cakes can be stored in the refrigerator for up to 6 hours before baking.
• For best results, take the cakes out of the fridge 10 minutes before baking.
Nutrition Facts (per serving, estimated)
| 575 kcalCalories | 7gProtein | 58gCarbs | 35gFat |