It starts with a smell. Cumin heating up in the bottom of the pot, that warm and slightly earthy scent that settles into the whole kitchen. Wendy’s chili, homemade version — no drive-thru required, no complications.
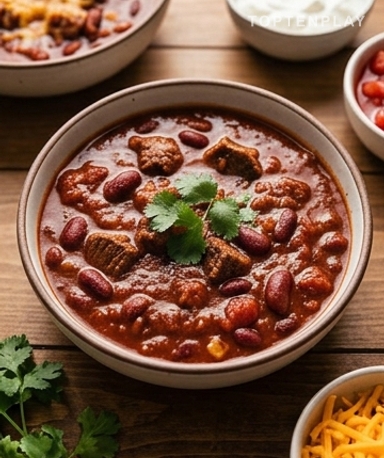
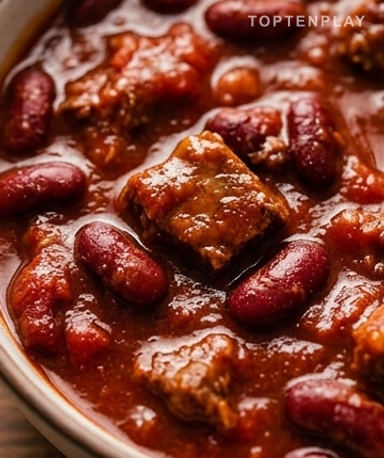
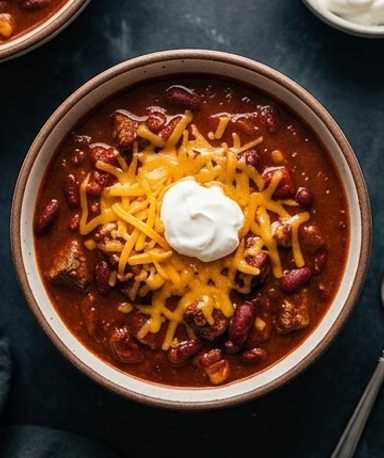
In the bowl, the sauce is a deep red, almost burgundy, with kidney beans surfacing between the chunks of beef. The consistency is thick but not sticky — it clings to the spoon just right. A light steam is still rising. If you had the reflex to add shredded cheddar, it’s already half-melted, forming small pale yellow islands on the dark background.
Why you’ll love this recipe
Ingredient Notes
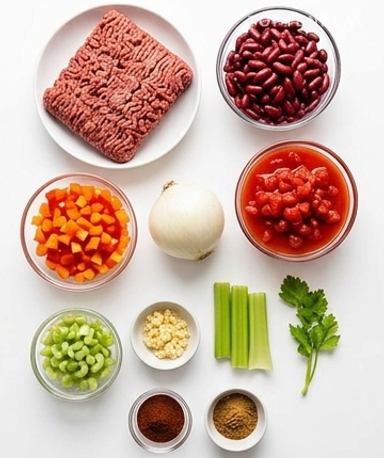
All the chili ingredients together: ground beef, kidney beans, fresh vegetables, and spices.
- Ground beef : Choose at least 15% fat. Beef that’s too lean gets dry and lacks flavor. An 80/20 if you can find it, otherwise the supermarket classic works just fine.
- Canned kidney beans : Rinse them well under cold water — this removes the canning liquid that can make the chili look cloudy. No need for dried beans soaked overnight, let’s be honest.
- Crushed tomatoes + paste : One large can of crushed tomatoes and one small can of tomato paste. The paste is what gives it that deep red color and that rich flavor. Don’t skip it.
- Cumin and chili powder : These are the two spices that make all the difference. Cumin gives it that warm, slightly smoky side, while chili powder brings the progressive heat. Start with the suggested doses, taste, and adjust.
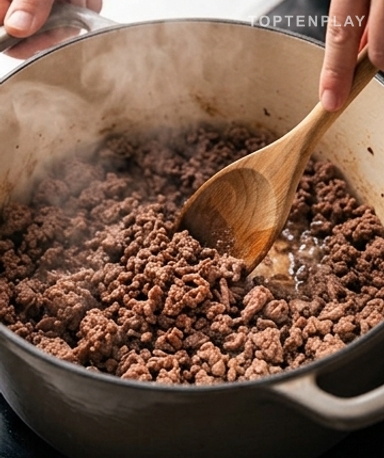
Don’t rush this step: the beef must be truly browned
Heat a drizzle of oil over high heat in your large pot. When you add the beef, you should hear a sharp sizzle — if it’s sizzling softly, it’s not hot enough. Leave the meat untouched for two good minutes. It should take on a dark caramel-brown color on the bottom before you stir. This is where the flavor base of the whole dish is formed. Then crumble it coarsely, not too fine — we want chunks with some bite.
Your vegetables need five minutes, not a second less
Once the beef is browned, lower the heat slightly and add the chopped onion, diced green bell pepper, and celery. Stir regularly. In five minutes, the onion becomes translucent with slightly browned edges, the pepper softens and loses its raw edge — you can smell the sweet aroma being released. This is the exact moment you want. Add the garlic at the very end, for just one minute, otherwise it burns and turns bitter.
Toast the spices for thirty seconds before everything else
Before opening your cans of tomatoes, pour the chili powder and cumin directly onto the meat and vegetables. Cook dry for thirty seconds in the hot bottom of the pot, stirring constantly. This short toasting releases the aromatic oils — the difference is noticeable. Only then, pour in the crushed tomatoes, paste, drained beans, and about 200 ml of water. Scrape the bottom of the pot well with your spoon to release all those flavorful bits.
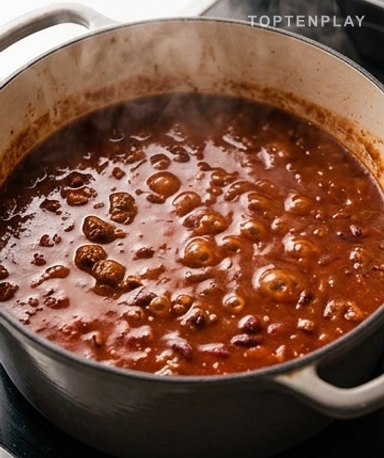
Simmer uncovered — and let it be
Lower to medium-low heat, let it simmer without a lid for 30 to 40 minutes. Without a lid is important: it allows the sauce to reduce and thicken naturally. The surface should have small, steady bubbles, not an aggressive boil. After twenty minutes, the color will have changed — deeper, darker, with almost burgundy reflections. Taste at the end and adjust the salt. If you find it too acidic, half a teaspoon of sugar fixes the problem in thirty seconds.
Tips & Tricks
- Double the recipe and freeze in portions of two — in an airtight container, it keeps for three months. On a busy weeknight, you defrost in the microwave and you’re set.
- Toppings change everything: shredded cheddar, a dollop of sour cream, sliced red onion, a squeeze of lime. Set them aside on the table and let everyone build their own bowl.
- If the sauce is still too thin after 40 minutes, turn up the heat for two minutes while stirring constantly — it thickens very quickly once it’s quite hot.
Can I prepare this chili in advance?
It’s actually recommended. Chili is better after a night in the fridge — the spices meld better and the sauce gains depth. Reheat over low heat with a splash of water if necessary.
How do I thicken a chili that is too liquid?
Remove the lid and turn the heat to medium-high, stirring regularly. In 5 to 8 minutes, the sauce reduces quickly. You can also mash a few beans against the side of the pot — it thickens naturally without adding anything.
Can I freeze this chili?
Perfectly. Wait until it’s completely cooled, then freeze in portions in airtight containers. It keeps for 3 months in the freezer. Defrost in the refrigerator overnight or directly in the microwave.
Can I replace ground beef with something else?
5% fat ground beef works but the chili will be less rich in flavor. Ground turkey is a good lighter alternative — cook it exactly the same way, just slightly less time as it dries out faster.
How to adjust the heat for children?
Halve the chili powder and reduce the cumin to one teaspoon. You can serve with Tabasco on the side for adults. Using red bell pepper instead of green also sweetens the flavor profile.
Can I use black beans instead of kidney beans?
Yes, no problem. Black beans provide a slightly firmer texture and a milder taste. You can also mix both for more texture in the bowl.
Homemade Wendy’s Chili
American
Main course
A thick and flavorful American chili, true to the original version. Ground beef, kidney beans, and spices simmered for an hour in a single pot.
Ingredients
- 500g ground beef (minimum 15% fat)
- 1 can (400g) canned kidney beans, drained and rinsed
- 1 can (400g) crushed tomatoes
- 70g tomato paste (1 small can)
- 1 green bell pepper, finely diced
- 1 medium onion, chopped
- 2 celery stalks, finely diced
- 3 garlic cloves, minced
- 2 tsp chili powder
- 1.5 tsp ground cumin
- 1 tsp sweet paprika
- 200ml water
- 2 tbsp olive oil
- 1 tsp salt
- ½ tsp ground black pepper
Instructions
- 1Heat the oil over high heat in a large pot. Add the ground beef and let it brown without stirring for 2 minutes, then crumble coarsely.
- 2Reduce heat to medium, add the onion, bell pepper, and celery. Cook for 5 minutes, stirring regularly until the onion is translucent.
- 3Add the garlic and cook for 1 additional minute.
- 4Pour the chili powder, cumin, and paprika directly onto the meat. Stir constantly for 30 seconds to toast the spices.
- 5Add the crushed tomatoes, tomato paste, drained beans, and water. Scrape the bottom of the pot well.
- 6Bring to a simmer then let simmer uncovered over medium-low heat for 30 to 40 minutes, until the sauce is thick.
- 7Taste, adjust salt and heat. Serve hot with the toppings of your choice.
Notes
• Storage: 4 days in the refrigerator in an airtight container, or 3 months in the freezer in portions.
• Make ahead: the chili is better reheated the next day — prepare it the day before for optimal results.
• Suggested toppings: shredded cheddar, sour cream, sliced red onion, fresh cilantro, lime wedges.
Nutrition Facts (per serving, estimated)
| 470 kcalCalories | 34gProtein | 33gCarbs | 21gFat |