What if the bread you’ve been dreaming of making for years was finally within reach? Sourdough looks intimidating. It shouldn’t be. Flour, water, salt, and an active starter — that’s all it takes for a loaf that will transform your Sunday morning.
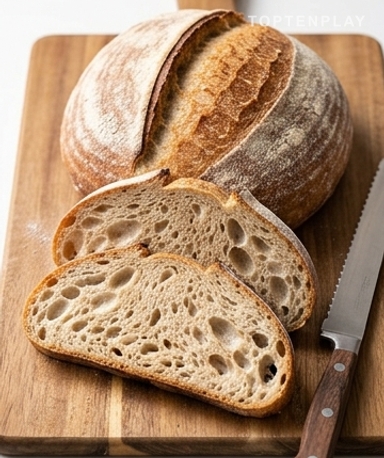
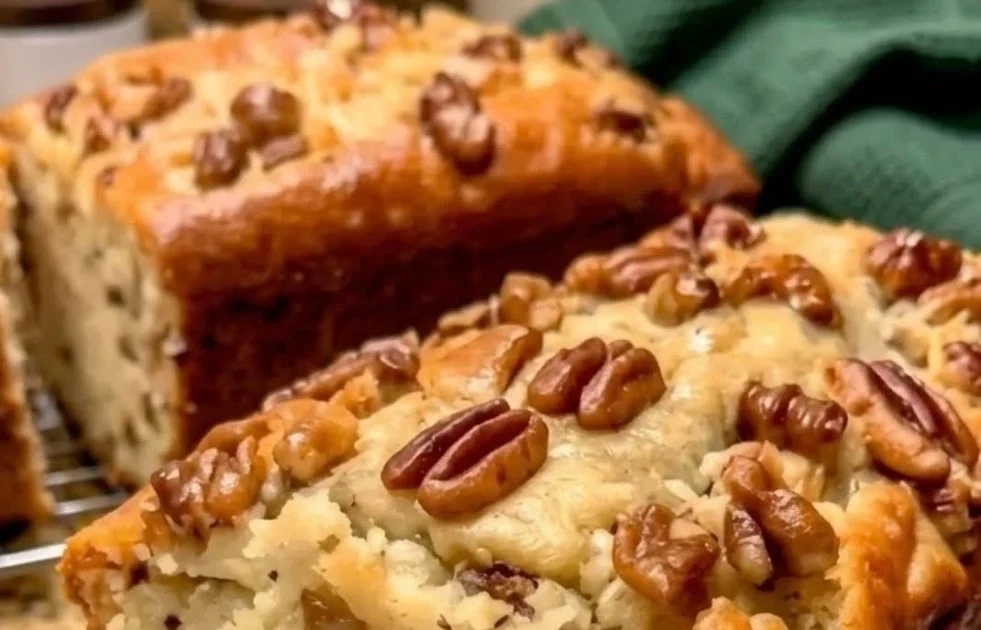
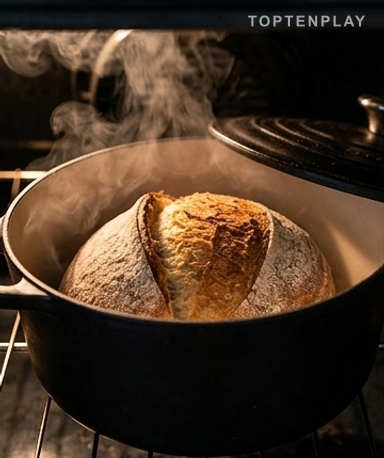
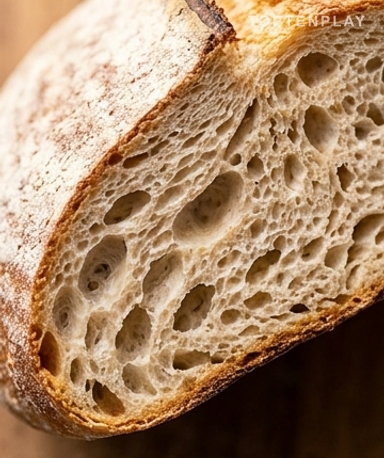
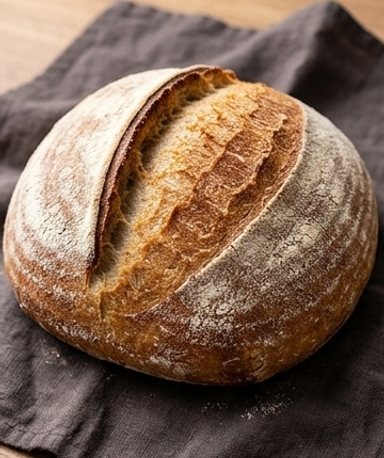
Look at that crust. Not uniform, a bit irregular, with that crack that opened up during baking — exactly as it should. It’s an amber caramel color, almost mahogany at the edges of the score. Underneath, an open, light crumb with holes that vary by zone. The smell that comes out of the oven when you lift the lid of the Dutch oven is one of those smells you never forget — tangy, warm, with something vaguely resembling an artisan bakery on a Tuesday morning. One real slice with cold butter melting on top, and you’ll understand why people do this every weekend.
Why you’ll love this recipe
Ingredient Notes
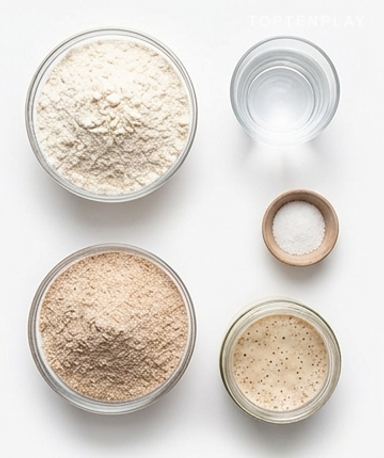
Flour, water, salt, and active starter — that’s really all it takes for homemade sourdough bread.
- T65 Flour (or all-purpose) : This is the base. A classic white flour is perfect to start with. For more flavor and a more active fermentation, some replace 10 to 15% of the total with T150 whole wheat flour — it adds a nice nutty note. Avoid flours labeled ‘fluffy’ or ‘light’, as they are over-processed and produce a dough that doesn’t hold its shape well.
- Active starter : It must have doubled in volume and still be domed at the top — not collapsed, not flat. If you take it out of the fridge, feed it and give it 4 to 6 hours at room temperature before using it. A starter that smells like slightly tangy yogurt with a hint of fresh cheese is a good sign.
- Fine non-iodized salt : Never put it in direct contact with the pure starter — salt weakens the bacteria. Incorporate it after mixing the flour, water, and starter together. Fine salt dissolves better than coarse salt and distributes more evenly throughout the dough.
- Warm water (28-30°C) : No need for a thermometer: water that feels comfortable on the wrist, slightly warmer than lukewarm, is fine. If your tap water is highly chlorinated, let it sit for 30 minutes in a glass — the chlorine evaporates and the starter handles it much better.
Give your starter a night to wake up
It all starts the day before. Take your starter out of the fridge, feed it with an equal part of flour and water, and leave it on the counter — it must double in volume and show active bubbles on the surface before falling back. This is the most reliable indicator of its activity. The next morning, mix flour, water, and starter in a large bowl. No need to knead: just mix until there are no more pockets of dry flour. Cover and let rest for 30 minutes — this is the autolyse, and this rest changes everything for gluten development without any effort on your part.
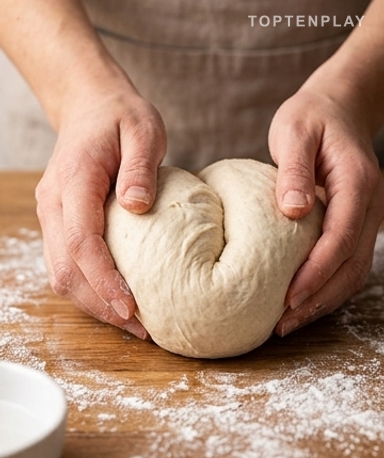
Do the folds, then stop touching the dough
Add the salt dissolved in a little water and incorporate it with wet fingers until completely absorbed. Now, the folds. Every 30 minutes for 3 hours, grab one side of the dough, stretch it upwards without tearing it, and fold it back over itself — four sides make one fold. You’ll feel the dough change under your fingers: at the first fold, it’s sticky and soft. By the third, it becomes elastic, almost silky, and it holds itself in a ball. That’s the magic of the gluten structuring itself. After the last fold, cover and don’t touch anything during the bulk fermentation — between 4 and 8 hours depending on your room temperature.
Shape quickly, then put in the cold
The dough has risen well — it should have increased by 50 to 75% in volume, with visible bubbles on the sides of the bowl. Lightly flour your work surface and gently turn it out. Pre-shape into a ball with a bench scraper or your hands, let rest uncovered for 20 minutes. Final shaping: pull the dough towards you to create surface tension, then place it in a floured banneton (or a bowl lined with a towel). Cover and put directly in the fridge overnight — between 8 and 14 hours. This cold fermentation slows down the yeast, develops flavors, and makes the dough much easier to score the next day.
Preheat the Dutch oven thoroughly
An hour before baking, put your cast iron Dutch oven with its lid in the oven at 250°C. It must be scorching hot. This pot acts like a professional bakery oven — it traps the steam released by the dough, allowing the crust to remain flexible while the loaf expands. Take the dough out of the fridge, turn it onto parchment paper, make a clean 45° incision with a razor blade or a very sharp knife. The sound when you place the loaf in the pot — that immediate, almost violent crackle — is exactly what should happen. Cover and bake for 20 minutes, then remove the lid for an additional 20 to 25 minutes until you get a deep mahogany brown crust.
Resist for one more hour before slicing
Take the loaf out and place it on a wire rack. It will emit little crackling sounds as it cools — the crust contracts slightly, which is normal and frankly beautiful to hear. Let cool for at least an hour before slicing. This is the hardest part. If you cut too early, the crumb will seem gummy and damp — it hasn’t finished solidifying. An hour later, the texture will be firm, the crumb open, and the crust will crunch under the blade with that sharp, satisfying sound that confirms you did a good job.
Tips & Tricks
- Do the ‘float test’ to check if your starter is truly ready: drop a small spoonful into a glass of water. If it floats, it’s full of gas and active — you’re good to go. If it sinks, give it another 2 to 3 hours.
- Flour your banneton with rice flour rather than regular white flour — it really doesn’t stick and gives that pretty spiral pattern on the loaf. Without rice flour, a 50/50 mix of flour and cornstarch does the trick.
- If your kitchen is cold (below 21°C), bulk fermentation can take 10 hours or more. Don’t trust the clock, trust the dough: it must have clearly increased in volume with visible bubbles on the edges.
- Store the bread wrapped in a clean dish towel, never in a plastic bag — the crust softens in a matter of hours. It stays excellent for 4 to 5 days. After that, slice what’s left and freeze immediately.
How do I know if my starter is really ready to use?
Do the float test: drop a small spoonful of starter into a glass of cold water. If it floats, it’s active and full of gas — you can use it. If it sinks, feed it again and wait another 2 to 3 hours. Visually, it should have doubled in volume and show active bubbles on the surface, without having fallen back yet.
Why didn’t my loaf rise in the oven?
The most common cause is a starter that isn’t active enough or insufficient bulk fermentation. Make sure your starter has doubled before use and that the dough has increased by at least 50% in volume during bulk fermentation. A Dutch oven that isn’t preheated enough can also block development — it must be truly scorching hot, preheated for 1 hour at 250°C.
Can I make this bread without a banneton?
Yes, no problem. Line a bowl with a clean towel, flour it generously with a mix of white flour and cornstarch (50/50 to prevent sticking), and place the shaped dough in it. The towel simulates the structure of the banneton so the dough holds its shape during the fridge proof.
My dough is extremely sticky, is that normal?
Completely normal at the beginning. A dough with high hydration (around 70%) is naturally sticky at the first mix. It’s during the series of folds that it will develop its structure and gradually become more elastic and manageable. Keep your hands slightly damp rather than floured to handle the dough without it sticking everywhere.
How long does this bread keep?
4 to 5 days at room temperature, wrapped in a clean towel (definitely not in plastic, as the crust softens immediately). The natural acidity of the sourdough acts as a natural preservative. If you won’t finish the loaf in that time, slice the excess and freeze the slices — they reheat perfectly in the toaster.
Can I skip the fridge fermentation and bake the same day?
Yes, but the result will be different. After shaping, let it rest at room temperature for 2 to 4 hours until the dough is slightly puffy, then bake directly. The crumb will be a bit less developed and the flavors less complex. Long cold fermentation isn’t mandatory; it’s simply what gives the best result.
Homemade Sourdough Bread
French
Bread & Bakery
A rustic loaf with an open crumb and mahogany brown crust, made only with flour, water, salt, and natural sourdough starter. Patience required, technique accessible.
Ingredients
- 450g T65 flour (or all-purpose flour)
- 50g T150 whole wheat flour
- 350ml warm water (28-30°C)
- 100g active sourdough starter (doubled after feeding)
- 10g fine non-iodized salt
Instructions
- 1The day before, feed the starter in equal parts (starter / flour / water) and leave at room temperature until it doubles in volume.
- 2Mix the T65 flour, whole wheat flour, 330ml of warm water, and the active starter in a large bowl until incorporated. Cover and let rest for 30 minutes (autolyse).
- 3Dissolve the salt in the remaining 20ml of water, incorporate into the dough with wet fingers until completely absorbed.
- 4Every 30 minutes for 3 hours, perform a series of folds: grab one side of the dough, stretch it upwards and fold it over itself, 4 sides per series.
- 5Cover and let bulk ferment at room temperature for 4 to 8 hours, until the dough has increased by 50 to 75% in volume.
- 6Pre-shape into a ball on a lightly floured work surface. Let rest uncovered for 20 minutes.
- 7Shape into a ball by pulling the dough towards you to create surface tension. Place in a banneton or a bowl lined with a well-floured towel.
- 8Cover and leave in the refrigerator for 8 to 14 hours.
- 9Preheat the oven to 250°C with the covered cast iron Dutch oven inside for 1 hour.
- 10Turn the cold dough onto parchment paper, score at a 45° angle with a razor blade or sharp knife.
- 11Lift carefully and place in the scorching pot. Cover and bake for 20 minutes.
- 12Remove the lid and continue baking for 20 to 25 minutes until a deep mahogany brown crust is achieved.
- 13Let cool on a wire rack for at least 1 hour before slicing.
Notes
• Storage: 4 to 5 days at room temperature wrapped in a towel. Slices freeze very well and can be reheated in the toaster.
• Room temperature: if your kitchen is cool (below 21°C), bulk fermentation can take up to 10 hours. Trust the volume of the dough rather than the clock.
• All-white version: if you don’t have whole wheat flour, use 500g of T65 flour only. Fermentation will be slightly slower but the result just as good.
Nutrition Facts (per serving, estimated)
| 240 kcalCalories | 8gProtein | 49gCarbs | 1gFat |