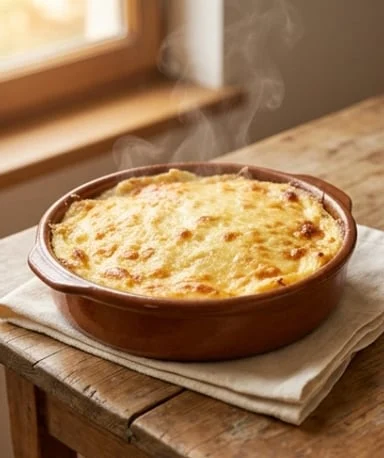
A freezing Sunday in January. It’s the perfect time to start a broth that will simmer all by itself while you do something else — read, rest, or take the kids out. The house will smell wonderful, and by evening you’ll have a homemade kitchen staple that warms the soul.
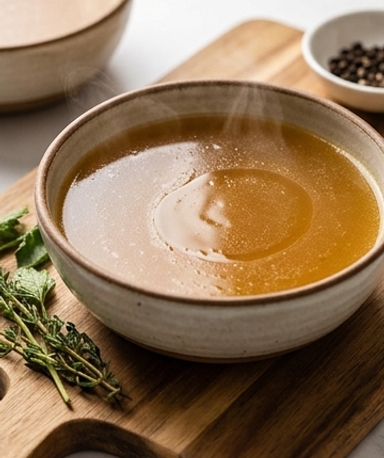
The finished broth is a deep amber, almost light caramel on the surface when light passes through it. In the still-warm pot, it barely quivers — tiny circles widening gently. The scent is somewhere between a Sunday pot-au-feu and a winter vegetable soup, with that slightly earthy undertone from the bones. And if you’ve done it right, the next morning you’ll find a supple gel in your bowl, almost like a panna cotta — a sign that the collagen has done its job.
Why you’ll love this recipe
Ingredient Notes
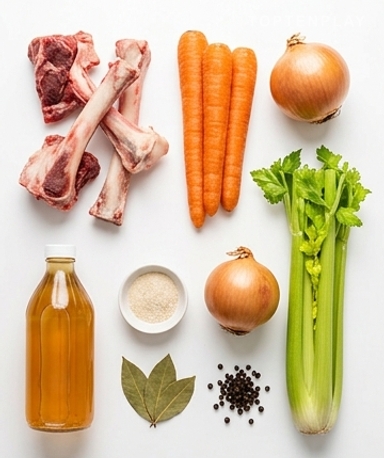
Everything you need: meaty bones, bottom-of-the-fridge vegetables, and a splash of apple cider vinegar.
- The bones : This is the main ingredient, and the choice matters. Ask your butcher for beef shank or knuckle bones — these provide the most collagen. For chicken, save carcasses after a roast or buy them directly. The more joints and cartilage, the more the broth will gel. Marrow bones, chicken feet: they all work very well.
- Apple cider vinegar : Two tablespoons might seem strange in a broth. But vinegar helps extract minerals from the bones during the long cooking time — and no, you won’t taste it in the final result. Any store-brand apple cider vinegar will do; no need for a special brand.
- The vegetables : Carrot, onion, celery — the classic trinity. No need to peel anything, just cut into large chunks. It’s also a great way to use carrot tops, onion skins, or celery leaves that you usually throw away.
- The herbs : Bay leaf and peppercorns are the base. If you have thyme or garlic lying around, add them. As for salt, wait until the end — the broth reduces slightly during cooking and can become too salty if seasoned too early.
Bones first
Rinse the bones well under cold water. There might be blood or small fragments — don’t worry, it comes off easily. Some people blanch the bones for five minutes in boiling water before discarding it and starting over with fresh water: this yields a clearer broth. Others roast them in the oven at 200°C for twenty minutes, which adds a darker color and a nearly toasted flavor. For a first attempt, the direct version works very well.
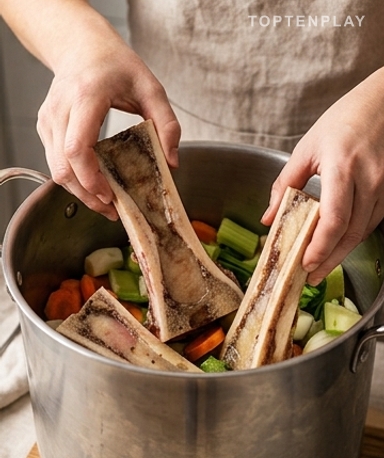
Assembly and the vinegar bath
Place the bones in your largest pot. Cover with cold water — about two centimeters above the bones. When you pour in the apple cider vinegar, you can smell its sharp acidity contrasting with the neutral scent of the raw bones. Let it sit for thirty minutes without heating. Meanwhile, roughly chop the vegetables and set them aside. This cold waiting period allows the vinegar to start its work even before cooking — it’s the kind of subtle detail that makes a difference in the final result.
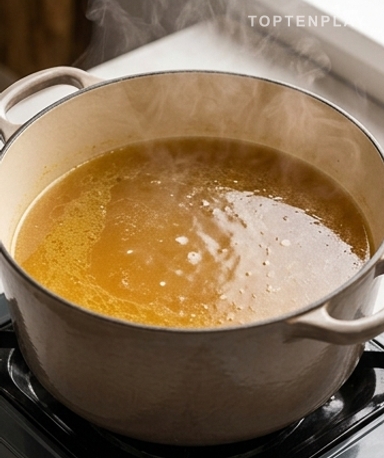
The slow-motion moment
Add the vegetables and herbs. Bring to a gentle boil, then immediately lower the heat to minimum. The broth should barely simmer — small bubbles rising slowly, not a rolling boil. If it boils too hard, the broth becomes cloudy. After the first hour, a grayish foam may appear on the surface: remove it with a slotted spoon. Then, you have nothing left to do. Eight hours minimum, twelve is better. The smell will evolve throughout — first light and vegetal, then increasingly round and deep, almost sweet toward the end.
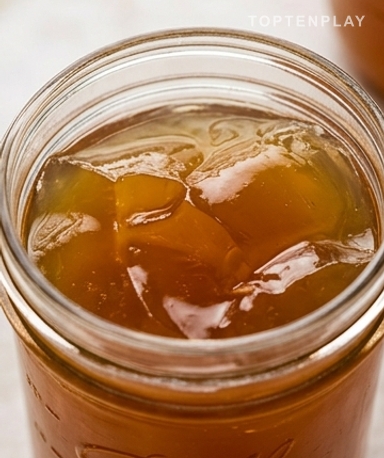
The harvest
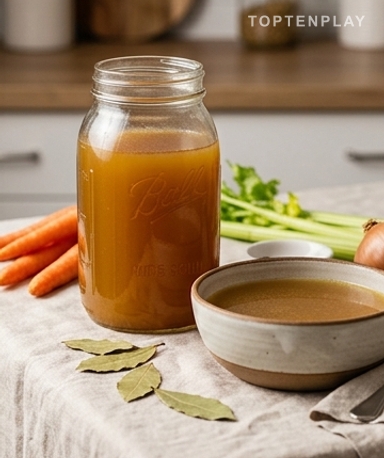
Strain the broth through a fine mesh sieve. Discard the bones and vegetables — they’ve given everything they had. Let it cool to room temperature, then put it in the fridge. The next day, a layer of white fat may have solidified on top: remove it if you want a lighter broth, or leave it if you want more body. Beneath this layer, the broth will have turned into jelly. That is exactly what we were looking for.
Tips & Tricks
- Do it in a pressure cooker if you’re in a hurry — two hours under high pressure gives a result close to an eight-hour simmer. The color will be slightly less golden, but the collagen will be there.
- Never throw away a roasted chicken carcass. Put it directly into a freezer bag and collect two or three before making the broth — it costs nothing and the result is excellent.
- Always taste before seasoning. A reduced broth may already be naturally salty. Add salt at the end of cooking, small pinch by small pinch.
How long can homemade broth be kept?
In the refrigerator, broth keeps for up to 5 days in an airtight container. For longer storage, freeze it in 250 ml portions — it keeps easily for 3 months. Thaw overnight in the fridge or directly in the microwave.
My broth doesn’t gel. What happened?
Either the bones were too lean in cartilage (prioritize feet, shanks, and knuckles over just marrow bones), or the cooking time wasn’t long enough. A minimum of 8 hours is necessary, 12 to 16 hours yield much better results. Gelling is only visible when cold — if your broth is liquid when hot, that’s normal.
Can I use any type of bones?
Beef, chicken, turkey, fish — everything works. Chicken bones (carcasses, feet) give a lighter broth that’s faster to prepare (6-8 hours is enough). Beef bones give a bolder, richer broth that requires 12 to 24 hours. You can also mix both.
Is a slow cooker absolutely necessary?
No. A simple large pot with a slightly ajar lid works just fine, as long as you maintain very low heat. A slow cooker is practical because it manages the temperature on its own without supervision. A pressure cooker reduces the time to 2-3 hours, with a slightly different but perfectly acceptable result.
Can I add other vegetables or aromatics?
Yes, absolutely. Leeks, garlic, ginger, turmeric, parsley with stems — it all blends well. Avoid cruciferous vegetables (cabbage, broccoli) which give a bitter taste after several hours of cooking. Fresh ginger adds an interesting note if you plan to drink the broth hot and plain.
The fat layer on the surface: should I keep it or remove it?
Both are valid. The fat adds body and flavor — some leave it for soups and sauces. If you’re drinking the broth directly or want something lighter, remove it with a spoon after cooling: it solidifies in the fridge and comes off easily in one piece.
Homemade Collagen Broth
Traditional
Broth
A slow-simmered bone broth, rich in collagen and minerals. Drink it hot on its own or use it as a base for all soups, sauces, and stews.
Ingredients
- 1 to 1,5 kg beef or chicken bones (shank, knuckle, carcasses, feet)
- 2,5 litres filtered cold water
- 2 tbsp apple cider vinegar
- 2 carrots, cut into large chunks
- 1 onion, quartered
- 2 celery stalks, cut into pieces
- 2 bay leaves
- 1 tsp whole black peppercorns
- 1 tsp salt (adjust at the end of cooking)
Instructions
- 1Rinse the bones thoroughly under cold water. For a clearer broth, blanch them for 5 minutes in boiling water then drain.
- 2Place bones in a large pot. Cover with cold water and add apple cider vinegar. Let sit at room temperature for 30 minutes without heating.
- 3Add vegetables, bay leaf, and peppercorns. Bring to a gentle boil over medium heat.
- 4As soon as it starts boiling, skim off the grayish foam that rises to the surface with a slotted spoon.
- 5Lower heat to minimum. The broth should barely simmer — just a few slow bubbles. Place a lid slightly ajar and simmer between 8 and 24 hours.
- 6Strain the broth through a fine sieve. Discard the bones and vegetables.
- 7Let cool, then refrigerate. Remove the solidified fat layer from the surface if desired. Season with salt to taste.
Notes
• Storage: 5 days in the refrigerator, 3 months in the freezer in 250 ml portions.
• Broth gelling when cold is a sign of high collagen content — it’s normal and desirable. It becomes liquid again as soon as it is heated.
• For a more pronounced flavor, roast the bones in the oven at 200°C for 20 minutes before starting the recipe.
Nutrition Facts (per serving, estimated)
| 40 kcalCalories | 8gProtein | 1gCarbs | 1gFat |