That dull thud when the dough pulls away from the sides of the pan — that’s the moment you know it’s going to work. Chouquettes are made of almost nothing: water, butter, flour, eggs. And yet, fresh out of the oven, they taste exactly like the local bakery.
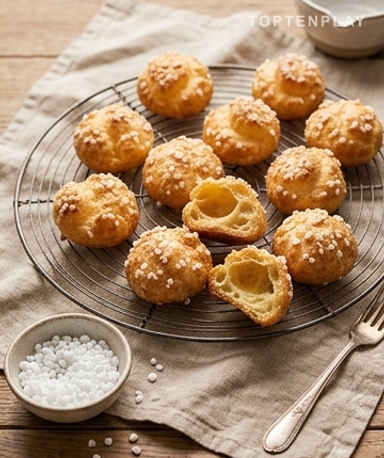
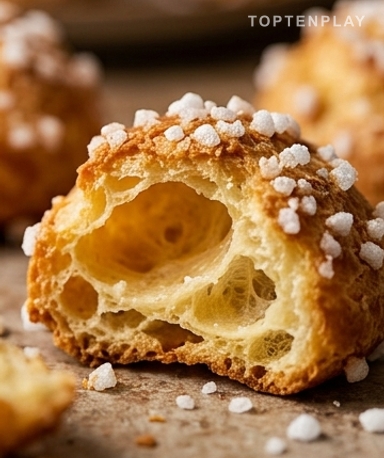
Golden like light caramel, slightly domed, with those little pearls of sugar catching the light. When you break them open, the inside is hollow and almost empty — that’s the magic of choux pastry. The crust cracks under your teeth, yields, and releases that warm scent of freshly baked butter. You eat two. Then three.
Why you’ll love this recipe
Ingredient Notes
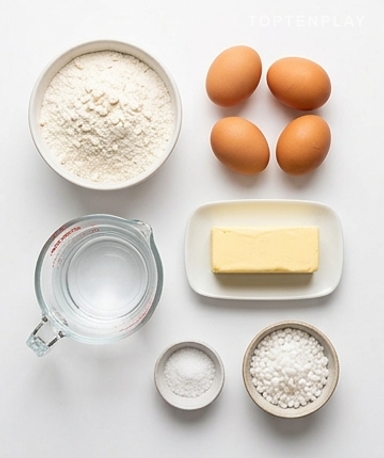
Five ingredients are all you need to make real homemade chouquettes.
- Butter : Unsalted preferably — semi-salted works too, but make sure you don’t add extra salt. 80 grams is precise. Don’t reduce the quantity: insufficient butter results in a dry dough that won’t puff up correctly during baking.
- Eggs : Size M, and take them out of the fridge 30 minutes before. Size really matters here: one large egg too many and the dough becomes too liquid to be shaped. Cold dough receiving cold eggs also shrinks — room temperature prevents this.
- Pearl sugar : This is what provides the crunch, the sound, the identity of the chouquette. Don’t replace it with powdered sugar — it will melt during baking and you’ll get a sticky, smooth surface. Pearl sugar resists heat and stays on the surface; that’s its one and only job.
- Flour : All-purpose or pastry flour (T45/T55), both work. T45 gives a slightly finer dough, but the difference is almost invisible in the final result. Any pantry flour does the trick perfectly.
Starting the dough
Start by putting the water, butter cut into pieces, and salt in a saucepan. Heat over medium heat until a rolling boil — the butter must be completely melted before it boils, not after. Remove from heat, pour in all the flour at once, and mix immediately. Hard and without hesitation. Within 30 seconds, the dough forms a compact ball that pulls away from the sides. Put back on low heat and work it for another 1 to 2 minutes, stirring constantly: this is the drying-out stage. You’re looking for a thin white film to form at the bottom of the pan and a dough that no longer sticks to the sides. That film at the bottom is the exact sign that you can move on.
Eggs, one by one
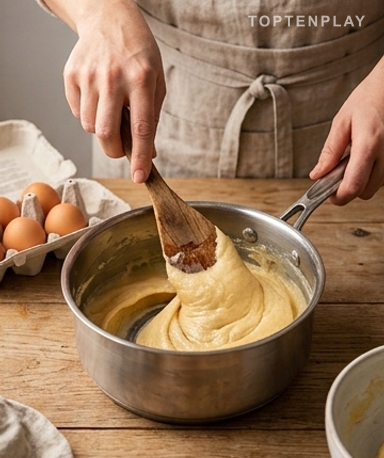
Let the dough cool for 3 to 4 minutes off the heat. If it’s still steaming, the eggs will cook on contact and you’ll find bits of scrambled egg in your dough — it’s unfixable. Add the first egg and mix: the dough will first separate into pieces and look completely ruined. Keep going. It pulls back together, becomes smooth and shiny. Then the second, same thing. Then the third. At the end, the dough should fall off the spatula in a thick, shiny ribbon that holds for a few seconds before breaking. If it runs like water, it’s too liquid and the batch will be flat.
Shaping and sugaring
A round piping bag or two teaspoons — both work, but the bag gives regular shapes that cook uniformly. Small mounds the size of a walnut, well-spaced on the sheet: they will puff up and double in volume. Generously sprinkle pearl sugar over each chouquette, pressing very lightly so it sticks without sinking into the dough. The oven should be at 180°C, preferably static heat — convection dries out the surface too quickly and stunts growth.
The moment you do nothing
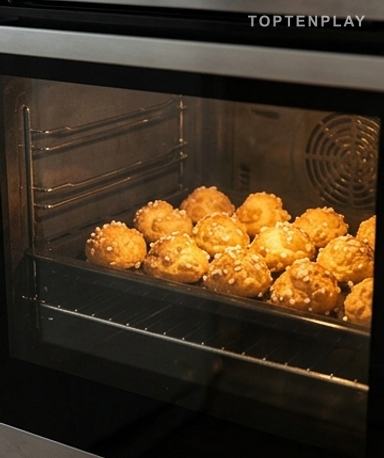
Put them in the oven and do not open the oven door. No quick peek halfway through, no cracked door to check. Thermal shock makes the choux collapse instantly and they stay flat until the end without exception. 20 to 25 minutes depending on your oven: the chouquettes are ready when they are well puffed, golden like light caramel, and sound hollow when you tap the bottom with a finger. Let them cool on a wire rack — on the hot baking sheet, the steam softens them from the bottom and you lose the crunch.
Tips & Tricks
- Never skip the drying-out step on low heat — it’s what drives the moisture out of the dough and guarantees choux that really puff up. A dough that is too wet results in flat choux that won’t rise, even with a perfect oven.
- Chouquettes are best within two hours of baking. After that, the pearl sugar absorbs ambient moisture and the crunch disappears. If you want to prepare them in advance, freeze them raw (shaped, sugar on top) and bake directly from the freezer, adding 5 minutes.
- If your choux consistently collapse, your oven probably loses temperature halfway through. At the end of baking, leave them for another 3 minutes with the door held open by a centimeter (a wedged wooden spoon is enough) to stabilize the structure before taking the sheet out.
Why do my chouquettes flatten out when taken out of the oven?
The most common cause is opening the oven during baking: the thermal shock makes the choux collapse instantly. The other culprit is a dough that is too wet — if you skipped or shortened the drying-out step on low heat, the dough contains too much water and the choux won’t hold. Once flattened, they cannot be fixed.
Can I prepare choux pastry in advance?
Yes, but freeze it once shaped on the tray, not raw in a bowl. Place the choux on parchment paper, put the tray in the freezer for 1 hour, then transfer to a freezer bag. On the big day, bake directly from the freezer at 180°C, adding 5 to 7 minutes of baking time. Ready-made dough in a bowl in the fridge does not keep well beyond a few hours.
How to store chouquettes after baking?
At room temperature, in an open box — never airtight, otherwise moisture softens everything. They are really best within two hours of baking. If you must reheat them, 5 minutes at 160°C in the oven is enough to regain a semblance of crispness, but nothing beats fresh out of the oven.
Is a piping bag mandatory?
No. Two teaspoons work very well: take a spoonful of dough with the first, shape with the second to drop a small, even mound onto the tray. The result is a little less neat than a bag, but the texture and taste are identical. If you still want a bag without buying one, a freezer bag with a corner cut off does the trick perfectly.
Can chouquettes be filled?
Absolutely. Let them cool completely, pierce the bottom with the tip of a knife, and fill with homemade whipped cream, pastry cream, or diplomat cream. As soon as they are filled, eat them within the hour — the crispness disappears quickly in contact with cream.
Why add eggs one by one?
Because the amount of eggs needed depends on the moisture remaining in your dough after drying, and it varies slightly every time. By adding egg by egg, you control the consistency: the dough should form a thick and shiny ribbon, not run like water. With some more absorbent flours, you might only need 2.5 eggs. Beating the third separately before incorporating it partially is a useful option.

Homemade Chouquettes
French
Pastry / Snack
Light and hollow chouquettes with their crunchy pearl sugar shell — made with a classic choux pastry in less than 40 minutes.
Ingredients
- 250 ml (25 cl) water
- 80 g unsalted butter, cut into pieces
- 1 pinch salt
- 150 g T45 or T55 flour
- 3 medium eggs (M), at room temperature
- 50 to 70 g pearl sugar
Instructions
- 1Preheat the oven to 180°C static heat. Line a baking sheet with parchment paper.
- 2In a saucepan, bring the water, butter, and salt to a boil. The butter must be completely melted before boiling.
- 3Remove from heat. Pour in the flour all at once and mix immediately and vigorously with a spatula until a smooth ball forms.
- 4Return the saucepan to low heat. Mix constantly for 1 to 2 minutes until a thin white film forms at the bottom and the dough pulls away from the sides.
- 5Remove from heat and let cool for 3 to 4 minutes. Incorporate the eggs one by one, mixing well between each addition, until you obtain a smooth, flexible, and shiny dough that forms a thick ribbon.
- 6Using a round piping bag or two teaspoons, place small mounds the size of a walnut on the sheet, spacing them 4 cm apart.
- 7Generously sprinkle pearl sugar on each chouquette. Press very lightly to make it stick.
- 8Bake for 20 to 25 minutes without opening the oven. The chouquettes are ready when they are well puffed, golden, and sound hollow underneath.
- 9Let cool on a rack. Serve warm or at room temperature.
Notes
• Storage: best consumed within 2 hours of baking. To reheat, 5 minutes at 160°C in the oven. Do not store in an airtight container.
• Freezing before baking: shape the choux on a tray, freeze for 1 hour then transfer to a bag. Bake directly from the freezer, adding 5 to 7 minutes.
• Filled version: pierce the bottom of cooled chouquettes and fill with whipped cream or pastry cream. Consume within the hour once filled.
Nutrition Facts (per serving, estimated)
| ~295 kcalCalories | 7 gProtein | 34 gCarbs | 14 gFat |