
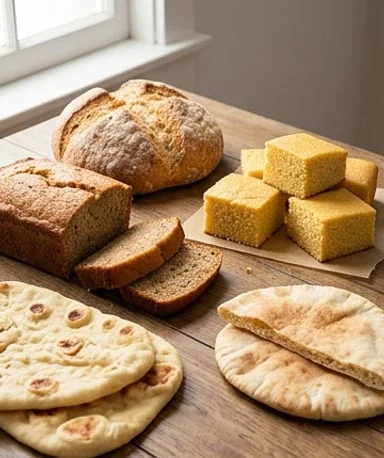
Homemade bread doesn’t have to be a three-hour ceremony to be good. For everyday use, I prefer a simple, reliable dough that smells of warm flour and comes out of the oven with a golden crust, rather than a pretentious recipe that takes up the whole afternoon. Here, we’re aiming for easy, quick breads that are flexible enough to go with soup, curry, salad, or breakfast.

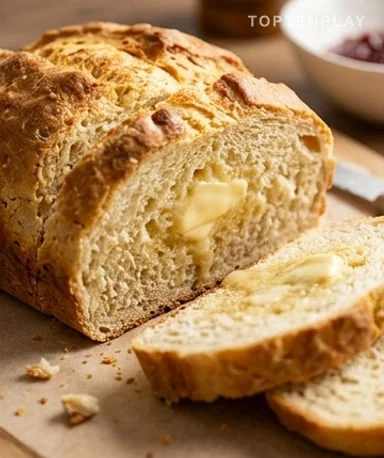
A good beginner’s bread should feel reassuring to the touch: a soft dough, slightly warm under the fingers, never dry like sand. When baking, the kitchen fills with that smell of toasted grains, melted butter, or warm crust that makes a simple meal feel much more serious. The crumb should stay tender, with a cream or pale yellow color depending on the flour and cornmeal, and a slightly crackled surface that says homemade. The goal isn’t a perfect bakery loaf, but an honest bread, good right away, and still decent the next day.
Why you’ll love this recipe
Ingredient Notes
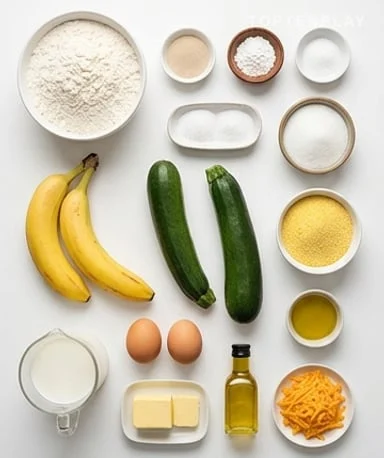
Flour, baking powder, milk, butter, bananas, zucchini, or cornmeal: very basic ingredients, but they change everything when well-measured.
- Flour : It gives the bread structure, so avoid packing it into the measuring cup or you’ll get a heavy crumb. Regular wheat flour works well; for more flavor, replace a quarter with whole wheat, but keep the rest white to avoid drying out the dough.
- Baking powder or baker’s yeast : Baking powder yields a quick bread, more like a savory cake or soda bread, with a tender and direct crumb. Baker’s yeast requires some rest but brings a more elastic texture and that sweet smell of risen dough; always check it foams in warm liquid if you’re unsure.
- Liquid : Milk, water, buttermilk, or sparkling water hydrate the flour and determine the tenderness of the crumb. Milk gives a softer crumb, water a more neutral result, and buttermilk adds a pleasant slight acidity; if you don’t have it, mix milk with a little lemon juice and let it sit a few minutes.
- Fat : Butter or oil make the bread softer and slow down drying. Butter brings a nutty aroma when heated, while a neutral oil stays discreet; don’t add too much or the crumb becomes heavy and slightly greasy on the palate.
- Salt : It’s not just for salting: it awakens the taste of the flour and prevents a flat mouthfeel. Mix it into the flour first to distribute well, especially in a quick dough where you hardly knead.
- Simple additions : Ripe banana, grated zucchini, cornmeal, herbs, or cheese change the bread’s character without complicating the method. Drain or squeeze very wet ingredients, like zucchini, to avoid a sticky center.
The dough should stay lively, not perfect
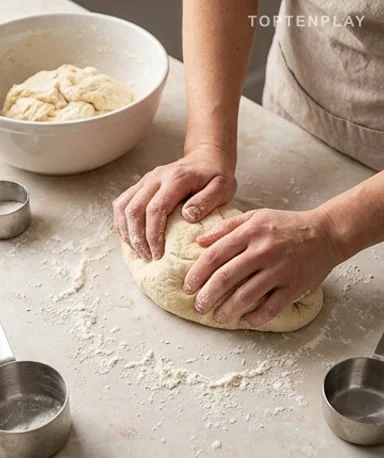
Start by mixing the dry ingredients in a large bowl, then add the liquid little by little. This is the most important moment: the dough should become soft, slightly uneven, sometimes a bit sticky, but never so dry that it cracks everywhere. If it clings to your fingers with a moist, elastic feel, that’s often a good sign; if it crumbles like crumble dough, add a spoonful of liquid. Don’t aim for a perfect smooth ball, especially for quick breads. Overmixing creates a dense texture, and nobody wants a bread that chews like a cold sponge.
Resting is useful, but not always mandatory
For baking powder breads, resting should be short: mix, shape, bake, because the yeast starts working as soon as it touches the liquid. For yeast breads, let the dough rise in a warm place until it looks lighter and more puffed on the surface. It doesn’t have to triple in volume; what matters is that sweet smell of damp flour and that airier texture when you touch it. If the room is cold, the dough will take longer, and that’s fine. Dough that rests too long can become soft, sour, and hard to handle, so keep an eye on it.
Shaping should stay simple
Lightly flour the work surface, just enough so the dough doesn’t stick everywhere. Too much flour at this point hardens the bread, especially on the edges, and gives a pale, floury crust. For a round loaf, bring the edges to the center and turn the ball over; for flatbreads, spread without crushing all the air, using the palm more than force. You should feel a soft dough that resists a little, not a stiff mass. If it shrinks back, let it rest five minutes: the gluten relaxes, and you’ll save time instead of fighting it.
Baking should color clearly
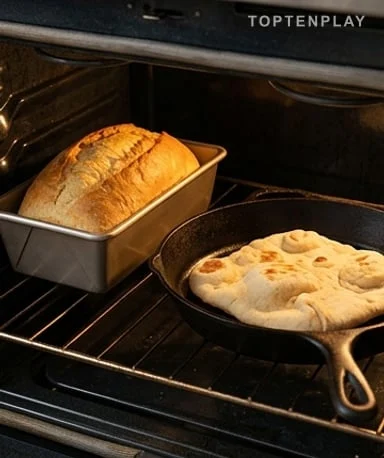
A pale bread is rarely a good bread. In the oven, look for a golden crust, sometimes cracked, with a smell of toasted grains that fills the kitchen. In a pan, especially for naan and pita, the surface should develop brown spots and puff in places; that slight dry sound when the dough hits the hot pan is exactly what you want. If it colors too fast, lower the heat slightly to let the inside cook. If nothing happens, the pan or oven isn’t hot enough, and the bread risks drying before browning.
Cooling matters more than you think
Let the bread breathe a few minutes before cutting, even if the smell makes you want to dig in right away. Coming out of the oven, the crumb continues to stabilize, and cutting too soon can make it sticky or squashed. Place the bread on a wire rack if possible, to avoid steam softening the bottom. For flatbreads, stack them in a clean kitchen towel: they stay warm, soft, and slightly moist. The next day, a quick pass in a pan or toaster revives the crust and gives an almost fresh smell.
Tips & Tricks
- Add the liquid gradually, because two flours from different brands don’t always absorb the same way, and a too-wet dough becomes annoying to shape.
- Don’t overwork baking powder doughs, because the more you mix, the denser the crumb becomes instead of staying tender and crumbly.
- Really preheat the oven or pan, because too low heat dries out the bread before giving it a nice golden crust.
- Freeze leftovers in slices or separate flatbreads, as they reheat faster and keep a better texture than a big frozen block.
Which bread is simplest to start with?
The quick baking powder bread is the most accessible, because it needs neither long kneading nor rising time. Just get a soft dough, put it in the oven, and watch the crust color.
Can I make this bread without baker’s yeast?
Yes, this version uses baking powder, so it’s quick to prepare and bakes directly. The texture will be softer and more rustic than a bakery loaf, but that’s exactly what we’re after for everyday bread.
Why is my bread too dense?
The most common cause is too much flour or overworking the dough. Mix just enough to form a homogeneous dough, and add liquid gradually to keep it soft.
How do I know when the bread is done?
The crust should be nicely golden and the bottom should sound slightly hollow when tapped. If the center still seems moist when cut, put it back in the oven at moderate temperature for a few minutes.
Can I freeze this bread?
Yes, it’s best to slice it once cooled. That way you can reheat only what you need in the toaster or pan, without drying out the whole loaf.
Easy Breads for Beginners
Home
Bread
A quick homemade bread without yeast, perfect for everyday meals. The crumb stays tender, the crust browns well, and the recipe requires no special equipment.
Ingredients
- 350g all-purpose flour
- 1 packet baking powder
- 1 tsp salt
- 1 tbsp sugar
- 250ml milk
- 60g melted butter
- 1 tbsp lemon juice
Instructions
- 1Preheat the oven to 200°C and line a baking sheet with parchment paper.
- 2Mix the milk with lemon juice and let sit 5 minutes to get slightly thickened milk.
- 3In a large bowl, mix the flour, baking powder, salt, and sugar.
- 4Pour in the thickened milk and melted butter, then mix just enough to form a soft dough.
- 5Place the dough on a lightly floured surface and shape into a ball without over-kneading.
- 6Place the bread on the sheet, lightly score the top with a knife, then bake.
- 7Bake for 30 to 35 minutes, until the crust is golden and the bottom sounds slightly hollow.
- 8Let cool on a wire rack for at least 10 minutes before slicing.
Notes
• Do not overwork the dough: that’s what keeps the crumb tender.
• If the dough seems dry, add 1 to 2 tablespoons of milk.
• For a more rustic version, replace 80g of white flour with whole wheat flour.
• This bread keeps for 2 days well wrapped, or up to 2 months in the freezer sliced.
Nutrition Facts (per serving, estimated)
| 205 kcalCalories | 6gProtein | 34gCarbs | 6gFat |