A poorly made breaded cutlet is frankly disappointing—and yet it’s one of the simplest recipes there is. Breading that peels off, dry meat underneath, oil at the wrong temperature: everyone has experienced this at least once. These panko-crusted turkey cutlets solve the problem once and for all.
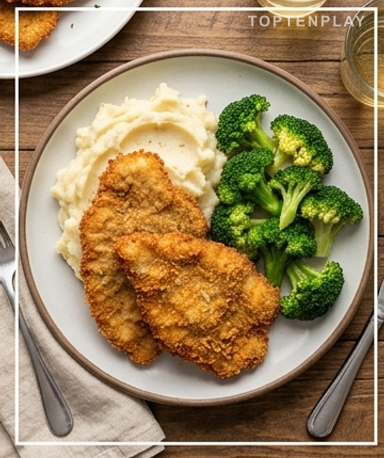
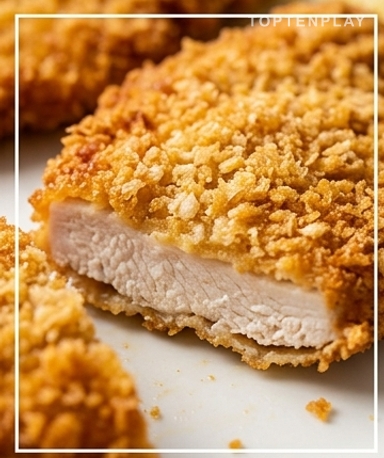
The crust is a deep gold, almost an amber caramel color, with small crispy ridges that you can hear crackle when you rest a knife on them. Underneath, the turkey stays tender and moist—it contrasts so much with the outer texture that it’s almost satisfying to cut into. The smell rising from the pan, that mixture of toasted garlic and breadcrumbs browning in hot oil, makes you instantly hungry. It’s simple, but it doesn’t look simple.
Why you’ll love this recipe
Ingredient Notes
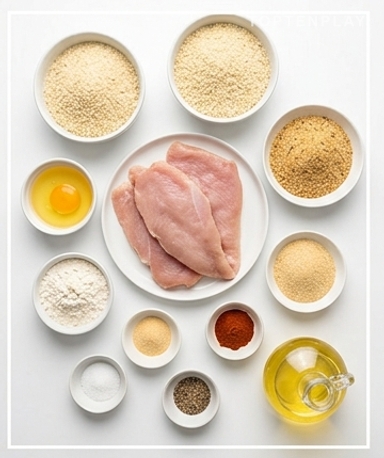
Everything you need for ultra-crispy cutlets: turkey, panko, seasoned breadcrumbs, and a few spices.
- Turkey cutlets : Get pre-sliced thin cutlets if you can find them—it saves a step. Otherwise, a nice slice of turkey breast that you cut yourself and flatten with a rolling pin (with plastic wrap on top) works perfectly. The goal: a regular thickness of 5 to 6 mm. When you press lightly, the meat should have a little spring under your fingers, neither rigid nor soft.
- Panko : Japanese breadcrumbs with large, irregular, and light particles—this is what gives that crunchy texture that fine breadcrumbs cannot replicate. You can easily find it in supermarkets in the international food aisle. Don’t replace it with classic breadcrumbs: the result really has nothing to do with it.
- Seasoned breadcrumbs : It’s the mix of panko and seasoned breadcrumbs that makes the difference here. Seasoned breadcrumbs bring color and pre-integrated aromas—garlic, herbs, salt. If you don’t have any, ordinary breadcrumbs with a pinch of oregano, garlic salt, and a bit of grated parmesan work very well.
- Paprika and garlic powder : Two discreet but essential spices. Paprika colors the breading during cooking—it contributes to that characteristic caramel tint. Garlic powder gives depth without being aggressive. No need to do more: the crust should have flavor without overwhelming the turkey.
- Vegetable oil : Choose a neutral oil with a high smoke point: sunflower, grapeseed, or canola. Extra virgin olive oil is a no—it burns too fast at this temperature and gives a bitter aftertaste to the breading. No negotiation on this.
Why this step everyone skips changes absolutely everything
Flattening the cutlets. Many skip it because it seems optional. That’s a mistake. A cutlet of uneven thickness guarantees an overcooked zone on one side and an undercooked one on the other. A few strokes of the rolling pin on the wrapped meat takes 45 seconds. Aim for a regular thickness across the entire surface—and once done, salt the cutlets generously on both sides before touching the flour. Salt placed directly on the naked meat, before coating, is what ensures the final result has flavor through to the core and not just on the surface.
The three-bath coating—and the resting time we always forget
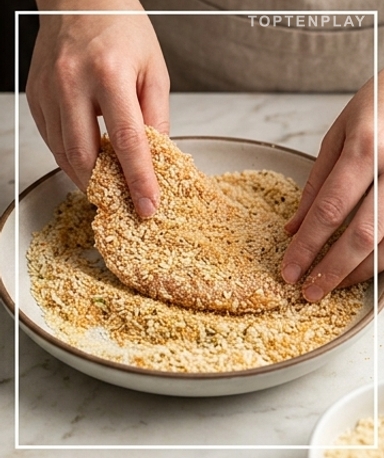
Flour first, lightly: it just serves to make the egg stick. Shake off the excess, otherwise you create thick, floury clumps that don’t cook well. Beaten egg next—really beaten, not just poked with a fork. Then the panko breadcrumbs, pressing firmly with your palm: you should feel the small grains embedding into the meat surface. What is crucial and almost everyone ignores: letting the breaded cutlets rest for ten minutes at room temperature before putting them in the pan. The breading dries slightly on the surface and sticks much better during cooking. Without this rest, it slides off.
The pan, the oil, and the moment to stop interfering
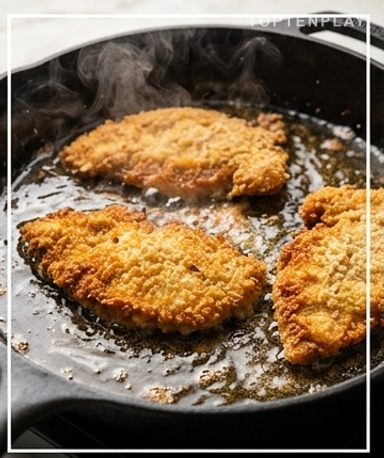
The oil must be hot before placing anything in it. How to know? A grain of panko thrown in should sizzle immediately with a sharp, steady sound. If it sizzles lazily, wait longer. If it smokes, you’ve gone too far—lower the heat and let it cool down. Place the cutlets without crowding them: each piece needs space for steam to escape, otherwise the breading steams instead of frying and becomes soft. Two to three minutes on each side, without touching them. When they lift easily and the visible side is a deep caramel brown, it’s time to flip—not before.
What you do after cooking matters as much as the cooking itself
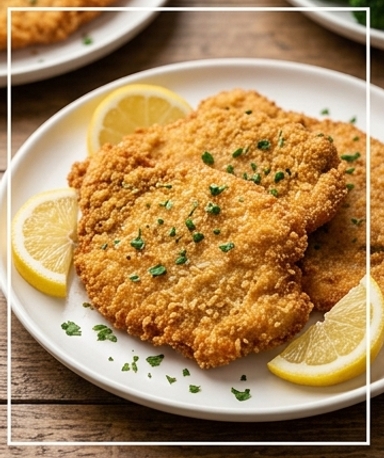
Place the cutlets on paper towels, never on top of each other. Stacking creates steam that immediately softens the breading—the classic trap of good cutlets that arrive soggy at the table. A small pinch of fine salt immediately after leaving the pan, while the crust is still hot, elevates everything else. Serve with lemon: a few drops of acidity on the fatty, hot crust is a contrast that works every time. If you have to wait before serving, keep the cutlets in the oven at 100°C on a rack placed over a baking sheet—never in a covered dish.
Tips & Tricks
- Use two separate hands for coating: one for the wet (egg), one for the dry (breadcrumbs). If you mix the two, your fingers end up covered in a thick paste that makes the coating irregular and lumpy.
- If cooking in multiple batches, don’t empty the oil between them. Just add a small drizzle to compensate for absorption and let it come back up to temperature for 30 seconds before the next batch—the first batch shouldn’t have an advantage over the second.
- To reheat already cooked cutlets without softening them: oven at 190°C, 8 to 10 minutes on a rack over a baking sheet. Never in the microwave, which turns the breading into a lukewarm sponge.
Can I replace turkey with chicken?
Yes, no problem. Chicken cutlets work exactly the same way. Just make sure to flatten them to the same thickness (5-6 mm) and check for an internal temperature of 74°C, slightly higher than for turkey.
Why is my breading peeling off during cooking?
Two main reasons: either the cutlet didn’t rest for 10 minutes after coating (the breading didn’t have time to adhere), or the oil wasn’t hot enough and the crust steamed. Respect the resting time and check that the oil sizzles sharply before adding the meat.
How do I store and reheat cutlets without them getting soft?
Store them for up to 4 days in an airtight container in the refrigerator, without stacking. To reheat, place them on a rack over a baking sheet in the oven at 190°C for 8 to 10 minutes. Absolutely avoid the microwave, which irreversibly softens the breading.
Can I prepare breaded cutlets in advance?
You can coat the cutlets up to 4 hours in advance and keep them on a rack in the refrigerator, uncovered. Take them out 10 minutes before cooking so they reach room temperature. Beyond 4 hours, the moisture from the meat starts to dampen the breadcrumbs.
Can I bake these cutlets in the oven instead of frying them?
Yes, but the result is different: the crust will be less golden and less crunchy. If you choose the oven, brush the cutlets with a drizzle of oil on both sides and cook at 220°C for 15 to 18 minutes, flipping halfway through. Using the broiler for the last 2 minutes helps brown the breading.
What should I serve these cutlets with for a complete meal?
The classic combination: homemade mash, a few lemon slices, and a green salad. For a lighter meal, garlic sautéed green beans or a crunchy coleslaw work very well. Avoid pouring liquid sauces directly onto the cutlets—they will immediately soften the breading.
Crispy Panko Turkey Cutlets
International
Main course
Flattened turkey cutlets coated in a mix of panko and seasoned breadcrumbs, then pan-fried until a golden crust like light caramel forms. Ready in 30 minutes, effortlessly impressive.
Ingredients
- 4 (approx. 600g) turkey cutlets
- 20g (2 tbsp) all-purpose flour
- 100g (1 cup) panko (Japanese breadcrumbs)
- 50g (½ cup) seasoned breadcrumbs
- 1½ tsp garlic powder
- ½ tsp paprika
- 1 egg
- 60ml (4 tbsp) vegetable oil (sunflower or grapeseed)
- to taste fine salt and black pepper
Instructions
- 1Cover the cutlets with plastic wrap and flatten with a rolling pin to a uniform 5-6 mm thickness. Salt and pepper generously on both sides.
- 2Pour the flour into a shallow dish. Coat each cutlet in flour and shake to remove excess.
- 3Mix the panko, seasoned breadcrumbs, garlic powder, paprika, ½ tsp salt, and a pinch of pepper in a shallow dish.
- 4Beat the egg in a second shallow dish until smooth and homogeneous.
- 5Dip each cutlet in the egg, then press firmly into the breadcrumb mixture on both sides. Let rest for 10 minutes at room temperature.
- 6Heat the oil in a 26 cm pan over medium-high heat until a grain of panko sizzles immediately on contact.
- 7Cook the cutlets in 2 batches without crowding, 2 to 3 minutes per side, until the crust is a deep golden brown.
- 8Transfer to a plate lined with paper towels (without stacking) and salt lightly. Serve immediately with lemon wedges.
Notes
• Storage: up to 4 days in the refrigerator in an airtight container. Reheat in the oven at 190°C for 8 to 10 minutes on a rack—never in the microwave.
• Crispy variation: replace the seasoned breadcrumbs with 40g of finely grated parmesan mixed with 10g of ordinary breadcrumbs. The crust will be even more golden and slightly cheesy.
• Make ahead: the breaded cutlets can rest for up to 4 hours in the refrigerator on a rack, uncovered. Take them out 10 minutes before cooking.
Nutrition Facts (per serving, estimated)
| 445 kcalCalories | 38gProtein | 31gCarbs | 18gFat |