Have you ever ordered Mongolian chicken at an Asian restaurant, inhaled it in three minutes, and regretted that the plate was empty? This dish is an obsession. And the reality is, it takes exactly 30 minutes to make at home — probably less than the delivery time.
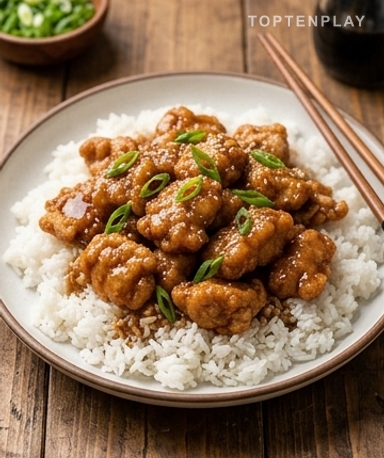
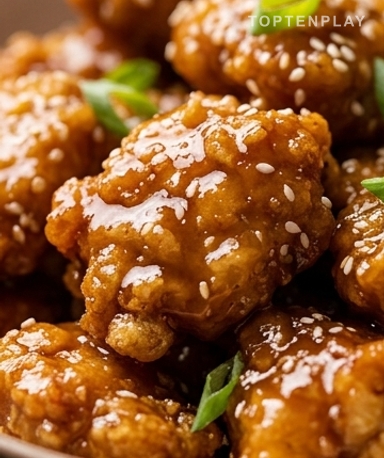
Look at that amber brown covering every piece. Not a thin runny sauce, but a thick, glossy glaze that clings. The chicken underneath stays crispy — that slight crunch when the fork goes through, that’s the cornstarch doing its job. The smell that filled the kitchen during cooking, that mixture of caramelized ginger and seared garlic, it’s still there.
Why you’ll love this recipe
Ingredient Notes
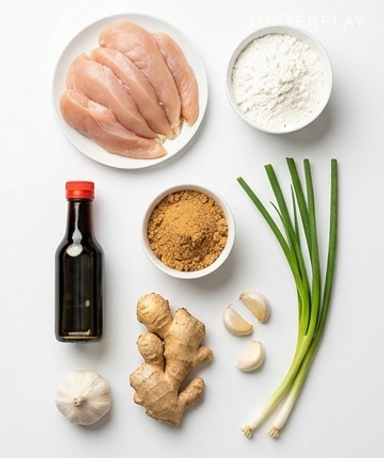
All the simple ingredients you need: chicken, cornstarch, and a few pantry basics.
- Chicken : Take chicken breasts, cut into strips about one centimeter thick. Boneless thighs also work — the meat is fattier and therefore more tender, but it holds up less well during quick cooking. Always slice against the grain so it’s tender to the bite.
- Cornstarch : This is the game-changer ingredient. It creates a protective layer around the chicken during frying — the technique is called velveting in Chinese cooking. Don’t use white flour instead: it absorbs too much oil and gives a pasty texture, not a crispy one.
- Dark brown sugar : Not white sugar, not light brown sugar. Dark brown sugar has a hint of molasses that gives this deep caramel color to the sauce and a richness you can’t get with anything else. If you don’t have it, light brown sugar will do, but the sauce will be lighter and less complex.
- Low-sodium soy sauce : The regular version makes the sauce too salty once reduced. With the low-sodium version, you stay in control. Any brand will do — Kikkoman, Wan Ja Shan, whatever you find.
- Fresh ginger : No ground ginger here. Fresh has a different heat — bright and slightly lemony, instead of the dull and somewhat dusty aroma of the powder. A thumb-sized piece is enough for the whole recipe. Peel it with a spoon, it works better than a knife.
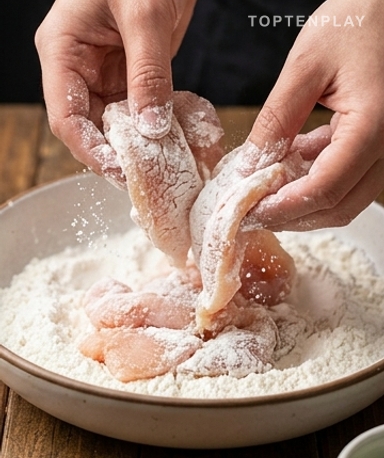
Slice the chicken as thin as you can
One centimeter, ideally. Thinner if you can manage it. Why? Because the chicken cooks in one to two minutes in hot oil — if your pieces are thick, the outside browns while the inside stays pink. Put the chicken in the freezer for 15 minutes before cutting: it firms up slightly, the knife glides better, and the slices are more regular. Then toss the strips in cornstarch in a bowl and mix with your hands until every piece is covered in a matte white film.
Make the sauce before touching anything else
Sauté the ginger and garlic in two tablespoons of oil — thirty seconds, no more, just long enough for the raw pungent smell to disappear and become something warm and enveloping. Then add the water, rice vinegar, soy sauce, brown sugar, and chili flakes. Let reduce over medium heat for 5 to 10 minutes, stirring occasionally. The sauce should lightly coat the back of a spoon without immediately running off — that’s the signal it’s ready. Remove from heat and wait for the chicken.
Wait until the oil is truly hot before diving the chicken in
A little oil in a wok or large frying pan — not olive oil, it burns too fast; use sunflower or grapeseed oil. When a small crumb of cornstarch falls in and sizzles immediately with a sharp, brisk sound, you’re ready. Add the chicken in a single layer, without overcrowding. If your pan is small, do two batches instead of one. The meat must sizzle loudly on contact — that sound is the crust forming. Don’t stir right away: give it 30 seconds to set, then turn. After one to two minutes, the chicken is a bright golden brown, somewhere between amber and light caramel. Remove it onto paper towels.
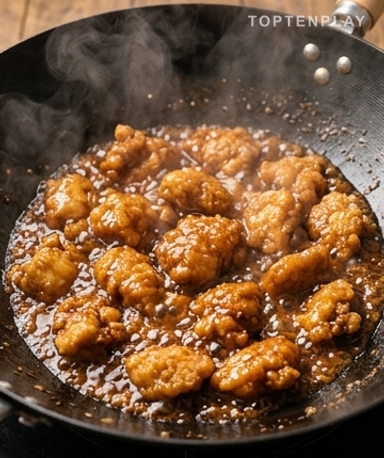
Glaze with the sauce and don’t touch for 2 minutes
Put the chicken back in the pan, pour the sauce over it, medium heat. This is where it all happens. The sauce will thicken on contact with the chicken and heat — it goes from a runny liquid to a clinging glaze. Two, three minutes maximum. If you stir too much, the chicken crust breaks. A few swipes of the spatula are enough. When every piece glows deep brown and the sauce no longer pools in the bottom of the pan but stays stuck to the meat, it’s done. Add the green onions cut on the bias, one last toss, and serve.
Tips & Tricks
- Paper towels after frying are mandatory. Without them, excess oil mixes with the sauce and makes it greasy and dull. Let the chicken rest on them for 30 seconds and you’ll see the difference.
- If the sauce reduces too quickly and starts sticking to the bottom before the chicken is ready, add a tablespoon of water. It doesn’t dilute the taste; it just gives you a little extra time.
- The chili flakes are very mild in this recipe — a pinch doesn’t burn, it just adds a subtle background heat. If serving to children, omit them completely; the sauce remains very good without them.
Can I prepare this dish in advance?
The sauce can be prepared up to 3 days in advance and stored in the refrigerator in a closed jar. However, the cornstarch-coated and fried chicken must be made at the last minute: the crunch disappears quickly once the sauce is added, so there’s no point in anticipating this part.
Breasts or chicken thighs, what’s the difference?
Breasts give a firmer texture and a more even crust — this is the classic option. Boneless thighs are moister and more forgiving if slightly overcooked, but they are fattier and the crust is a little less sharp. Both work well; it’s a matter of preference.
How to store leftovers and reheat them?
Store leftovers in an airtight container in the refrigerator for up to 3 days. For reheating, a pan over medium heat is by far the best option — the microwave completely softens the chicken and makes the sauce watery. Add a tablespoon of water to the pan to loosen the sauce while reheating.
The sauce isn’t thickening, what’s happening?
Two possible reasons: either the heat is too low, or you didn’t reduce it long enough during the first phase. The sauce needs to reduce for 5 to 10 minutes before adding the chicken. If it’s still too liquid when assembling the dish, cook for 2 more minutes over medium-high heat while stirring — the cornstarch left on the chicken also helps thicken it.
What to serve with this Mongolian chicken?
Basmati rice or jasmine rice, simply boiled, is the base. The rice absorbs the excess sauce and balances the sweet and salty. Sautéed rice noodles or vegetable fried rice also work very well if you want something more substantial.
How can I reduce the sweetness if the sauce is too sweet for me?
Lower the brown sugar to 100g instead of 150g and add an extra tablespoon of rice vinegar to balance the flavors. Don’t remove the sugar completely — it is also responsible for the shiny glaze and the sticky texture of the sauce.
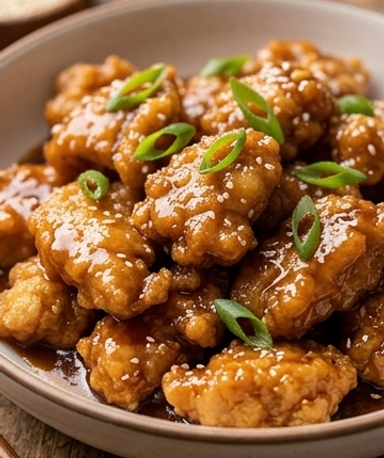
Crispy Mongolian Chicken
Asian
Main course
Chicken coated in cornstarch, fried until crispy, then glazed in a sweet-savory ginger and garlic sauce. Ready in 30 minutes.
Ingredients
- 700g chicken breasts, sliced into 1 cm strips
- 80g cornstarch (about 6 tablespoons)
- 240ml sunflower oil for frying (about 1 cup)
- 3 green onions, sliced on the bias
- 1 tablespoon sesame seeds (for garnish, optional)
- 30ml sunflower oil for the sauce (2 tablespoons)
- 4 garlic cloves, finely minced
- 10g grated fresh ginger (about 1 tablespoon)
- 120ml low-sodium soy sauce
- 60ml water
- 30ml rice vinegar (2 tablespoons)
- 150g dark brown sugar (about 3/4 cup)
- 1/2 teaspoon dried chili flakes
Instructions
- 1Sauté the garlic and ginger in 2 tablespoons of oil over medium heat for 30 seconds.
- 2Add the soy sauce, water, rice vinegar, brown sugar, and chili flakes. Let reduce for 5 to 10 minutes over medium heat, stirring, until the sauce lightly coats a spoon. Set aside.
- 3Toss the chicken strips with the cornstarch in a bowl until every piece is well coated.
- 4Heat 240ml of oil in a wok or large pan over high heat. When the oil is very hot, cook the chicken in a single layer, 1 to 2 minutes, until golden brown. Proceed in two batches if necessary.
- 5Drain the chicken on paper towels. Discard the frying oil.
- 6Put the chicken back in the pan, pour the sauce over it. Cook over medium heat for 2 to 3 minutes, stirring gently, until the sauce thickens and glazes the chicken.
- 7Stir in the green onions, garnish with sesame seeds, and serve immediately with rice.
Notes
• Storage: leftovers keep for 3 days in the refrigerator in an airtight container. Reheat in a pan with a tablespoon of water to loosen the sauce.
• The sauce can be prepared up to 3 days in advance and stored in a jar in the refrigerator. Warm gently before use.
• For a less sweet version, reduce the brown sugar to 100g and add an extra tablespoon of rice vinegar to maintain the flavor balance.
Nutrition Facts (per serving, estimated)
| 520 kcalCalories | 42gProtein | 48gCarbs | 14gFat |