Everyone thinks fried chicken is a lot of work. Something for restaurateurs, too greasy, too technical to handle at home. The reality: it’s one of the simplest fried dishes there is, as long as you understand two things.
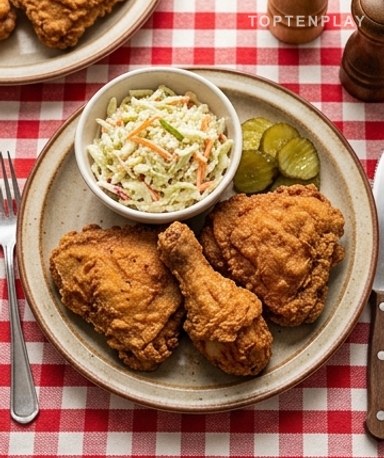
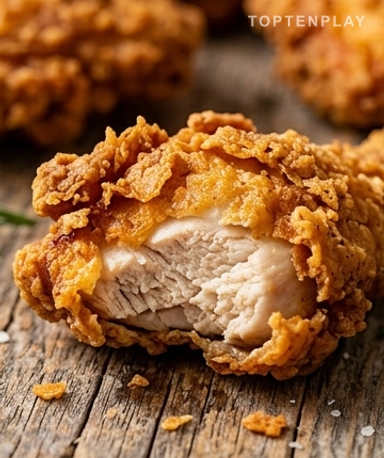
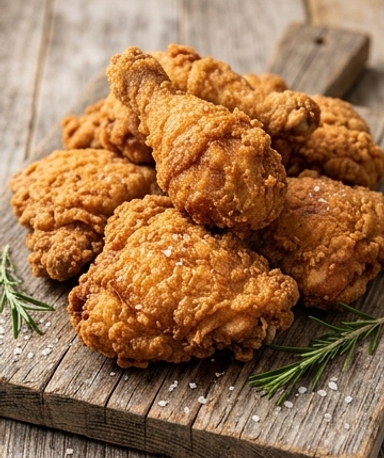
Mentally place this chicken in front of you. The crust is thick, irregular, a light caramel color—not uniform, not industrial. Underneath, the meat is white and moist, still steaming. The smell rising up is that mix of toasted paprika, warm garlic, and flour cooked in hot oil. When you break a piece in half, it snaps. Not a little discreet sound—a real, sharp crack.
Why you’ll love this recipe
Ingredient Notes
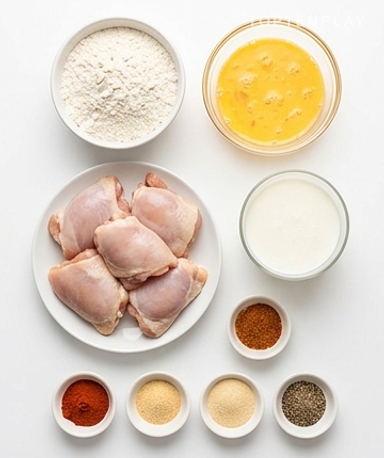
Everything you need for successful fried chicken: buttermilk marinade, seasoned flour, and a good spice blend.
- Buttermilk : The ingredient most people skip—and it’s a mistake. Its acidity tenderizes the meat deeply and helps the flour stick. No buttermilk on the shelf? Mix 250 ml of whole milk with a tablespoon of white vinegar, let it sit for five minutes: same result.
- Smoked paprika : Not classic sweet paprika—smoked. It gives that mahogany color and a slightly woody background that makes all the difference. La Chinata brand is good, but any brand works as long as it’s smoked.
- Frying oil : Sunflower or peanut, definitely not olive. You need a smoke point high enough to hold at 175°C without flinching. Plan for at least one liter to have depth in the pot—a chicken that touches the bottom is a chicken that burns on one side.
- The chicken : Bone-in thighs if you can. They stay juicy even if the cooking goes slightly over. Breasts dry out very quickly—if you use them anyway, reduce the cooking time by about five minutes and check the internal temperature.
The marinade is where it all begins
Put your chicken pieces in a large bowl and cover them with buttermilk. Salt, garlic powder, pepper. Wrap it and put it in the fridge. The minimum is four hours. A whole night is even better. The next morning, when you take the bowl out, the liquid has changed texture: it’s slightly thickened, almost creamy, and the chicken has absorbed the flavors right into the fiber. You can’t make up for this step during cooking—if you botch it, you’ll taste it.
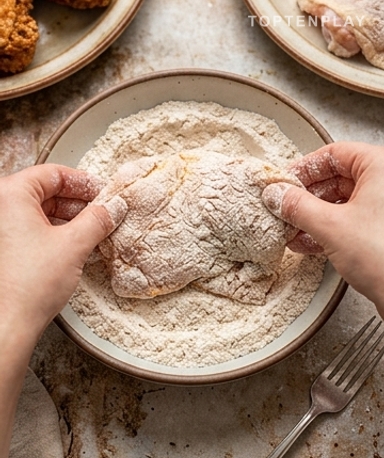
Start the coating
In a shallow dish, mix the flour with smoked paprika, garlic powder, onion powder, salt, and freshly ground black pepper. Don’t skimp on the spices—plain flour has no taste; it needs to be well loaded. Take the pieces out of the buttermilk one by one, let them drip for a few seconds, then press them into the flour using your fingers. You’ll feel the flour compacting against the moist meat. Flip, repeat. The crust should be thick and slightly rough under the palm—if it’s smooth and thin, add another layer.
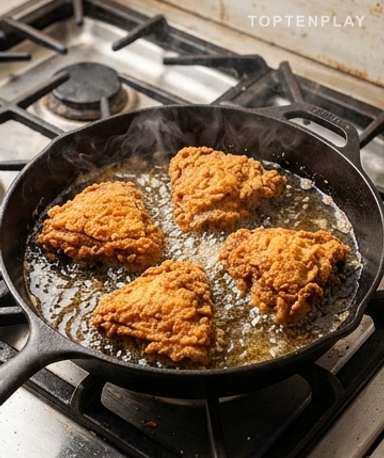
The critical moment
Heat the oil in a large, heavy-bottomed pot—cast iron is ideal. Target: 175°C. Without a thermometer, test with a pinch of flour: it should sizzle immediately without browning in five seconds. Too hot, and the crust burns before the meat is cooked. Not hot enough, and the oil seeps everywhere, leaving you with something heavy and soggy. Drop the pieces presentation-side down. The sound you’re looking for: a frank and steady crackle, deep and continuous—not a high-pitched hiss, not an ominous silence.
And now, patience
Don’t touch. Don’t flip every two minutes. Let the crust build up quietly for seven to eight minutes before flipping only once. Never overlap the pieces—work in two batches if necessary. When the color turns to dark amber on both sides and the internal temperature reaches 75°C, it’s done. Place on a wire rack, not on paper towels: paper traps the steam underneath and softens the crust you just spent an hour perfecting in thirty seconds.
Tips & Tricks
- Take the chicken out of the fridge twenty minutes before coating it. Cold meat cooks unevenly—the exterior reaches the right temperature while the interior is still cold. Result: you overcook the crust to finish the meat.
- For a really thick crust, double the coating: flour → buttermilk → flour again. It takes two more minutes. The difference in the bite is clear.
- A cooking thermometer costs ten euros and changes everything for frying. Without it, you’re navigating by sight—and the first ten seconds after dropping the chicken determine the rest of the cooking.
Can I make this recipe without buttermilk?
Yes, no problem. Mix 500 ml of whole milk with a tablespoon of white vinegar or lemon juice, let it sit for 5 minutes and you get a functional substitute. The result is very similar—the acidity tenderizes the meat the same way.
Why is my crust peeling off during frying?
It’s almost always a problem with coating adhesion: either the chicken didn’t drip enough before being coated, or the flour wasn’t pressed firmly enough against the meat. Press really hard with your fingers during coating, and don’t handle the pieces too much when placing them in the oil—lay them in gently.
How to store and reheat fried chicken?
In the fridge in an airtight container, it keeps for 3 days. To reheat without softening the crust, put it in the oven for 15 minutes at 190°C on a wire rack—definitely not the microwave, which turns the crust into rubber. You can also eat it cold the next day: it’s great in a sandwich.
Can I prepare the chicken in advance?
The marinade can go up to 24 hours in the fridge; it’s actually recommended. However, once coated in flour, you must fry within 30 minutes—the flour absorbs moisture and the crust loses its structure if you wait too long.
Is a kitchen thermometer absolutely necessary?
It’s not mandatory, but it’s really helpful. Without a thermometer, test with a pinch of flour: it should sizzle and rise immediately to the surface. If it browns in less than 3 seconds, the oil is too hot. If it sinks without reacting, wait longer.
Can I use chicken fillets instead of thighs?
Yes, but adjust the cooking time downwards: 4 to 5 minutes per side is enough for fillets, compared to 7 to 8 minutes for bone-in thighs. Fillets dry out quickly—check the internal temperature (75°C) rather than relying on color.
Crispy Fried Chicken
American
Main course
Homemade fried chicken with a thick, golden crust and juicy buttermilk-marinated meat. Simple, direct, better than anything you’ll find for delivery.
Ingredients
- 1,2 kg bone-in chicken thighs (about 8 pieces)
- 500 ml buttermilk (or whole milk + 1 tbsp white vinegar)
- 1 tsp salt (marinade)
- 1 tsp garlic powder (marinade)
- ½ tsp ground black pepper (marinade)
- 200 g all-purpose flour
- 2 tsp smoked paprika
- 1 tsp garlic powder (coating)
- 1 tsp onion powder
- 1 tsp salt (coating)
- ½ tsp ground black pepper (coating)
- 1 litre sunflower or peanut oil
Instructions
- 1Mix the buttermilk with salt, garlic powder, and pepper in a large bowl. Add chicken pieces, cover, and let marinate in the fridge for at least 4 hours, ideally overnight.
- 2In a shallow dish, mix the flour with smoked paprika, garlic powder, onion powder, salt, and pepper.
- 3Take the chicken out of the fridge 20 minutes before cooking. Drain each piece for a few seconds then press it firmly into the flour on both sides—the crust should be thick and compact.
- 4Heat the oil in a large deep pot until it reaches 175°C. Submerge the pieces gently without overlapping. Work in two batches if necessary.
- 5Cook for 7 to 8 minutes without touching, then flip once. Continue for another 7 to 8 minutes until the crust is a dark amber caramel color and the internal temperature reaches 75°C.
- 6Place the pieces on a wire rack (no paper towels) and let rest for 5 minutes before serving.
Notes
• For an even thicker crust, double the coating: after the first layer of flour, dip quickly back into the buttermilk and then into the flour again.
• Storage: 3 days in the refrigerator. Optimal reheating in the oven at 190°C for 15 minutes on a rack—avoid the microwave.
• The chicken can also be eaten cold: the texture of the crust changes but remains pleasant, ideal for picnics or next-day sandwiches.
Nutrition Facts (per serving, estimated)
| 480 kcalCalories | 34 gProtein | 24 gCarbs | 26 gFat |