This is the perfect Wednesday night cake. The one you make when it’s raining outside, the kids are lounging in their pajamas, and you want something warm and familiar without spending the whole evening in the kitchen. Marble yogurt cake is like that: reliable, fuss-free, and always there at the right moment.
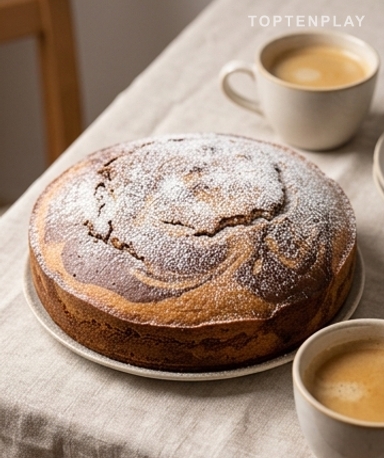
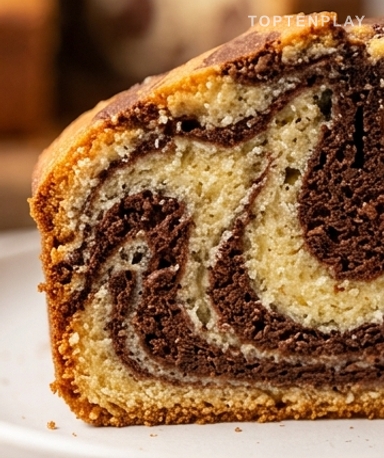
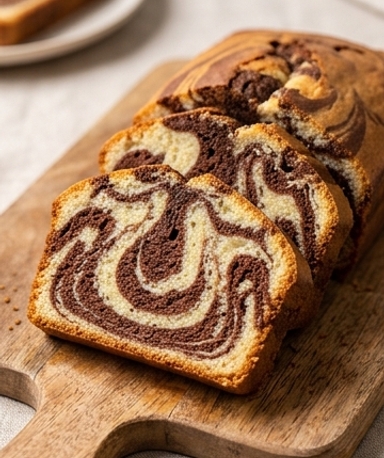
Imagine a slice sitting on a white plate. The crust is golden like light caramel, slightly cracked on top. Inside, the marbling: creamy white and deep brown intertwining without completely merging. The crumb is dense yet supple under the fork, still a bit moist at the center. And that smell — warm vanilla and toasted cocoa — that lingers in the kitchen long after it leaves the oven.
Why you’ll love this recipe
Ingredient Notes
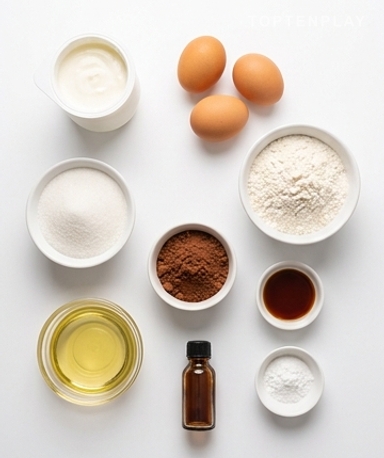
Everything you need for a successful marble yogurt cake — simple ingredients, nothing more.
- Plain yogurt : This is the boss here — not just for the taste, but because its container becomes your measuring unit for the entire recipe. Use a classic whole milk yogurt, 125g, the standard plastic cup. The brand doesn’t matter. Avoid 0% fat versions: they result in a cake that is somewhat dry and lacks character.
- Unsweetened cocoa powder : Truly unsweetened, and it matters. Use pure cocoa powder like Van Houten, not the chocolate mix used for morning milk. Real cocoa provides a slightly bitter undertone that balances the vanilla. With sugary powder, it becomes cloyingly sweet.
- Vegetable oil : Sunflower, canola, it doesn’t matter — the key is that it’s neutral in taste. No olive oil. This is what gives the cake its characteristic moistness, quite different from a butter-based pound cake that dries out by the next day.
- Vanilla extract : A few drops are enough. A packet of vanilla sugar also works — but liquid extract gives a bolder, more floral note. Both work; choose based on what you have on hand.
The empty cup does all the work for you
Once the yogurt is poured into the bowl, keep the cup. Rinse it, dry it quickly — it’s your measure for everything else. Three cups of flour, two of sugar, half a cup of oil. It sounds approximate, and it is a little, but that’s precisely why the recipe has stood the test of time for decades. Whisk the eggs with the sugar and yogurt until the mixture pales slightly and becomes foamy, almost airy. Then add the oil, then the flour with the baking powder. The final batter is thick, slightly sticky, with that dull thud of the whisk meeting resistance — a sign that the texture is exactly where it needs to be.
Divide by eye, no scale needed
Split the batter into two roughly equal parts in two bowls. In the first, pour the vanilla extract and mix gently. In the second, sift the cocoa directly over the batter — this avoids those little brown lumps that never disappear once baked. If the cocoa batter thickens too much, which often happens, add the two tablespoons of milk. Both batters should have roughly the same fluidity. If one side is too dense, the marbling will distort during baking and you’ll lose the effect.
Alternate layers without trying to be neat
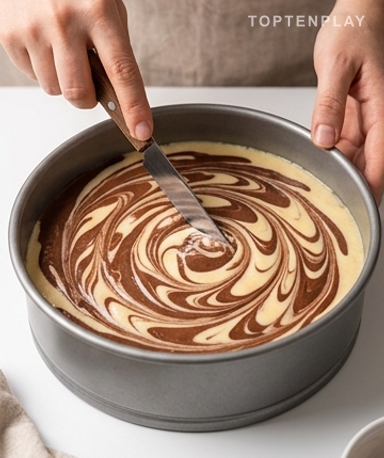
Pour a large spoonful of vanilla batter into the center of the pan, then one of cocoa on top, and repeat. The layers spread naturally and stack themselves. When everything is in the pan, take a round-tipped knife and draw two or three wide spirals through the batter. Slowly, without pressing down. The movement should be relaxed, almost lazy. If you go over the same spot ten times, the colors merge completely — and you end up with a uniform grayish batter, neither chocolate nor vanilla. Two or three passes are enough. Resist the urge.
Prick it with a knife at the twenty-fifth minute
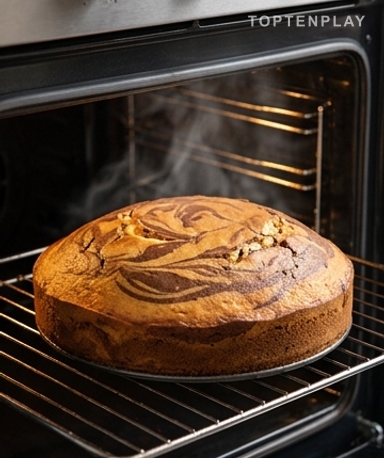
At 180°C, baking takes between 30 and 40 minutes depending on the oven. The surface will rise and crack slightly — this is normal, even a good sign. Toward the end, the smell changes: the cocoa becomes more intense, almost toasted, and the vanilla takes on a warm buttery note. That’s when you need to watch it. Prick the center with a knife blade: if it comes out with moist traces, bake for five more minutes. If it comes out clean, take it out. Not a minute longer.
Tips & Tricks
- Let the cake cool for at least 20 minutes in the pan before unmolding — when hot, it is fragile and breaks easily. And if you wait until it’s completely cold to slice it, the cuts will be clean and the marbling clearly visible.
- If you use a loaf pan rather than a round pan, add 5 to 8 minutes to the baking time. Heat takes longer to reach the center of an elongated shape. Trust the knife, not the timer.
- For a more polished look with zero effort, sift a dusting of powdered sugar over the top once cooled. It hides small surface cracks and gives the impression you spent time on the finishing touches.
How should I store the marble yogurt cake?
At room temperature, wrapped in plastic wrap or in an airtight container, it will keep for 3 to 4 days without a problem. It’s often even better the next day once the crumb has settled. Avoid the refrigerator — it dries out the cake unnecessarily.
Can I replace the oil with butter?
Yes, but the result changes. Melted butter gives a richer taste and a brioche-like quality, but the cake will be less moist after 24 hours. Vegetable oil is truly what keeps it moist over time. If using butter, use 80g for every 1/2 cup of oil.
My marbling disappeared during baking, why?
You mixed it too much with the knife. Two or three wide spirals are enough — if you go over it too often, the two batters merge completely and you lose the effect. You must resist the urge to perfect the pattern.
Can I use a flavored yogurt (strawberry, lemon, etc.)?
Technically yes, it works. But the fruit flavor often clashes with the cocoa. Plain whole yogurt remains the best choice to let the chocolate-vanilla marble express its two flavors without interference.
The cake is baked on the outside but still wet in the middle — what should I do?
Cover it with a sheet of aluminum foil and put it back in the oven for 8 to 10 minutes at 160°C. The foil prevents the crust from browning too much while the center finishes baking. This problem often occurs with ovens that heat strongly from the top.
Can I prepare this cake a day in advance?
It’s actually recommended. Prepared the day before and well-wrapped at room temperature, it’s at its best the next morning. The crumb tightens, and the vanilla and cocoa flavors blend better. It also freezes very well in individual slices.
Chocolate-Vanilla Marble Yogurt Cake
French
Dessert
A home-baking classic, moist to the core and successful every time. The yogurt base ensures a supple texture that keeps for several days.
Ingredients
- 125g (1 cup) plain whole yogurt
- 375g (3 cups) flour
- 250g (2 cups) granulated sugar
- 60ml (1/2 cup) neutral vegetable oil (sunflower or canola)
- 3 eggs
- 11g (1 packet) baking powder
- 1 pinch salt
- 20g (2 tablespoons) unsweetened cocoa powder
- 1 teaspoon liquid vanilla extract
- 30ml (2 tablespoons) milk (optional, to loosen the cocoa batter)
Instructions
- 1Preheat the oven to 180°C. Lightly grease a cake pan (22-24 cm) or line it with parchment paper.
- 2In a large bowl, pour in the yogurt. Add the eggs and sugar, whisking until the mixture pales slightly.
- 3Incorporate the oil, then add the flour, baking powder, and salt. Mix until you have a smooth batter without lumps.
- 4Divide the batter into two equal parts in two separate bowls.
- 5In the first bowl, add the vanilla extract and mix gently.
- 6In the second bowl, sift in the cocoa and mix. If the batter is too thick, add the 2 tablespoons of milk.
- 7Alternately pour a spoonful of vanilla batter and then one of cocoa batter into the pan until both are used up.
- 8Run a round-tipped knife through the batter, tracing 2-3 wide spirals to create the marbling. Do not overmix.
- 9Bake for 35 minutes. Check for doneness with a knife point — it should come out clean.
- 10Let cool for 20 minutes in the pan before unmolding onto a wire rack. Allow to cool completely before slicing.
Notes
• Storage: 3 to 4 days at room temperature in an airtight container or wrapped in plastic wrap. Do not refrigerate.
• Freezing: Freezes very well in individual slices, wrapped separately. Thaw at room temperature for 1 hour.
• Variation: Add 50g of dark chocolate chips to the cocoa batter for an even more indulgent result.
Nutrition Facts (per serving, estimated)
| 430 kcalCalories | 7gProtein | 68gCarbs | 14gFat |