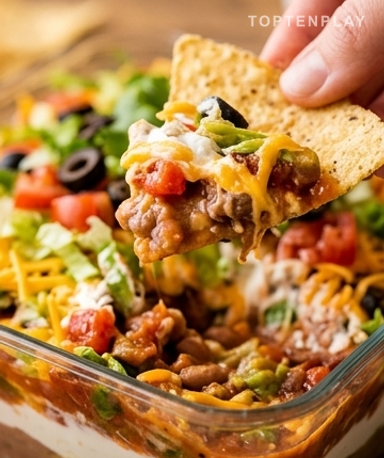
Everyone underestimates this dip. It’s been sitting on buffet tables for years, and you might think it’s just there as filler. Except it’s always the first one to be finished, and always the one that three people ask for the recipe before the end of the evening.
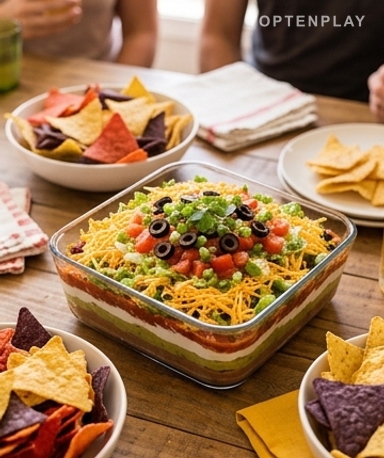
Seen from the side in a glass dish, it’s almost too beautiful to dip a chip into. The layers range from the dark brown of the beans to the bright green of the chives, passing through the thick white of the cream and the orange-red of the salsa. The shredded cheese forms a pale yellow veil, slightly saffron-tinted, barely hiding the diced tomatoes. It smells like cumin, fresh tomatoes, and something slightly tangy from the cream — the scent of a Mexican buffet on a Friday night.
Why you’ll love this recipe
Ingredient Notes
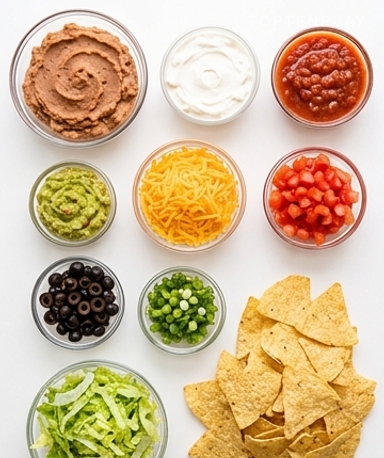
All the ingredients that make this dip a party classic: simple, colorful, and highly effective.
- Refried beans : This is the foundation. The texture must be creamy, not grainy — avoid low-end brands that result in a sandy mash. Mix the taco seasoning packet directly into the beans before spreading, otherwise the base remains bland under all the other layers.
- Heavy sour cream : Use the full-fat version, not light. Light cream releases water within a few hours and makes the bottom soggy. Spread it cold straight from the fridge — it holds up better and forms a clean layer without sliding around.
- Salsa : Jarred, preferably chunky. A salsa that is too liquid will migrate downward and make the beans soggy. If yours seems wet, quickly run it through a strainer with a fork before using.
- Shredded cheddar : Grate it yourself if you have two minutes. Pre-shredded bagged cheddar is coated in anti-caking starch — it makes it less melty and less flavorful. Hand-grated cheddar has a completely different texture on the palate.
- Diced tomatoes : Place them on paper towels for five minutes before using. A water-logged tomato is the main reason a 7-layer dip becomes watery after an hour on the table.
The layer that holds everything together
It all starts with the beans. Open the can, pour into a bowl, and mix in the taco seasoning packet. The aroma that rises — cumin, smoked paprika, a hint of mild chili — warns you that this won’t be bland. Spread this mixture at the bottom of your glass dish with a spatula, pressing lightly to get a roughly flat surface. The layer should be about one centimeter thick. No more, otherwise the chip has trouble scooping everything up at once and it ends up a mess on the sides of the dish.

Stacking the levels without rushing
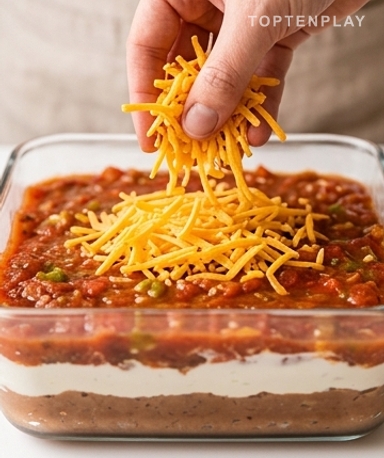
The sour cream comes next, cold and dense — it slides easily over the beans and forms a matte white surface that contrasts well. Then the salsa, spoon by spoon, so as not to break the layer underneath. The shredded cheese falls like a cascade and covers everything with a slightly golden veil. At this point, the dish already feels heavy in your hands. That’s a good sign.
The finish that changes everything
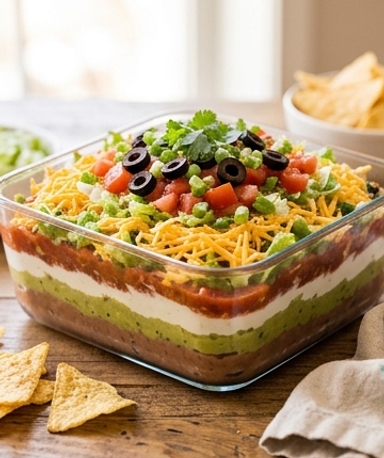
The diced tomatoes, sliced black olives, shredded lettuce, and chives — this is the surface layer, the one everyone sees first. Distribute the tomatoes while avoiding the edges so the layers remain visible from the side through the glass. The olive rings, shiny and slightly firm to the touch, go on last. A small handful of green chives, and the dish looks like it came out of a restaurant.
Tips & Tricks
- Absolutely use a transparent dish — glass or acrylic. Half the effect comes from the layers visible from the side. In an opaque bowl, you lose all the visual appeal and people don’t know what they are dipping into.
- Prepare it one to two hours in advance and put it in the fridge. Not the whole night — the lettuce softens and the tomatoes release their water. The ideal window is two hours before serving.
- Serve with thick, sturdy chips, not thin classic-style nacho chips. A chip that breaks on contact with the sour cream is frustrating and leaves pieces in the dip.
How far in advance can this dip be prepared?
The ideal window is 1 to 2 hours before serving. The layers stabilize, the flavors blend slightly, and you have nothing to do at the last minute. Avoid preparing it the day before: the lettuce softens and the tomatoes release water, which soggies the bottom layers.
How do I prevent the dip from becoming watery after a few hours?
Two critical points: drain your diced tomatoes on paper towels before placing them, and choose a chunky salsa rather than a watery one. If your salsa is too wet, run it quickly through a strainer before use. Full-fat sour cream (not light) also holds up much better over time.
Can I replace the cheddar with another cheese?
Yes, no problem. Monterey Jack works very well and melts more softly. A Mexican shredded blend (often sold in bags) is also a good option. Avoid high-moisture cheeses like fresh mozzarella, which would release water onto the layers.
How to store leftovers?
Plastic wrap directly touching the surface to prevent oxidation, then in the fridge. Consume within 24 hours. Beyond that, the lettuce and tomatoes start to degrade the overall dish. Do not freeze.
What dish should I use for the best results?
A transparent glass rectangular dish of 23×33 cm (like a casserole dish), or a glass bowl with straight sides. Transparency is essential: it allows you to see the layers from the side, which is half the visual impact of the dish.
Can I make this dip spicier?
Easily. Replace the classic salsa with a jalapeño or verde salsa, add a thin layer of guacamole between the cream and the salsa, or scatter some sliced jalapeños on top. The taco seasoning packet also exists in a hot version if you want the base to have more character.
7-Layer Tex-Mex Dip
Mexican
Appetizer
The appetizer dip that impresses effortlessly: seven colorful layers stacked in a glass dish, served with crunchy tortilla chips.
Ingredients
- 425g (1 can) refried beans
- 28g (1 packet) taco seasoning
- 240g (1 cup) heavy full-fat sour cream
- 240g (1 cup) jarred chunky salsa
- 110g (4 oz) shredded cheddar
- 180g (1 cup) diced tomatoes
- 65g (2.25 oz) drained sliced black olives
- 30g (¼ cup) chopped chives
- 45g (1.5 oz) shredded lettuce
- as desired tortilla chips for serving
Instructions
- 1In a bowl, mix the refried beans with the taco seasoning packet until smooth.
- 2Spread the bean mixture in an even layer at the bottom of a 23×33 cm rectangular glass dish.
- 3Spread the cold sour cream on top in a regular layer.
- 4Distribute the salsa over the sour cream by the spoonful, without piercing the layer underneath.
- 5Sprinkle the shredded cheddar over the entire surface.
- 6Place the diced tomatoes, previously drained on paper towels.
- 7Arrange the black olive rings, then distribute the shredded lettuce and chopped chives.
- 8Cover and refrigerate for 1 to 2 hours before serving with tortilla chips.
Notes
• Prepare it 1 to 2 hours before — no more, as the lettuce and tomatoes begin to degrade the layers after 24 hours.
• Use a transparent dish so the 7 layers are visible from the side: this is the key to the dish’s spectacular look.
• Storing leftovers: plastic wrap in contact, fridge, consume within 24 hours. Do not freeze.
Nutrition Facts (per serving, estimated)
| 190 kcalCalories | 8gProtein | 13gCarbs | 12gFat |